
In this post, I try and implement a Heat Pump emulator with Matterjs, running on Linux, namely Ubuntu.
This project is very similar to my Tiny Dishwasher, which emulators a Dishwasher and can be controlled over Matter. That project enabled me to better understand Device Energy Management within Matter. I’m going to continue this line of investigation, this time using a Heat Pump. I’m also going to try developing this with matter.js, rather than esp-matter.
Why a heat pump? Well, I’m getting one installed in the next few months so it’s on my mine. I’ve also finished a little project where I used ML to predict how much power a heat pump would need. It seems like a good fit to try and use that project inside a heat pump emulator.
What makes a Matter heat pump?
Like all Matter appliances, they follow a particular pattern and must contain a set of known endpoints, describing their behaviour. These are outlined in the Device Library specification.
For the Dishwasher, it only had one endpoint, the Dishwasher endpoint and on that, only the OperationalState cluster was mandatory.
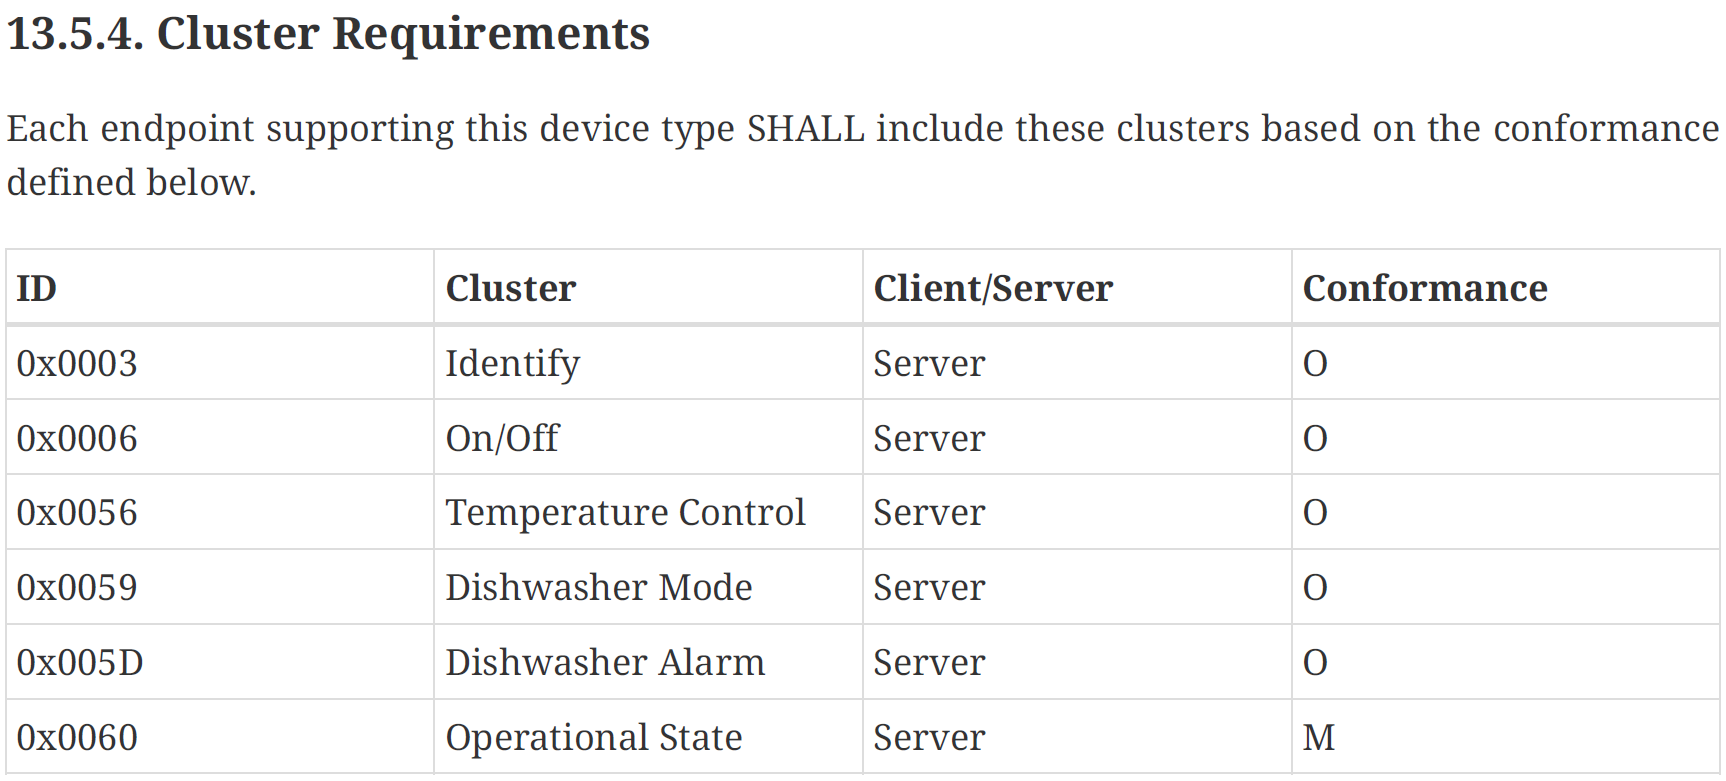
Being a somewhat more complicated beast, the Heat Pump requirements were a *little* more detailed
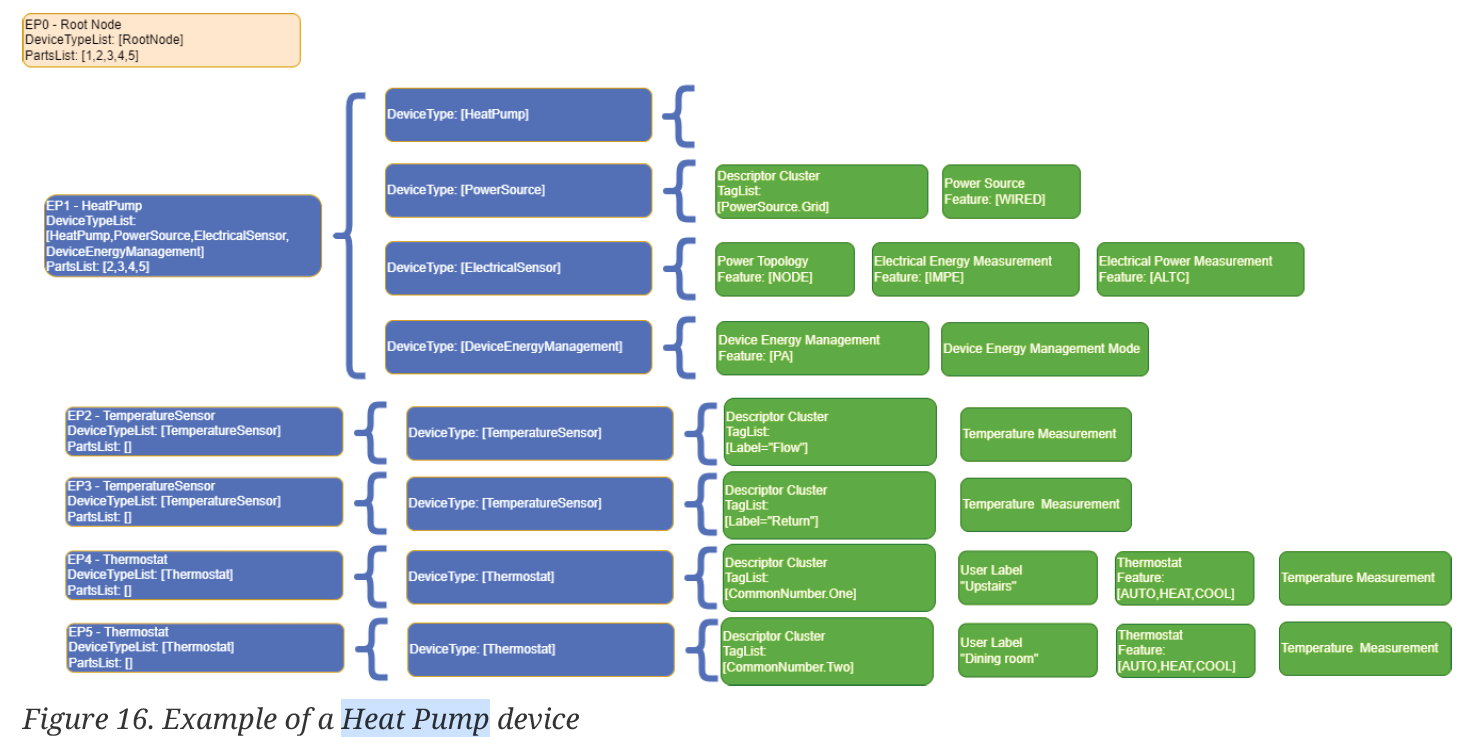
Reading this, you can hopefully see that a heat pump is made up of several DeviceTypes across multiple endpoints.
My Plan
I wanted to implement a few features on my Tiny Heat Pump.
Firstly, I needed a to add a Matter Thermostat, which would allow me to control the set-point. I also wanted to have an idea of the schedules of my heat pump, so I could show setback.
I then wanted it to reach out and fetch the current outdoor air temperature. This would be a real value, even if my Heat Pump was just code. Then, with a set-point and an outdoor temperature, I would use Machine Language model to estimate energy consumption.
Finally, that estimated energy consumption would then be shared via the DeviceEnergyManagement cluster.
Getting Started
To kick me off, I copied the basic structure of the example device-robotic-vacuum-cleaner, as it felt complicated enough.
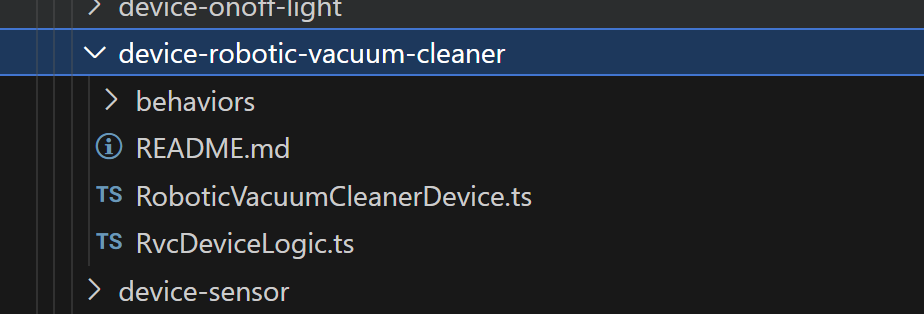
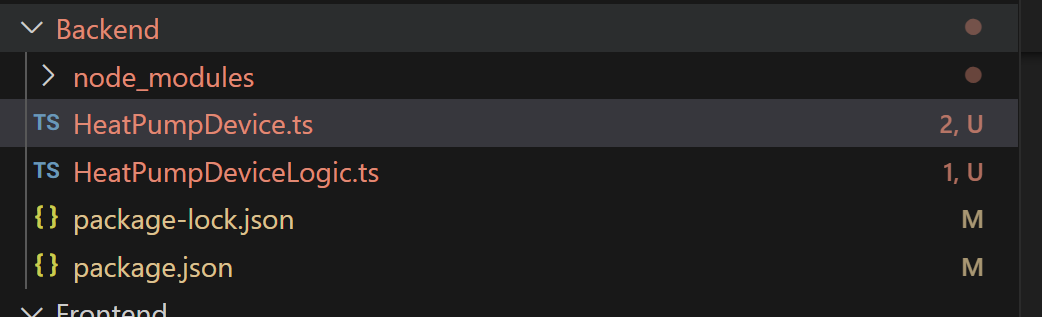
The HeatPumpDevice contained just this, with my HeatPumpDeviceLogic being basically empty.
const node = await ServerNode.create();

const heatpump = await node.add(HeatPumpDevice.with(HeatPumpDeviceLogic));

await node.start();
That was enough to get a Node appearing on the network and commissioned by iOS Home. Unsurprisingly, iOS Home doesn’t support the heat pump device.
I then tried to add a Thermostat.
const heatpump = await node.add(HeatPumpDevice.with(HeatPumpDeviceLogic, ThermostatServer),
    {
        id: "heat-pump",
        thermostat: {
            systemMode: Thermostat.SystemMode.Heat,
            controlSequenceOfOperation: Thermostat.ControlSequenceOfOperation.HeatingOnly,
        }
    }
);
Unfortunately, this yielded an error

After consulting with Discord, it turns out that the ThermostatServer doesn’t have a default implementation. The setpointRaiseLower is a mandatory command on the Thermostat Cluster, so there must be an implementation.
I defined my own like this
class HeatPumpThermostatServer extends ThermostatServer.with(Thermostat.Feature.Heating) {

   override async setpointRaiseLower(request: Thermostat.SetpointRaiseLowerRequest): Promise<void> {
        console.log("Setpoint Raise Lower called with value:", request.amount);
    }
}
and then updated the node.add call to use my instance.
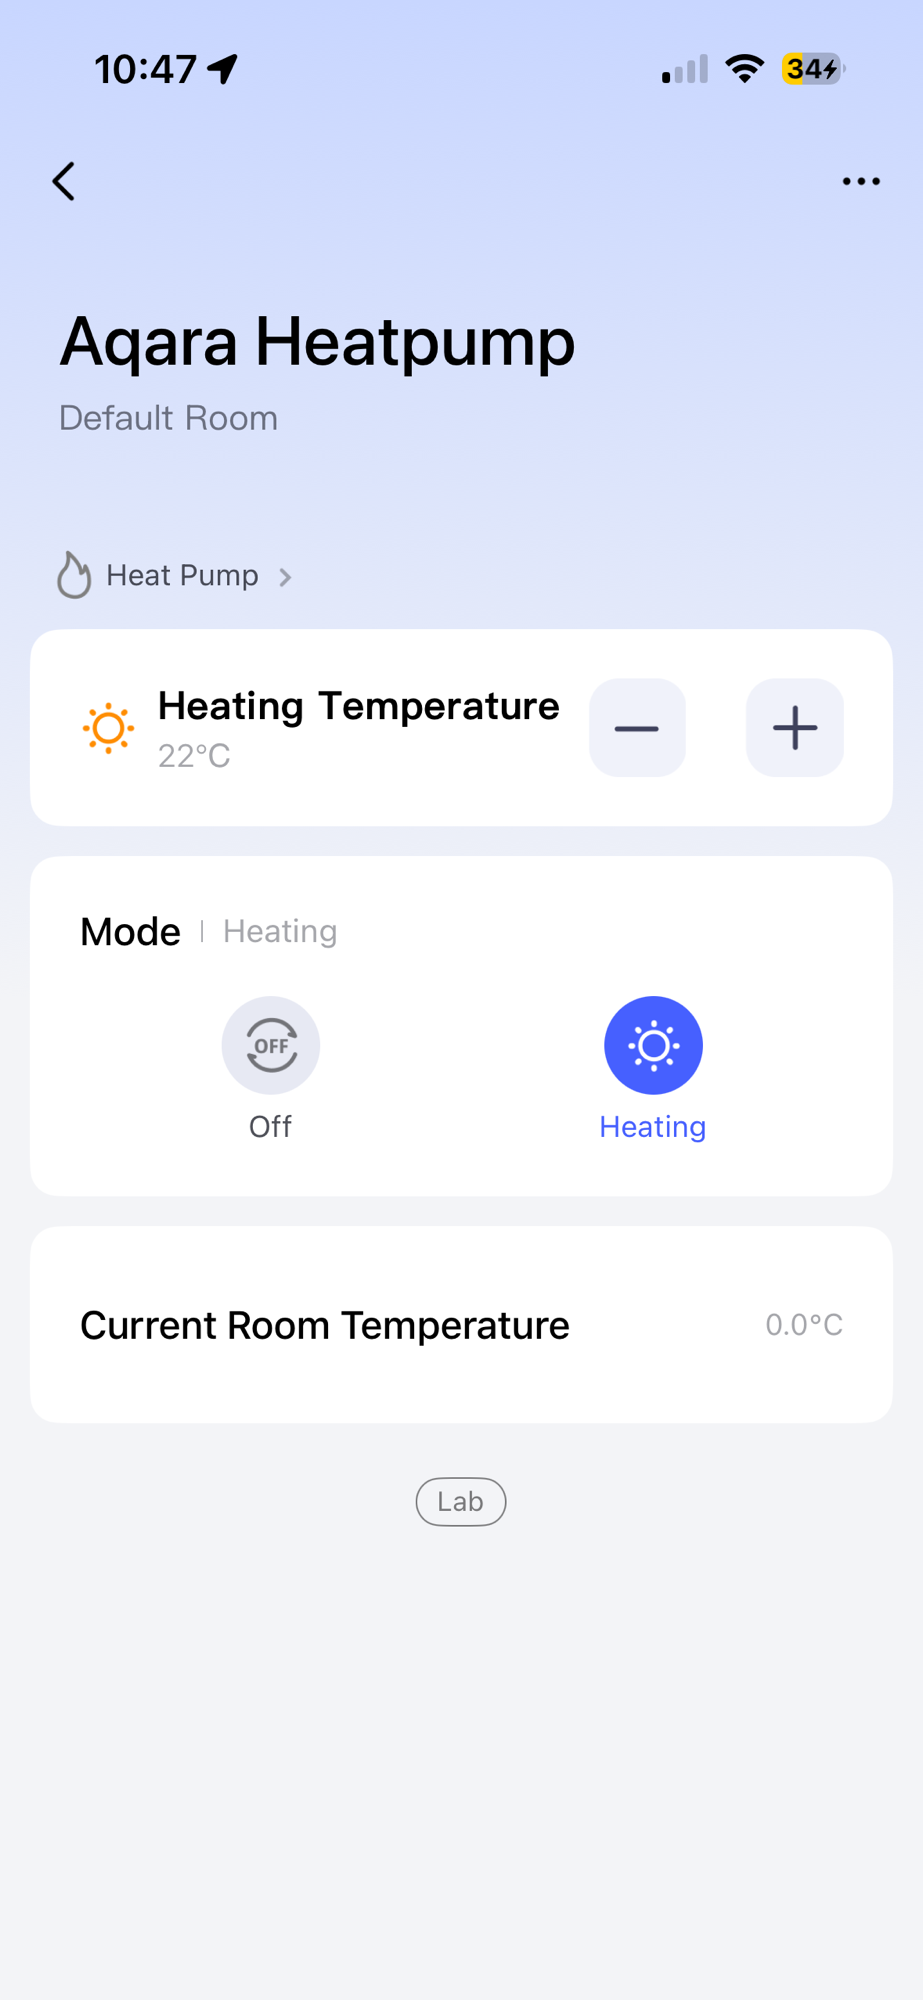
Upon starting the device and pairing with Aqara, I can see my heat pump and my simple thermostat!
Of course, that was just one piece of the heat pump. I needed to define all the other clusters on the endpoint. Like this:

This ElectricalSensor DeviceType is made up of three clusters (in green), as you can see. I needed to figure out how to compose this in matter.js.
After quite a few goes, I managed to define what I think is a heatpump.
var heatpumpEndpoint = await node.add(HeatPumpDevice.with(HeatPumpDeviceLogic,
    PowerSourceServer,
    PowerTopologyServer,
    ElectricalPowerMeasurementServer,
    ElectricalEnergyMeasurementServer,
    DeviceEnergyManagementServer), {
    id: "heat-pump",
    // heatPump: {
    //     tagList: [PowerSourceNs.Grid],
    // },
    powerSource: {
        featureMap: { wired: true },
        status: 1,
        order: 1,
        description: "Grid",
    },
    powerTopology: {
        featureMap: { nodeTopology: true },
    },
    electricalPowerMeasurement: {
        featureMap: { alternatingCurrent: true },
        powerMode: 2,
        numberOfMeasurementTypes: 1,
        accuracy: [{
            measurementType: MeasurementType.ActivePower,
            measured: true,
            minMeasuredValue: 0,
            maxMeasuredValue: 10000,
            accuracyRanges: [{
                rangeMin: 0,
                rangeMax: 10000,
                percentMax: 100
            }],
        }],
    },
    electricalEnergyMeasurement: {
        featureMap: { importedEnergy: true },
        accuracy: {
            measurementType: MeasurementType.ElectricalEnergy,
            measured: true,
            minMeasuredValue: 0,
            maxMeasuredValue: 10000,
            accuracyRanges: [{
                rangeMin: 0,
                rangeMax: 10000,
                percentMax: 100
            }],
        }
    },
    deviceEnergyManagement: {
        featureMap: { powerAdjustment: true },
    }
});
The only thing missing from the main endpoint is the Descriptor TagList (under Power Source)
For the thermostat, I added that as a second endpoint, changing what I did at the start. I think the fits more in-line with the specification.
var thermostatEndpoint = await node.add(ThermostatDevice.with(HeatPumpThermostatServer), {
    id: "heat-pump-thermostat",
    thermostat: {
        featureMap: { heating: true },
        controlSequenceOfOperation: 2,
        systemMode: 4,
    }
});
Listening for and notifying of changes
With the thermostat in places, I next needed to understand how matter.js communicated change. That is, how would I know the set-point was updated or the mode changed? This happens inside the Logic class.
async #initializeNode() {
    const thermostat = await this.agent.load(HeatPumpThermostatServer);

    this.reactTo(thermostat .events.systemMode$Changed, this.#handleSystemModeChanged, {
            offline: true,
        });
    this.reactTo(thermostat .events.occupiedHeatingSetpoint$Changed, this.#handleOccupiedHeatingSetpointChanged, {
        offline: true,
    });
}
This sets up two callbacks for the systemMode and the occupiedHeatingSetpoint.
To understand how I could update the Heat Pump, I needed a cluster to experiment with. As I’m using a Heat Pump, the electrical input is important, which is why there is an ElectricalSensor. To set the active power of the ElectricalPowerMeasurement, I could do this
await heatpumpEndpoint.setStateOf(ElectricalPowerMeasurementServer, {
    activePower: 1000,
});
Simulating a heat pump!
For the first pass through the simulation, I will simply have the heat pump consume 1kW whilst it’s switched on.
That means I need to get the thermostat responding and some sort-of timer to keep the activePower value up-to-date.
I added an event handler to detect when the heat pump was turned on (via the Thermostat)
var heatingOn = false;

thermostatEndpoint.events.thermostat.systemMode$Changed.on(value => {
    console.log(`Thermostat is now ${value ? "ON" : "OFF"}`);
    heatingOn = value === 4;
});
I then added a timer
var timer = setInterval(async function () {

    var power: number = 0;

    if(heatingOn) {
        power = 1000;
    }

    console.log("Setting power to:", power);

    await heatpumpEndpoint.setStateOf(ElectricalPowerMeasurementServer, {
        activePower: 0,
    });
}, 1000);
When heatingOn is true, we get an activePower measurement of 1000mW.
To make this an actual sensible number, I need to get a little more creative and use some heating basics. Heat pumps, at their most basic, heat or cool a medium, air or water, usually. I’m going to concentrate on air-to-water heat pumps, since I know a little about them.
A little note on flow temperature
When switched on, our heat pump is heating water and that water goes into our radiators or underfloor heating. The temperature of the water leaving the heat pump is called the Flow Temperature. The flow temperature isn’t a fixed value either. It’s calculated based on how much heat the building needs to get it to the target temperature. This is usually done by looking at the outdoor temperature. If it’s very cold, the flow temperature is high, if it’s mild the flow temperature is low. This helps ensure the heat pump isn’t working any harder than it needs to. This is usually called Weather Compensation or Load Compensation.
So, at any given in point in time, using the outdoor temperature, we can work out the flow temperature. The flow temperature will then tell me how hard the heat pump needs to work i.e. how much electricity it needs. It starts getting a little more complicated here. If the flow temp is high, the outdoor temp will be low and the energy need will be higher. Where can I get this information?
Predicting power consumption
This leads me back to a simple Machine Learning post I did a few weeks back. I used open-source data to help me create a simple prediction model. I give it the indoor temperature and the outdoor temperature and it gives me the power demand. I did this to cut out the complexity of the weather compensation.
My ML needed to be converted into something I can use in JS. I accomplished this with some AI help. Basically, I save the important properties to a JSON file and load it in NodeJS.
const data = fs.readFileSync('./model/model_params.json', 'utf8');
const modelParams = JSON.parse(data);

function predict(features: any) {
    let prediction = modelParams.intercept;
    for (let i = 0; i < features.length; i++) {
        prediction += features[i] * modelParams.coef[i];
    }
    return prediction;
}
Outside Temperature
This value is easy to get from the myriad weather APIs that exist. I’ll use hourly values from https://open-meteo.com/
const params = {
    "latitude": 52.4118,
    "longitude": 1.777652,
    "hourly": "temperature_2m",
    "timezone": "Europe/London",
    "start_date": "2025-09-30",
    "end_date": "2025-09-30",
};
const url = "https://api.open-meteo.com/v1/forecast";
const responses = await fetchWeatherApi(url, params);
Putting it all together
The target temperature (the value you set your thermostat to) will come from the occupiedHeatingSetpoint of the thermostat. I’ll combine this with outdoor temperature and then feed the two values into my ML model to get power consumption.
var power: number = 0;

var date = new Date();
var hour = date.getHours();

var outdoorTemperature = weatherData.hourly.temperature_2m![hour];
console.log("Outdoor temperature is:", outdoorTemperature);

var targetTemperature = heatingSetpoint / 100;
console.log("Target temperature is:", targetTemperature);

if (heatingOn) {
    power = predict([targetTemperature, outdoorTemperature]) * 1000; // mW;
}

console.log("Setting power to:", power);

await heatpumpEndpoint.setStateOf(ElectricalPowerMeasurementServer, {
    activePower: 0,
});
I simply take the current temperature for the hour and use that with the targetTemperature.
Outdoor temperature is: 12.449999809265137
Target temperature is: 22
Setting power to: 252464
Here is a video showing how the power changes in response to the set-point.
Wrapping Up
The matterjs API is pretty well thought out. There are a few little oddities I had to work through, but I got the basic Heat Pump device configured. That is probably one of the more complex devices in Matter, so I’m happy to get it done!
Thankfully, getting my simple ML into the project also wasn’t difficult and it’s nice to see the data being used. I’m not sure how *good* the prediction is, but it’s interesting all the same.
Next up, I want to add a power forecast to the DeviceEnergyManagement cluster. I can then *hopefully* display this in my Energy Manager. This will allow me to then explore power adjustments and how a heat pump might react.
As always, my code is open-source and on Github – https://github.com/tomasmcguinness/matter-js-heat-pump
Did you like reading this post?
If you found this blog post useful and want to say thanks, you’re welcome to buy me a coffee. Better yet, why not subscribe to my Patreon so I can continue making tinkering and sharing.
Be sure to check out my YouTube Channel too – https://youtube.com/tomasmcguinness
Thanks, Tom!

Leave a comment