
As I continue work on my Modbus to Matter Adapter, one of the challenges I face is configuring the device.
Since each Modbus device is different, I wanted a way to configure the adapter without needing to flash new firmware.
This would allow me to have generic firmware that could be configured on site. It would also allow new devices to be supported without new firmware.
What are the options?
Before looking at options, I want to set out my requirements.
- It must be possible to support new Modbus devices without the need for updated firmware.
- It should be as easy to use as possible e.g. as simple as choosing a device from a drop-down.
- There should be as little extra software as possible.
In the world today, there are some classic approaches to this problem.
The first involves creating a Wi-Fi network when the device is first plugged in. Through this Wi-Fi network, you can access a webpage that allows you to configure the device. This is very common across the ESP32 community. For my adapter, this won’t work because the webpage needs to be embedded in the device. This breaks my first requirement.
Another popular approach is to use a bespoke app and a Bluetooth connection. This would satisfy requirements 1 and 2, but it adds a whole world of pain. Building and supporting an app isn’t a trivial business. Of course, we could use Bluetooth via the browser, so this is an option.
A more direct option?
Whilst using Bluetooth is a solid option, it did bring another option into my mind: USB!
WebUSB, like WebBluetooth is experimental with limited supported, but it would meet my requirements. I’ve seen this API used to great effect for programming Micro:bit boards.
How does it work?
The ESP32-C6 supports serial USB out of the box. This is the classic COM port!
Other ESP32 variants can do more with USB, but a simple serial connection is enough for me. To enable it, we use the usb_serial_jtag_driver API.
void usb_serial_init(void){ usb_serial_jtag_driver_config_t config = { .tx_buffer_size = USB_SERIAL_BUF_SIZE, .rx_buffer_size = USB_SERIAL_BUF_SIZE, }; ESP_ERROR_CHECK(usb_serial_jtag_driver_install(&config)); xTaskCreate(usb_serial_read_task, "usb_serial", 4096, NULL, 5, NULL); ESP_LOGI(TAG, "USB serial listener started");}
This code sets up the serial interface and then starts a task to listen for data from the interface. It will read the data being sent and then log it.
while (true){ int len = usb_serial_jtag_read_bytes(buf + pos, sizeof(buf) - pos - 1, pdMS_TO_TICKS(100)); if(len > 0) { // do stuff if (strlen((char *)buf) > 0) { ESP_LOGI(TAG, "Received JSON: %s", (char *)buf); } // do stuff }}
That was the ESP32 side. Now, onto the JavaScript!
Writing to USB with JavaScript
On the JavaScript side, writing to the port was also straightforward. First, we need to open the serial port.
var port = await navigator.serial.requestPort();await port.open({ baudRate: 115200 });
This will cause the browser (Chrome or Edge are the only ones that support WebUSB) to pop-up a picker dialog.
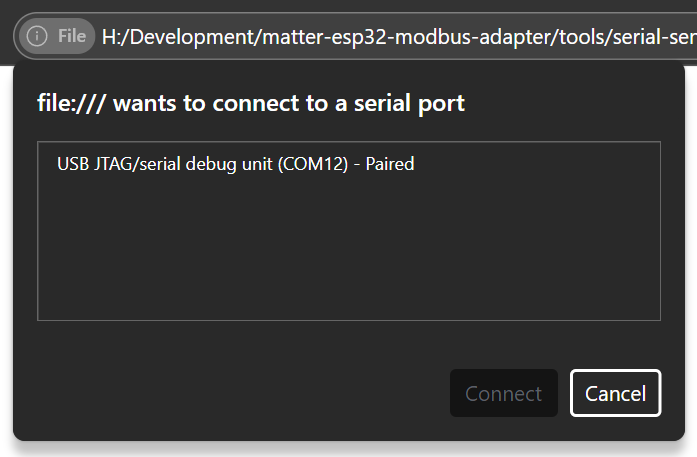
Unfortunately, the name isn’t really helpful. Unless this name can be customized, it will make this more difficult to use. For now, that’s not a worry.
One the port is selected and connected to, writing to it is simple. For a real example, I chose to send some JSON.
const encoder = new TextEncoder();const data = encoder.encode(JSON.stringify(payload) + '\n');const writer = port.writable.getWriter();await writer.write(data);writer.releaseLock();
That’s all there is to it!
Reading from JavaScript
For reading, the process is similar to the ESP. I set up a loop and wait for data to arrive.
const decoder = new TextDecoderStream();const readableStreamClosed = port.readable.pipeTo(decoder.writable);reader = decoder.readable.getReader();while (true) { const { value, done } = await reader.read(); if (done) { break; } log('RX: ' + value);}
A simple demo
I had Claude create a simple UI for sending and receiving via USB. After connecting, and clicking “Send Payload”, you can see the Logs show the TX from the JavaScript side. There is an RX logged, but the ESP32 doesn’t send anything. You can also see the Received JSON value, indicating the data was received.
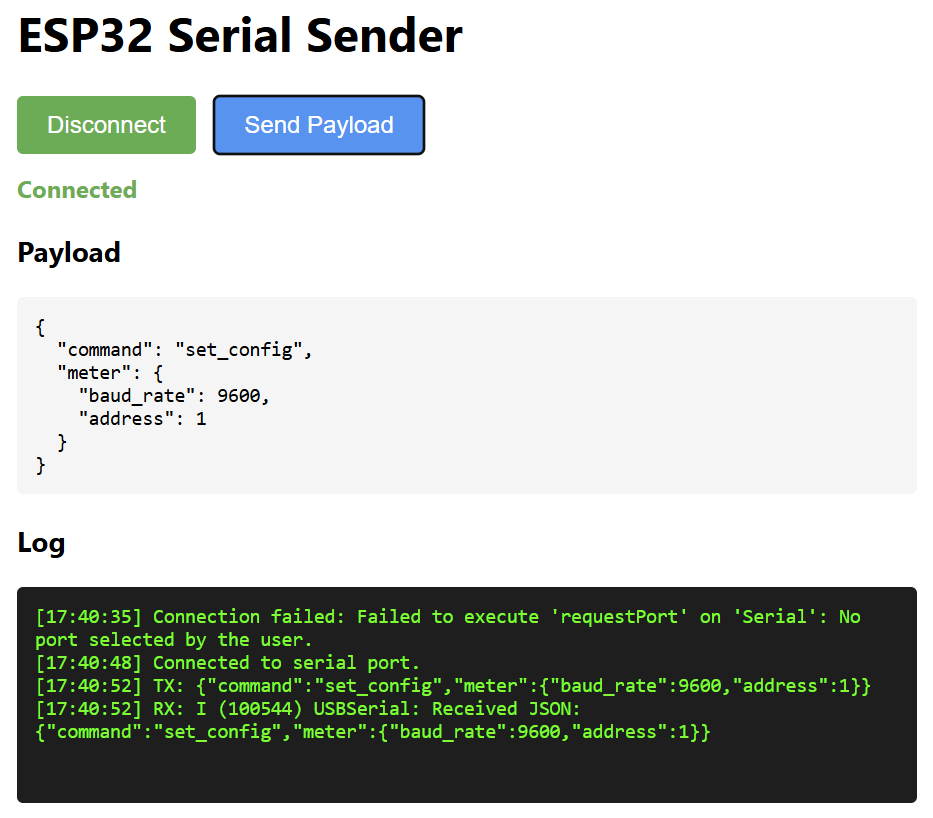
It’s a basic demo, but it shows it working end-to-end.
How will I use this?
Right now, I expect I’ll send a JSON payload that contains the configuration. This would include the type of device i.e. electrical meter, heat pump, solar inverter etc. I would then have to include the structure of the Matter device and the Modbus registers required.
The ESP32 would then parse the JSON and configure itself accordingly.
I’m not 100% sure it’s necessary, but this has been an interesting, if brief, dive into WebUSB!
Did you enjoy this post?
If you found this blog post useful and want to say thanks, you’re welcome to buy me a coffee.
Be sure to check out my YouTube Channel too – https://youtube.com/tomasmcguinness
Thanks,
Tom!

Leave a comment