To help me better understand how the Matter Smart Home protocol worked with appliances, I build a Dishwasher Emulator.
You can find everything about it here – ESP32 Tiny Matter Dishwasher
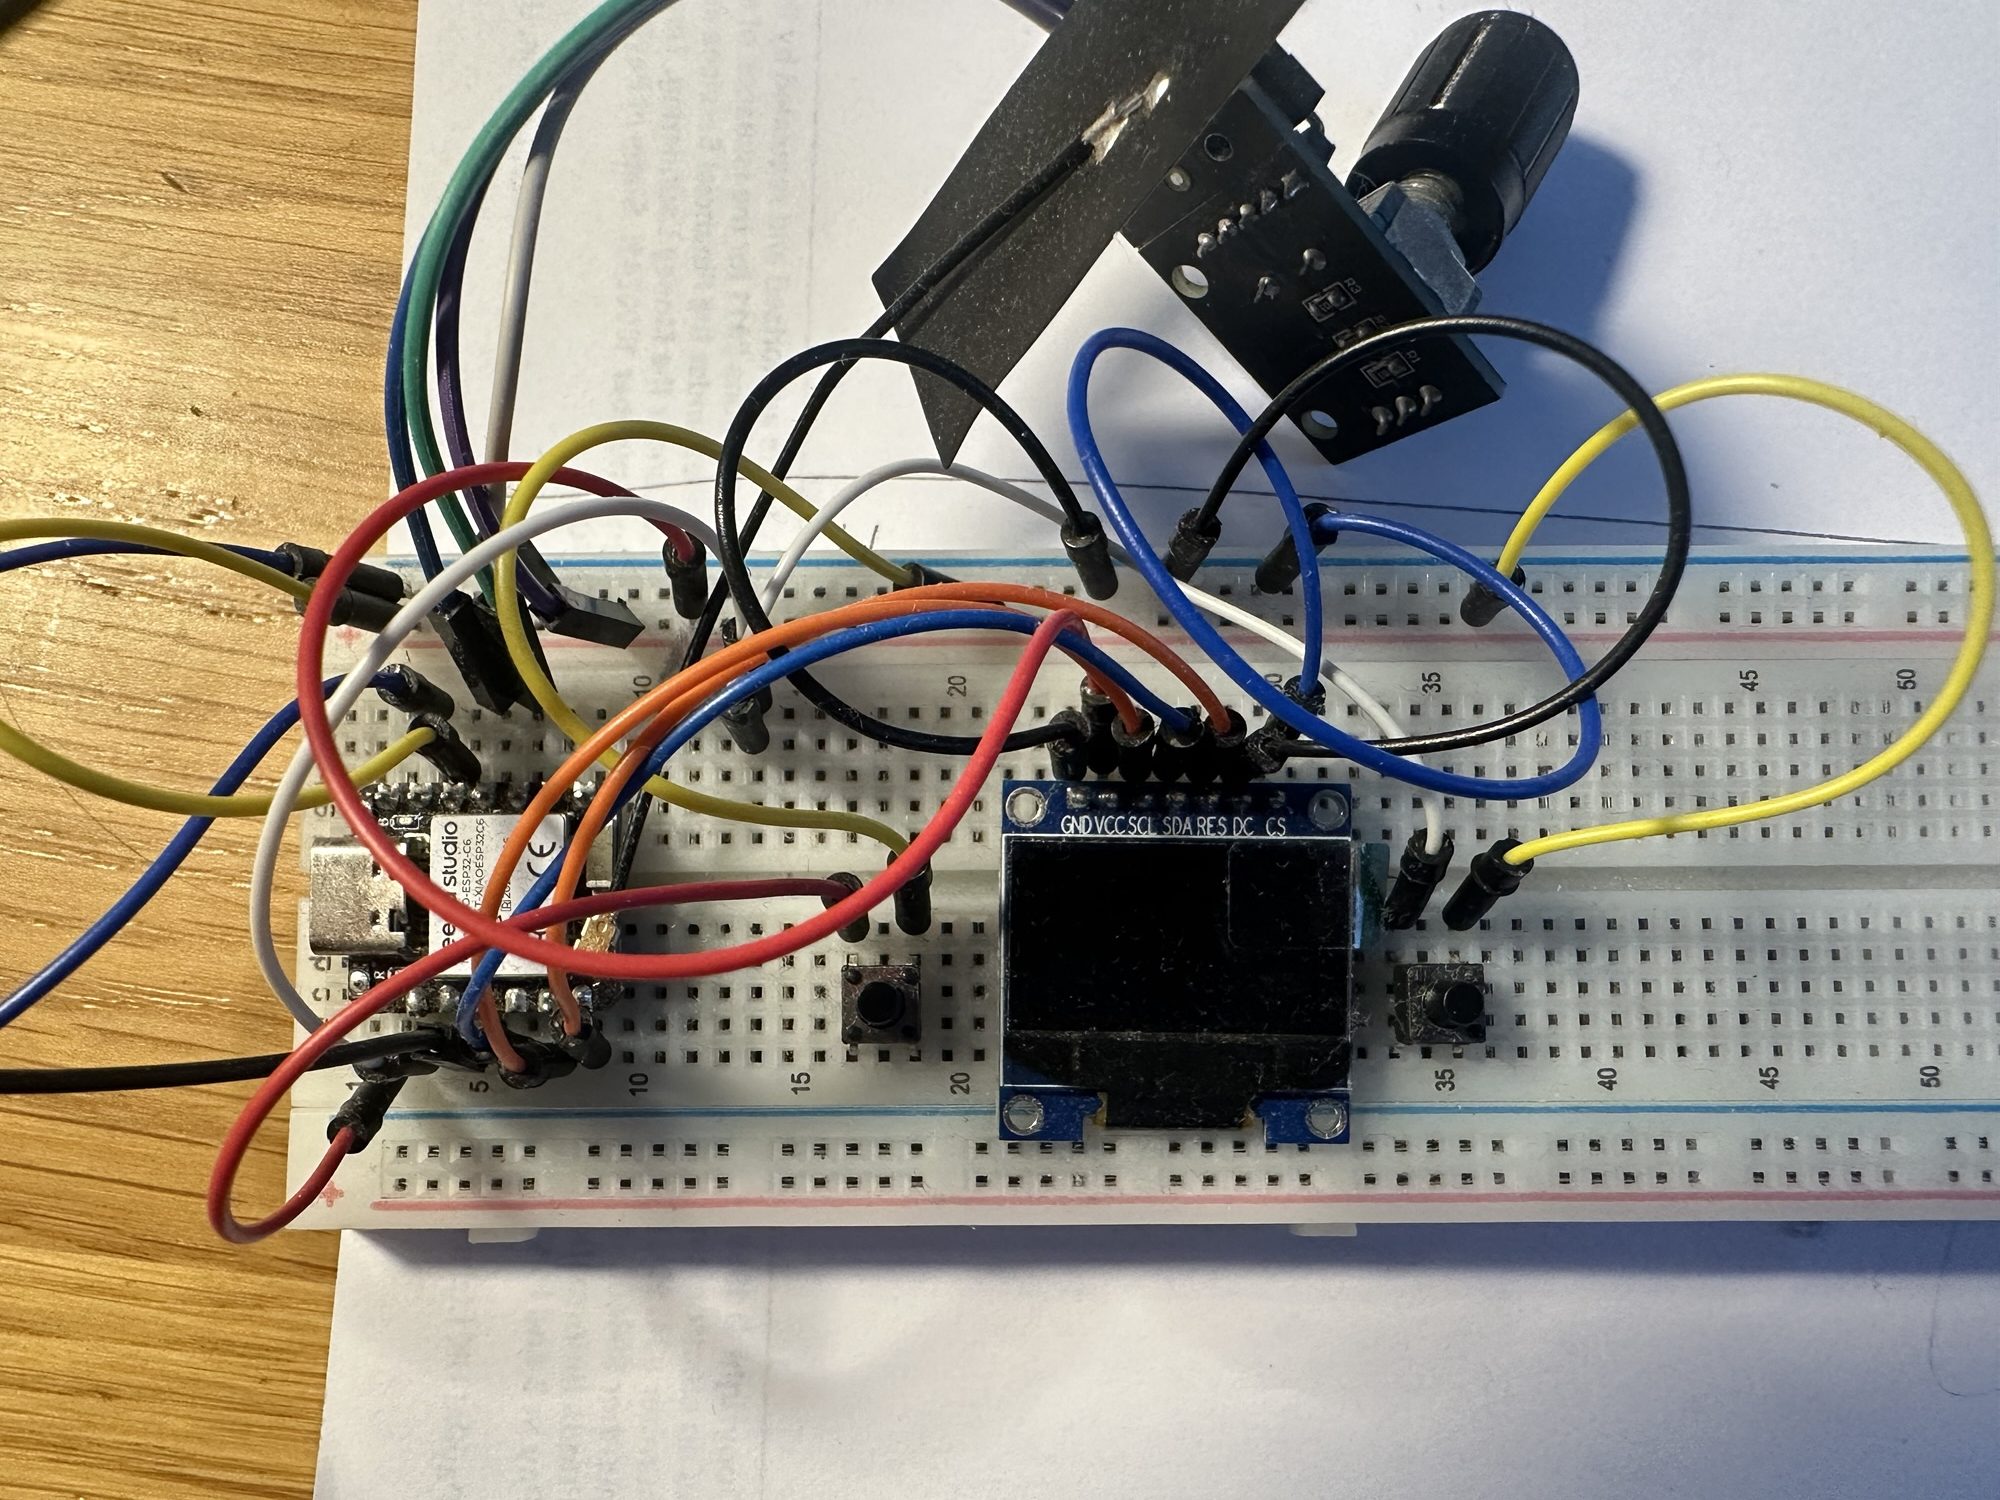
Whilst it worked really well and taught me a lot, it didn’t look too good on my desk!
Improving the packaging
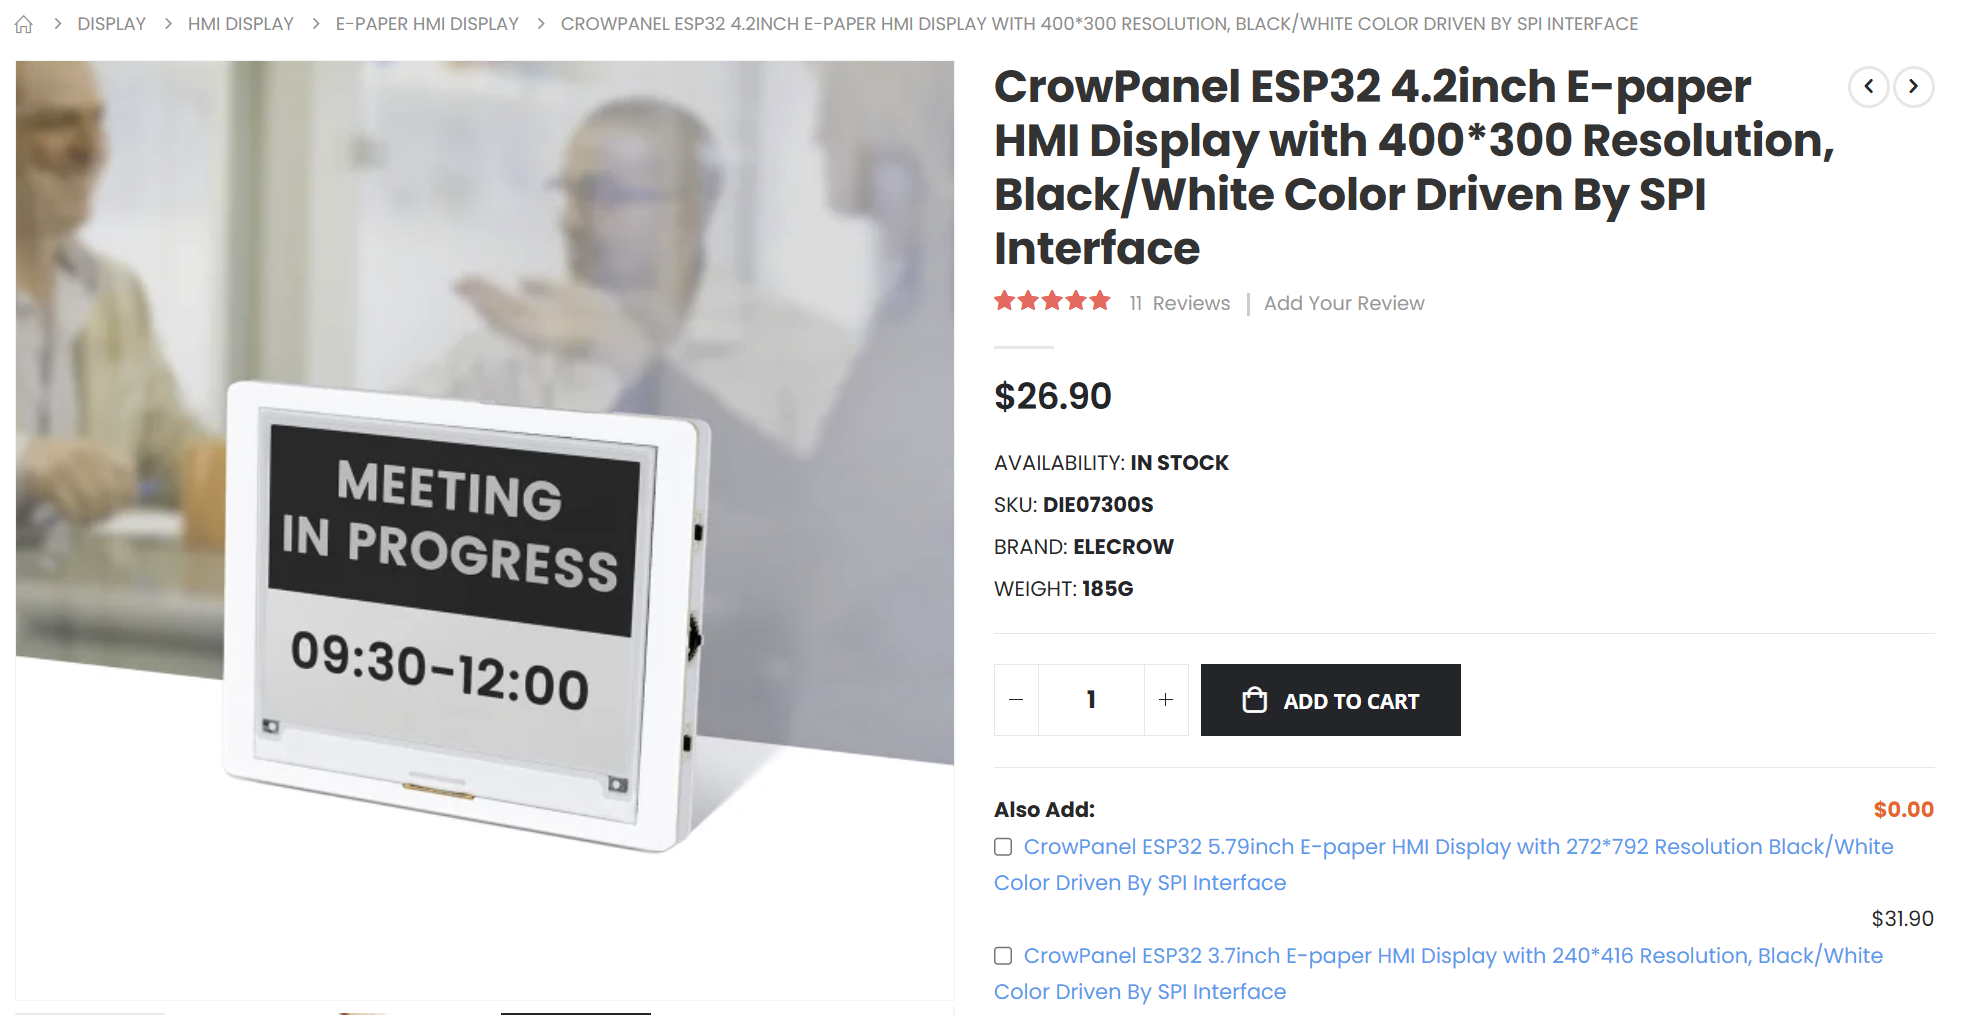
Towards the end of 2025, I received an email from Elecrow, offering some of their units for review. I’d never heard of Elecrow, but they had some cool stuff on their website. One of the items they were offering was a 4.2″ e-ink display.
My mind immediately jumped to my Tiny Dishwasher project. I thought that device would be the perfect home for this.
It has a two push buttons and an up/down/push selector, which matched the existing controls perfectly. Running on an S3 with 8MB of external memory, I knew it would have the grunt.
I knew this wouldn’t be a drop-in replacement, but I figured it was worth a shot. Not only would it clean up the packaging, it should make the project more accessible to others
I’ve included an affiliate link at the end of this post. If you decide to buy a CrowPanel, please use my link, as I think I make a small commission.
Buttons
I started with the simplest task; Changing the buttons.
This involved moving a few GPIO numbers around and flipping the active_level from 1 to 0.
Display
Changing display was going to be the most involved. The e-paper display drivers are different from the OLED display I’m currently using.
I was using Espressif’s LCD Peripheral API to drive the little OLED screen. On top of that ran the LVGL API, which is a graphics library.
In theory, all I needed to do was swap one driver for another and most stuff should continue to work.
Unfortunately, out of the box, the e-paper driver, an SSD1683 wasn’t supported by Espressif. There was, however, a component for it – https://components.espressif.com/components/espressif/esp_lcd_ssd1681
I started by adding that component.
idf.py add-dependency "espressif/esp_lcd_ssd1681^0.1.0~1"
Next step was swapping out the I2C bus for the SPI bus, which the e-paper display uses.
spi_bus_config_t buscfg = { .mosi_io_num = 11, .miso_io_num = 13, .sclk_io_num = 12, .quadwp_io_num = -1, .quadhd_io_num = -1, .max_transfer_sz = SOC_SPI_MAXIMUM_BUFFER_SIZE,};ESP_ERROR_CHECK(spi_bus_initialize(LCD_HOST, &buscfg, SPI_DMA_CH_AUTO));
Next came configuring the panel_io. This involved moving from esp_lcd_panel_io_i2c_config_t to esp_lcd_panel_io_spi_config_t
ESP_LOGI(TAG, "Install panel IO");esp_lcd_panel_io_handle_t io_handle = NULL;esp_lcd_panel_io_spi_config_t io_config = { .cs_gpio_num = PIN_NUM_CS, .dc_gpio_num = PIN_NUM_DC, .spi_mode = 0, .pclk_hz = 20 * 1000 * 1000, .trans_queue_depth = 7, .on_color_trans_done = NULL, .lcd_cmd_bits = EXAMPLE_LCD_CMD_BITS, .lcd_param_bits = EXAMPLE_LCD_PARAM_BITS,};ESP_ERROR_CHECK(esp_lcd_new_panel_io_spi((esp_lcd_spi_bus_handle_t)LCD_HOST, &io_config, &io_handle));
Next, we setup the panel itself. The example I’m using is for the SSD1681, which is functionally the same as the SSD1683.
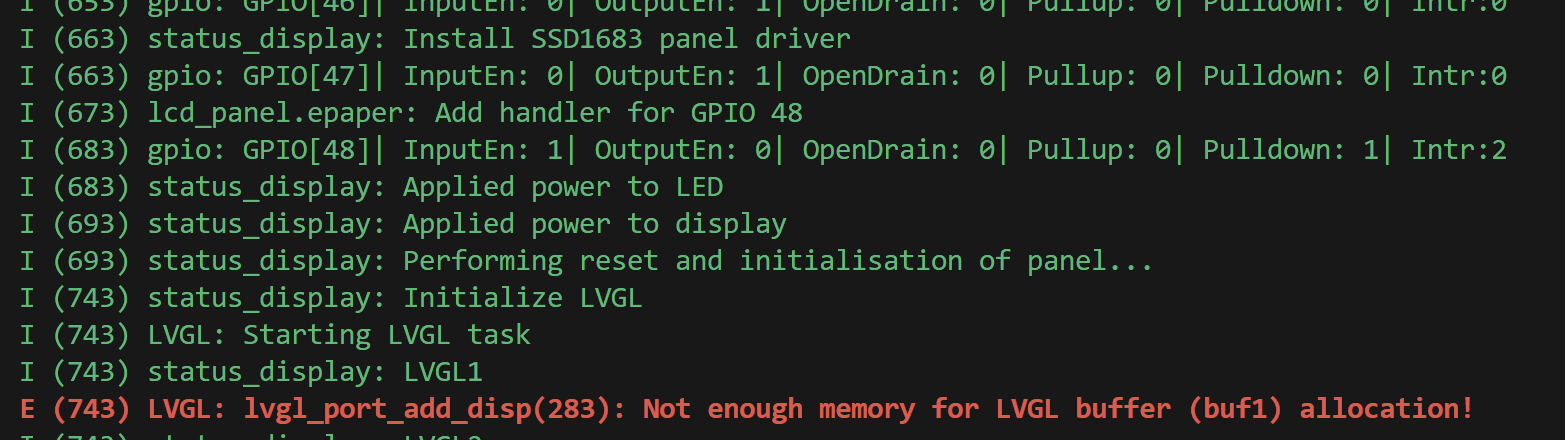
ESP_LOGI(TAG, "Install SSD1683 panel driver");esp_lcd_ssd1681_config_t epaper_ssd1681_config = { .busy_gpio_num = PIN_NUM_BUSY, .non_copy_mode = true,};esp_lcd_panel_dev_config_t panel_config = { .reset_gpio_num = PIN_NUM_RST, .flags = { .reset_active_high = false, }, .vendor_config = &epaper_ssd1681_config};gpio_install_isr_service(0);ESP_ERROR_CHECK(esp_lcd_new_panel_ssd1681(io_handle, &panel_config, &mPanelHandle));
Lastly, I apply power to the screen before the existing code takes over.
gpio_set_level((gpio_num_t)7, true);ESP_LOGI(TAG, "Applied power to display");
This *almost* worked!
Moar Memory!
Thankfully this Elecrow e-paper display comes packing! It has a whopping 8MB of PSRAM available. I just needed to enable that in the settings.

Down the rabbit hole. Again.
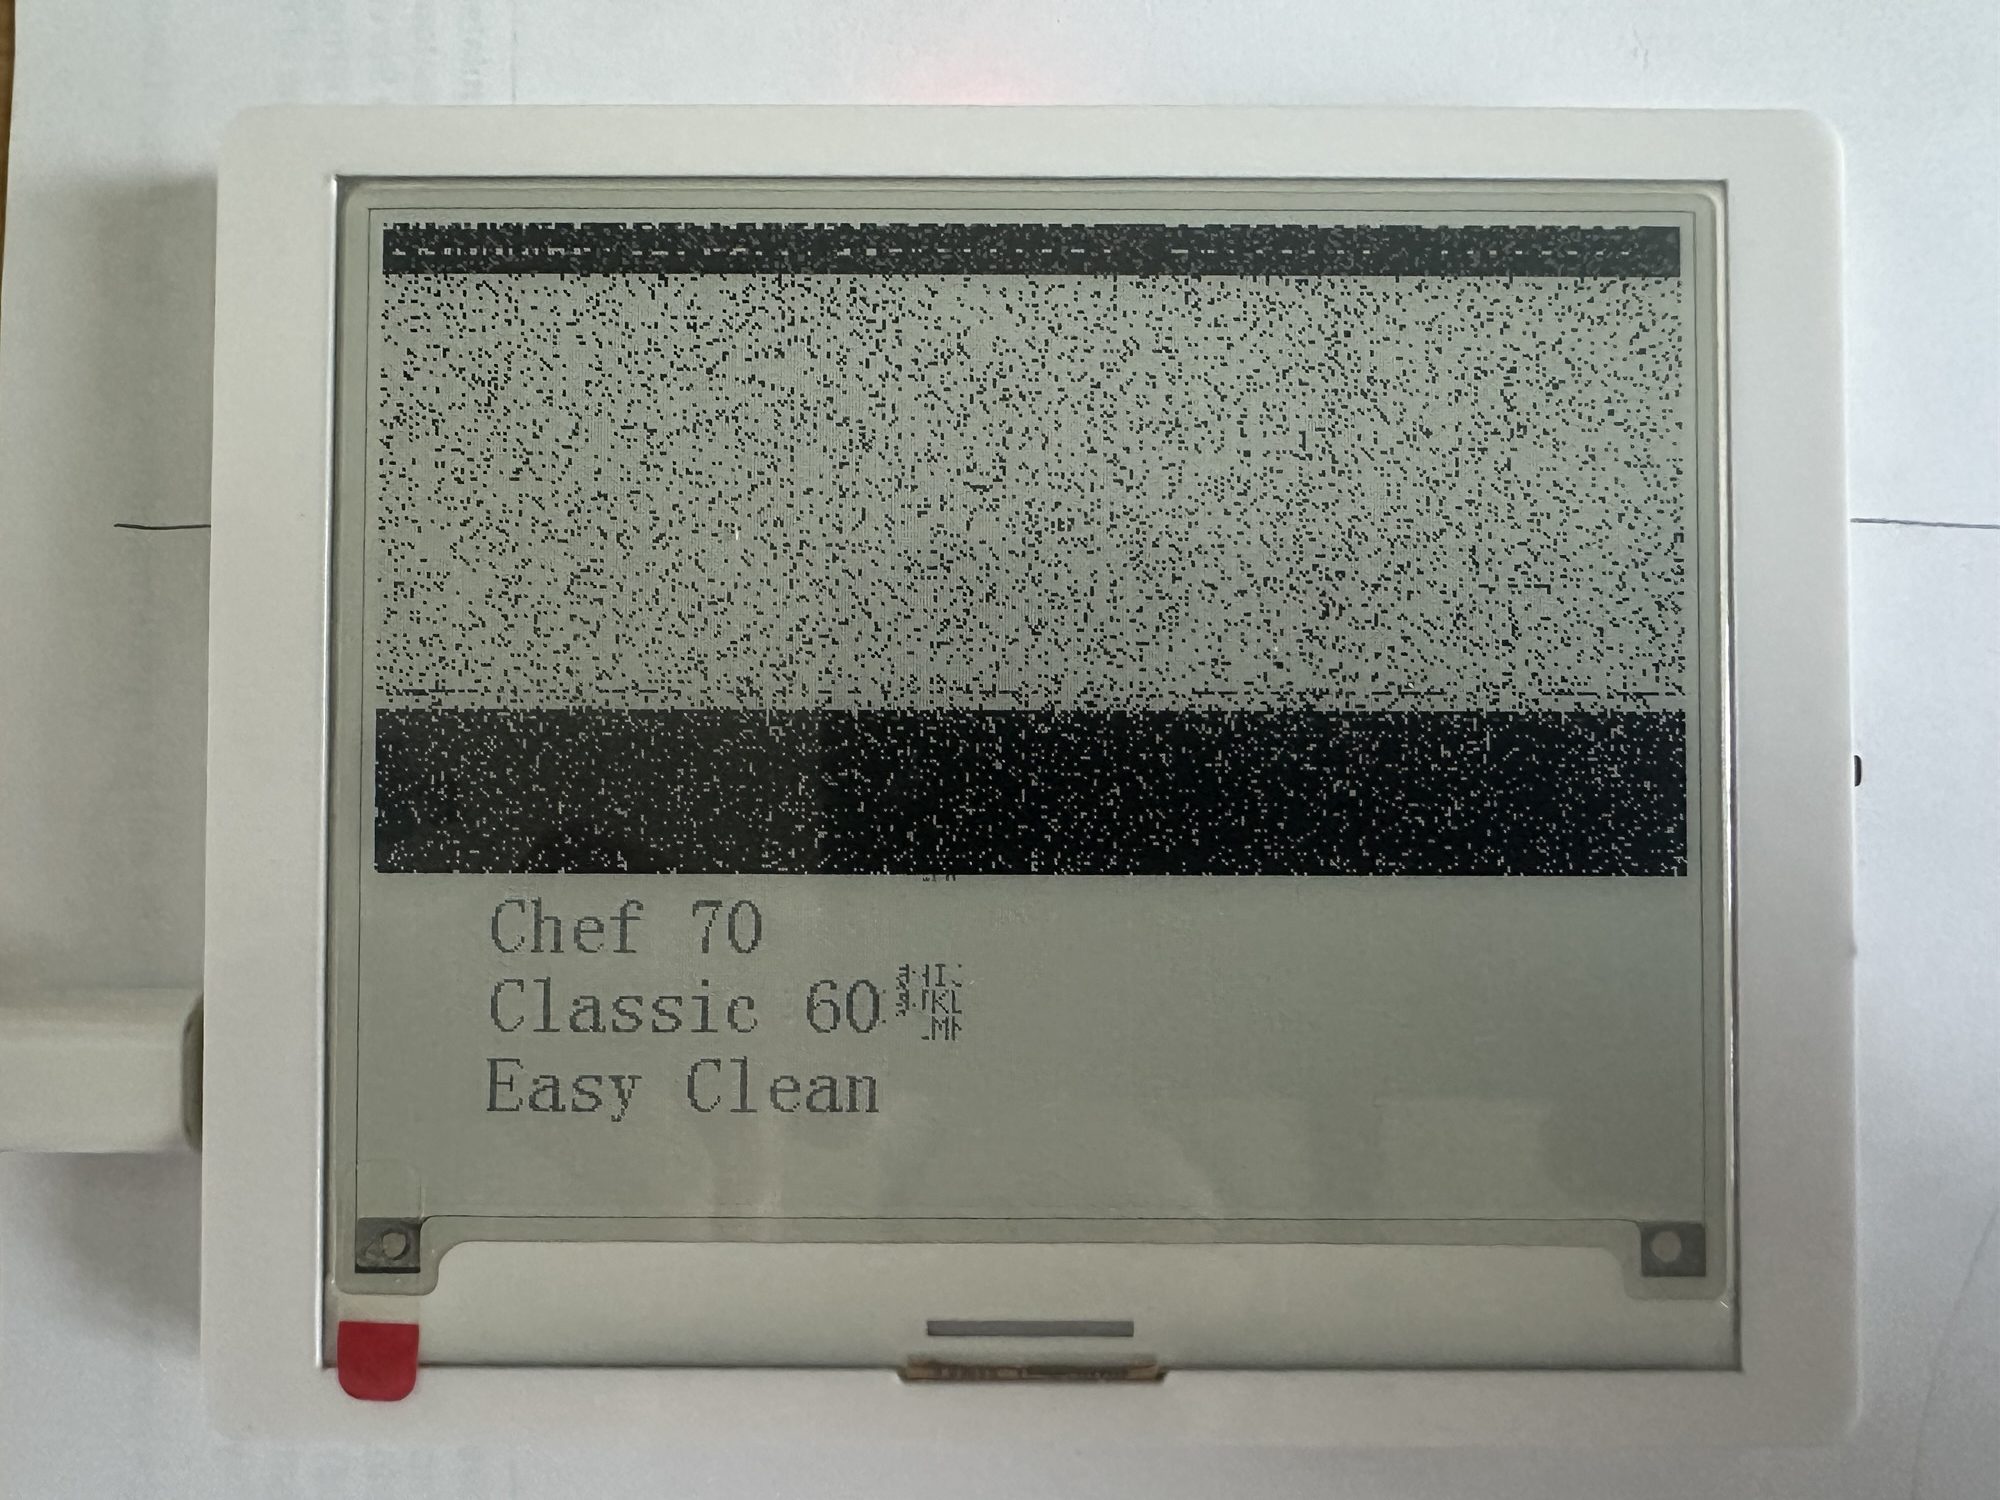
With the PSRAM enabled, I got something to happen when I pressed the on button, I was hit with disappointment! A spattering of noise, followed by the stuff that was on the screen from before!
What happened next was a frustrated exercise in copy/paste and banging my head against the wall.
The SSD1681 library I was trying to use just didn’t work. I had gone through similar pain with my Home Connect Matter proxy. I had a very rough idea of what bits and bytes made the Elecrow display work. The ones being sent by the library were similar, but different. Possibly because the 1683 is for bigger displays.
Who knows!
Between that and the LVGL library, it just didn’t work.
So, I did what any perfectly sane person does and wrote my own. I borrowed heavily from the 1681 code, tweaking it as best I could.
After battling with the Watchdog and many, many memory issues, I got something working.
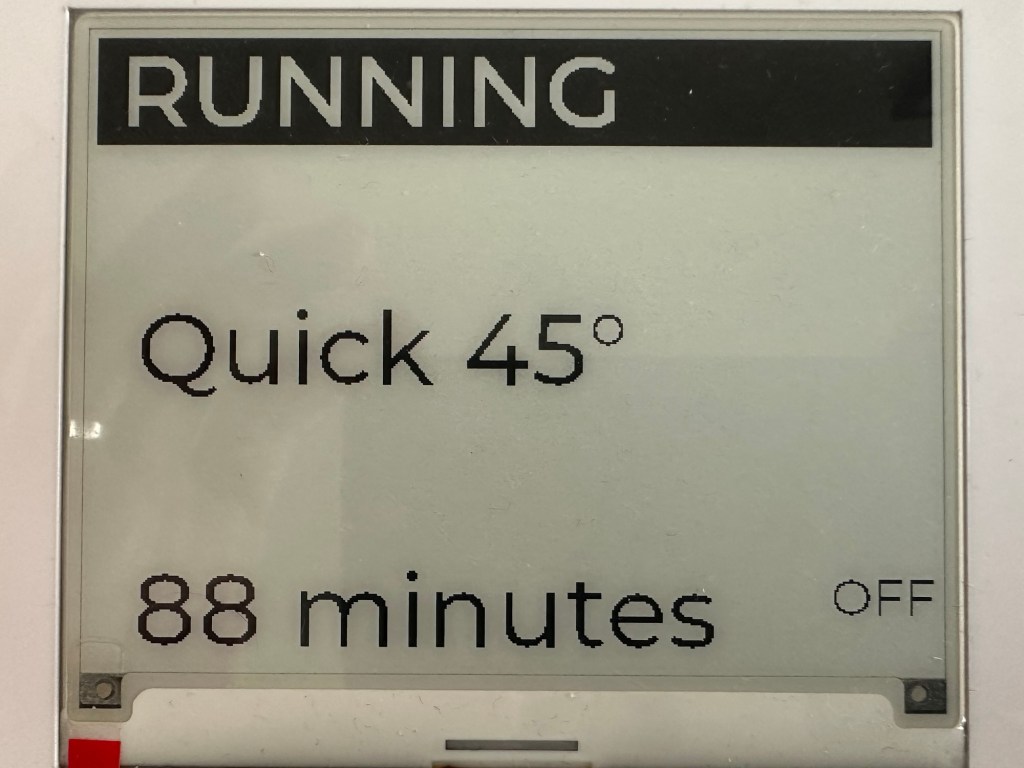
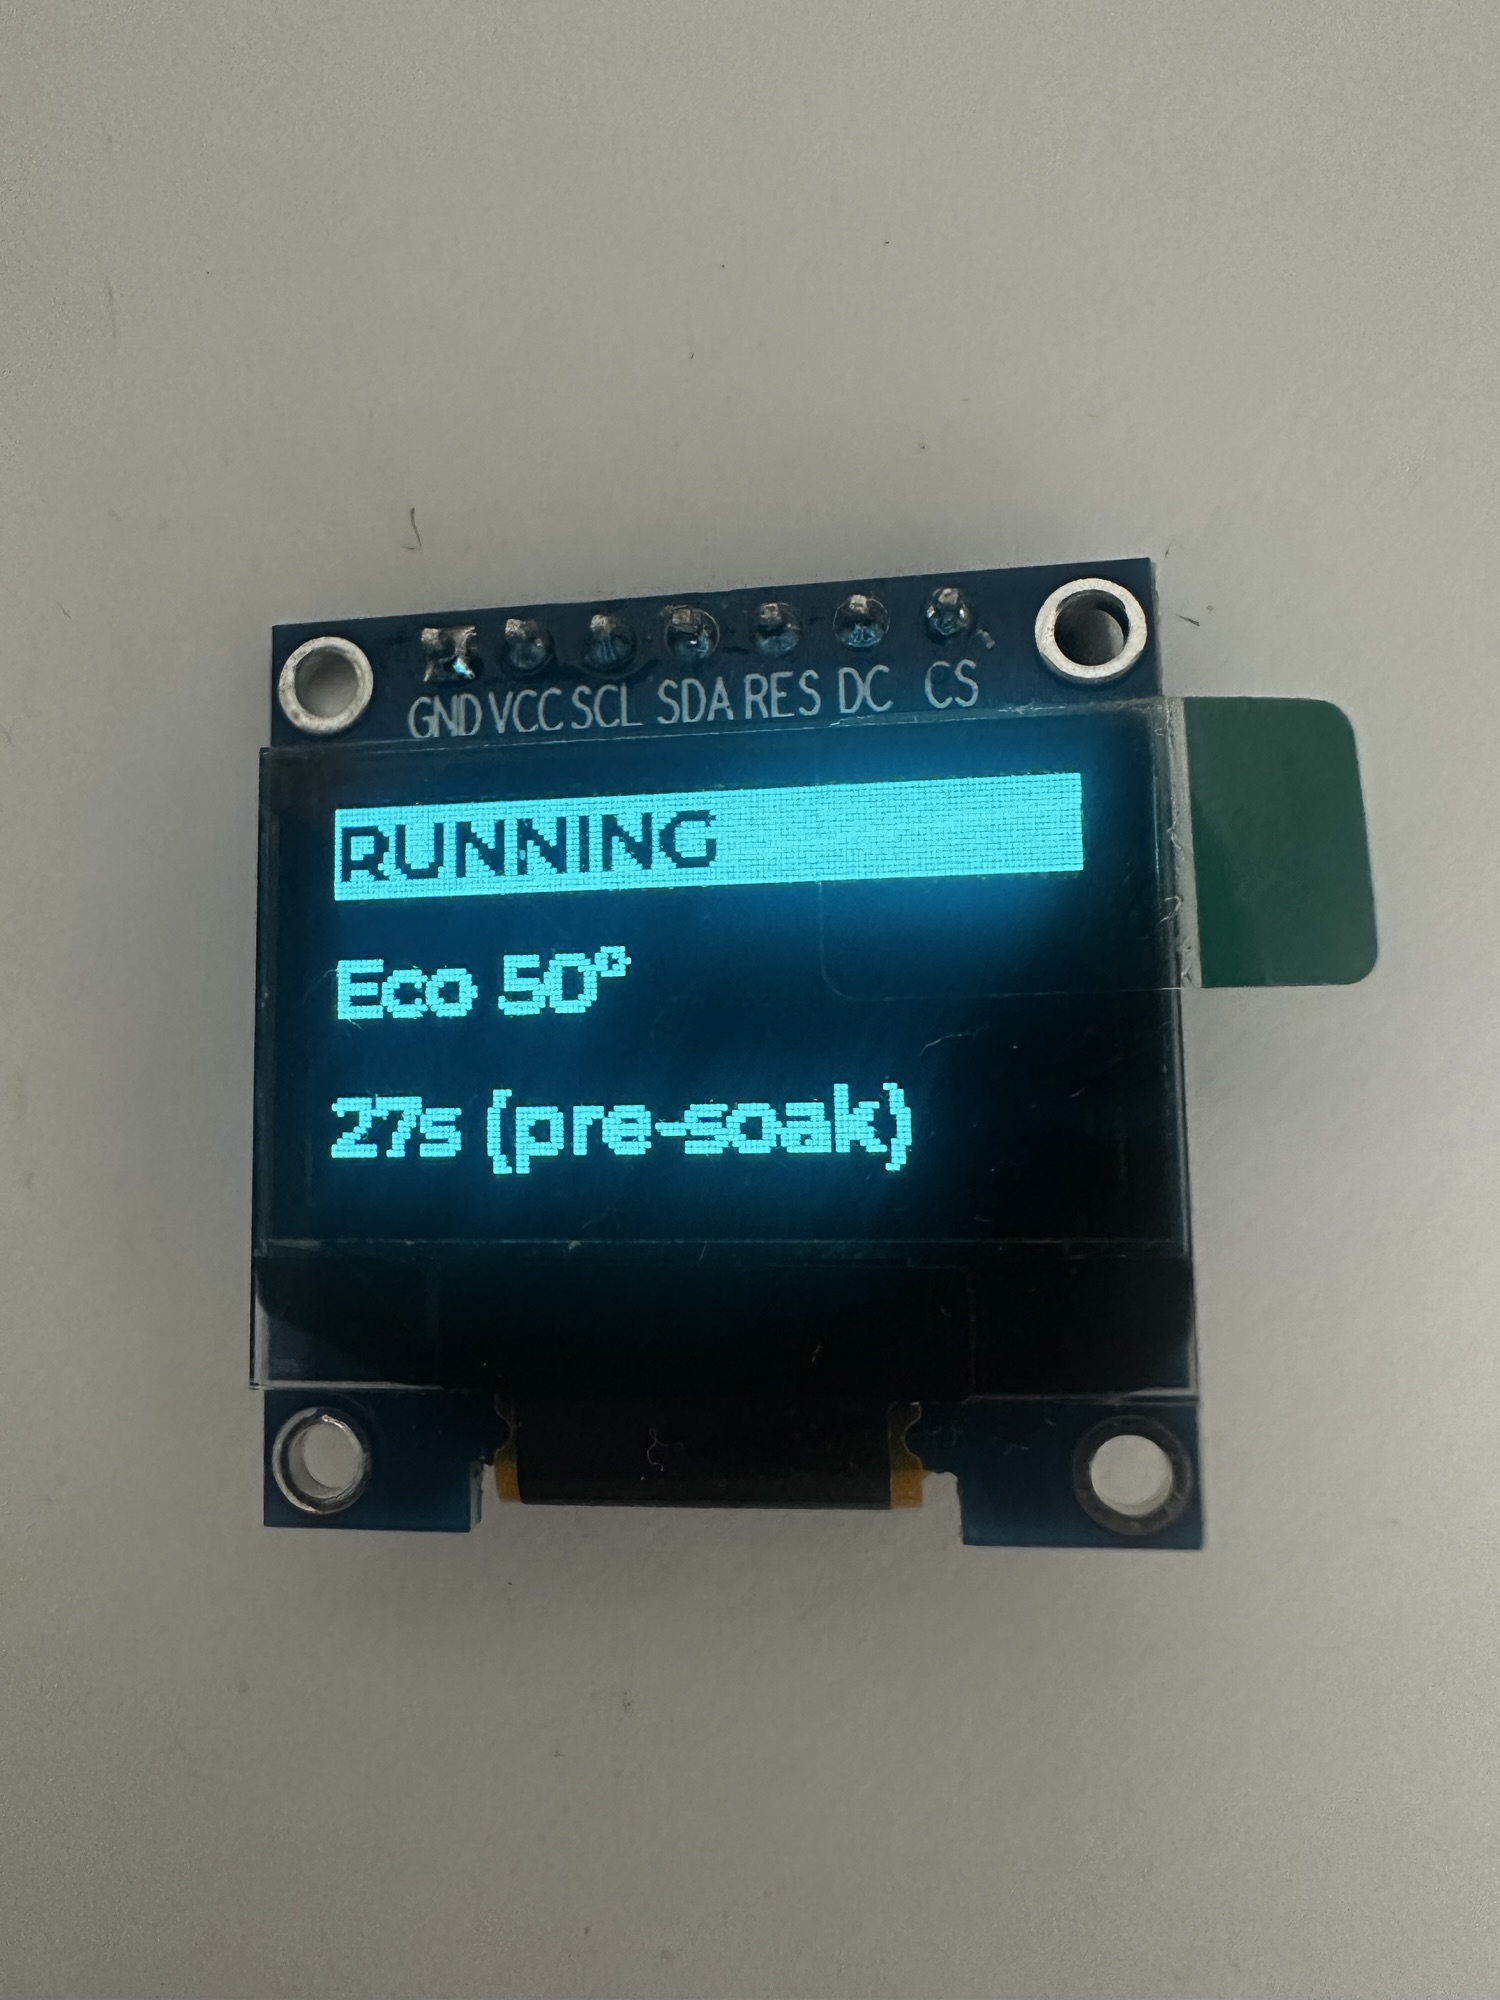
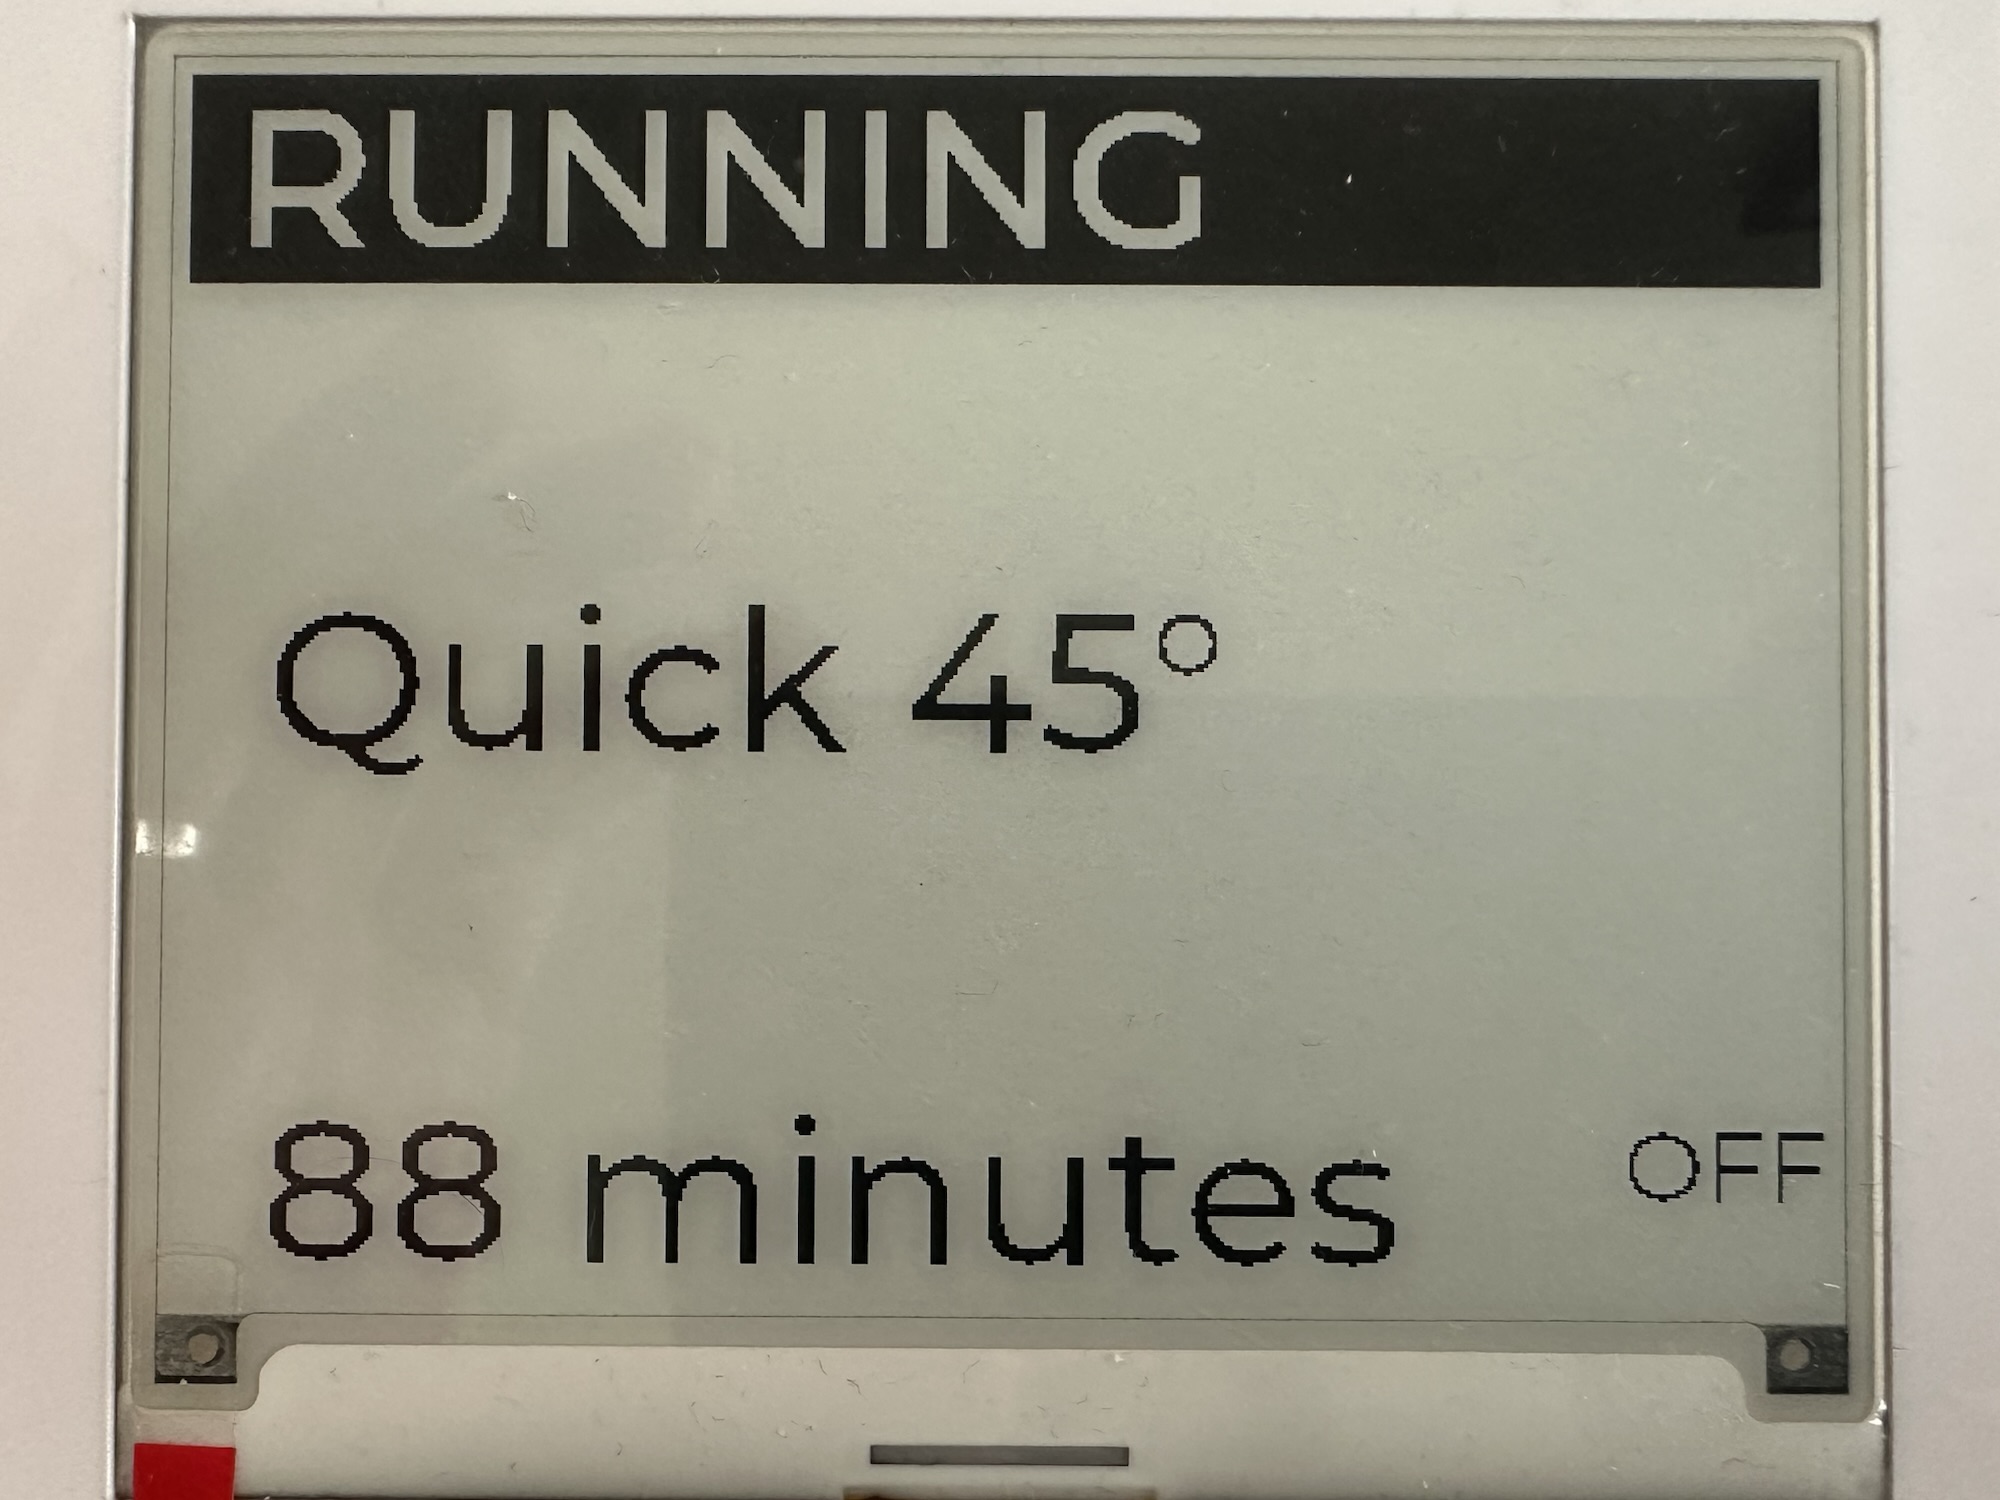
Compare this to the original OLED…
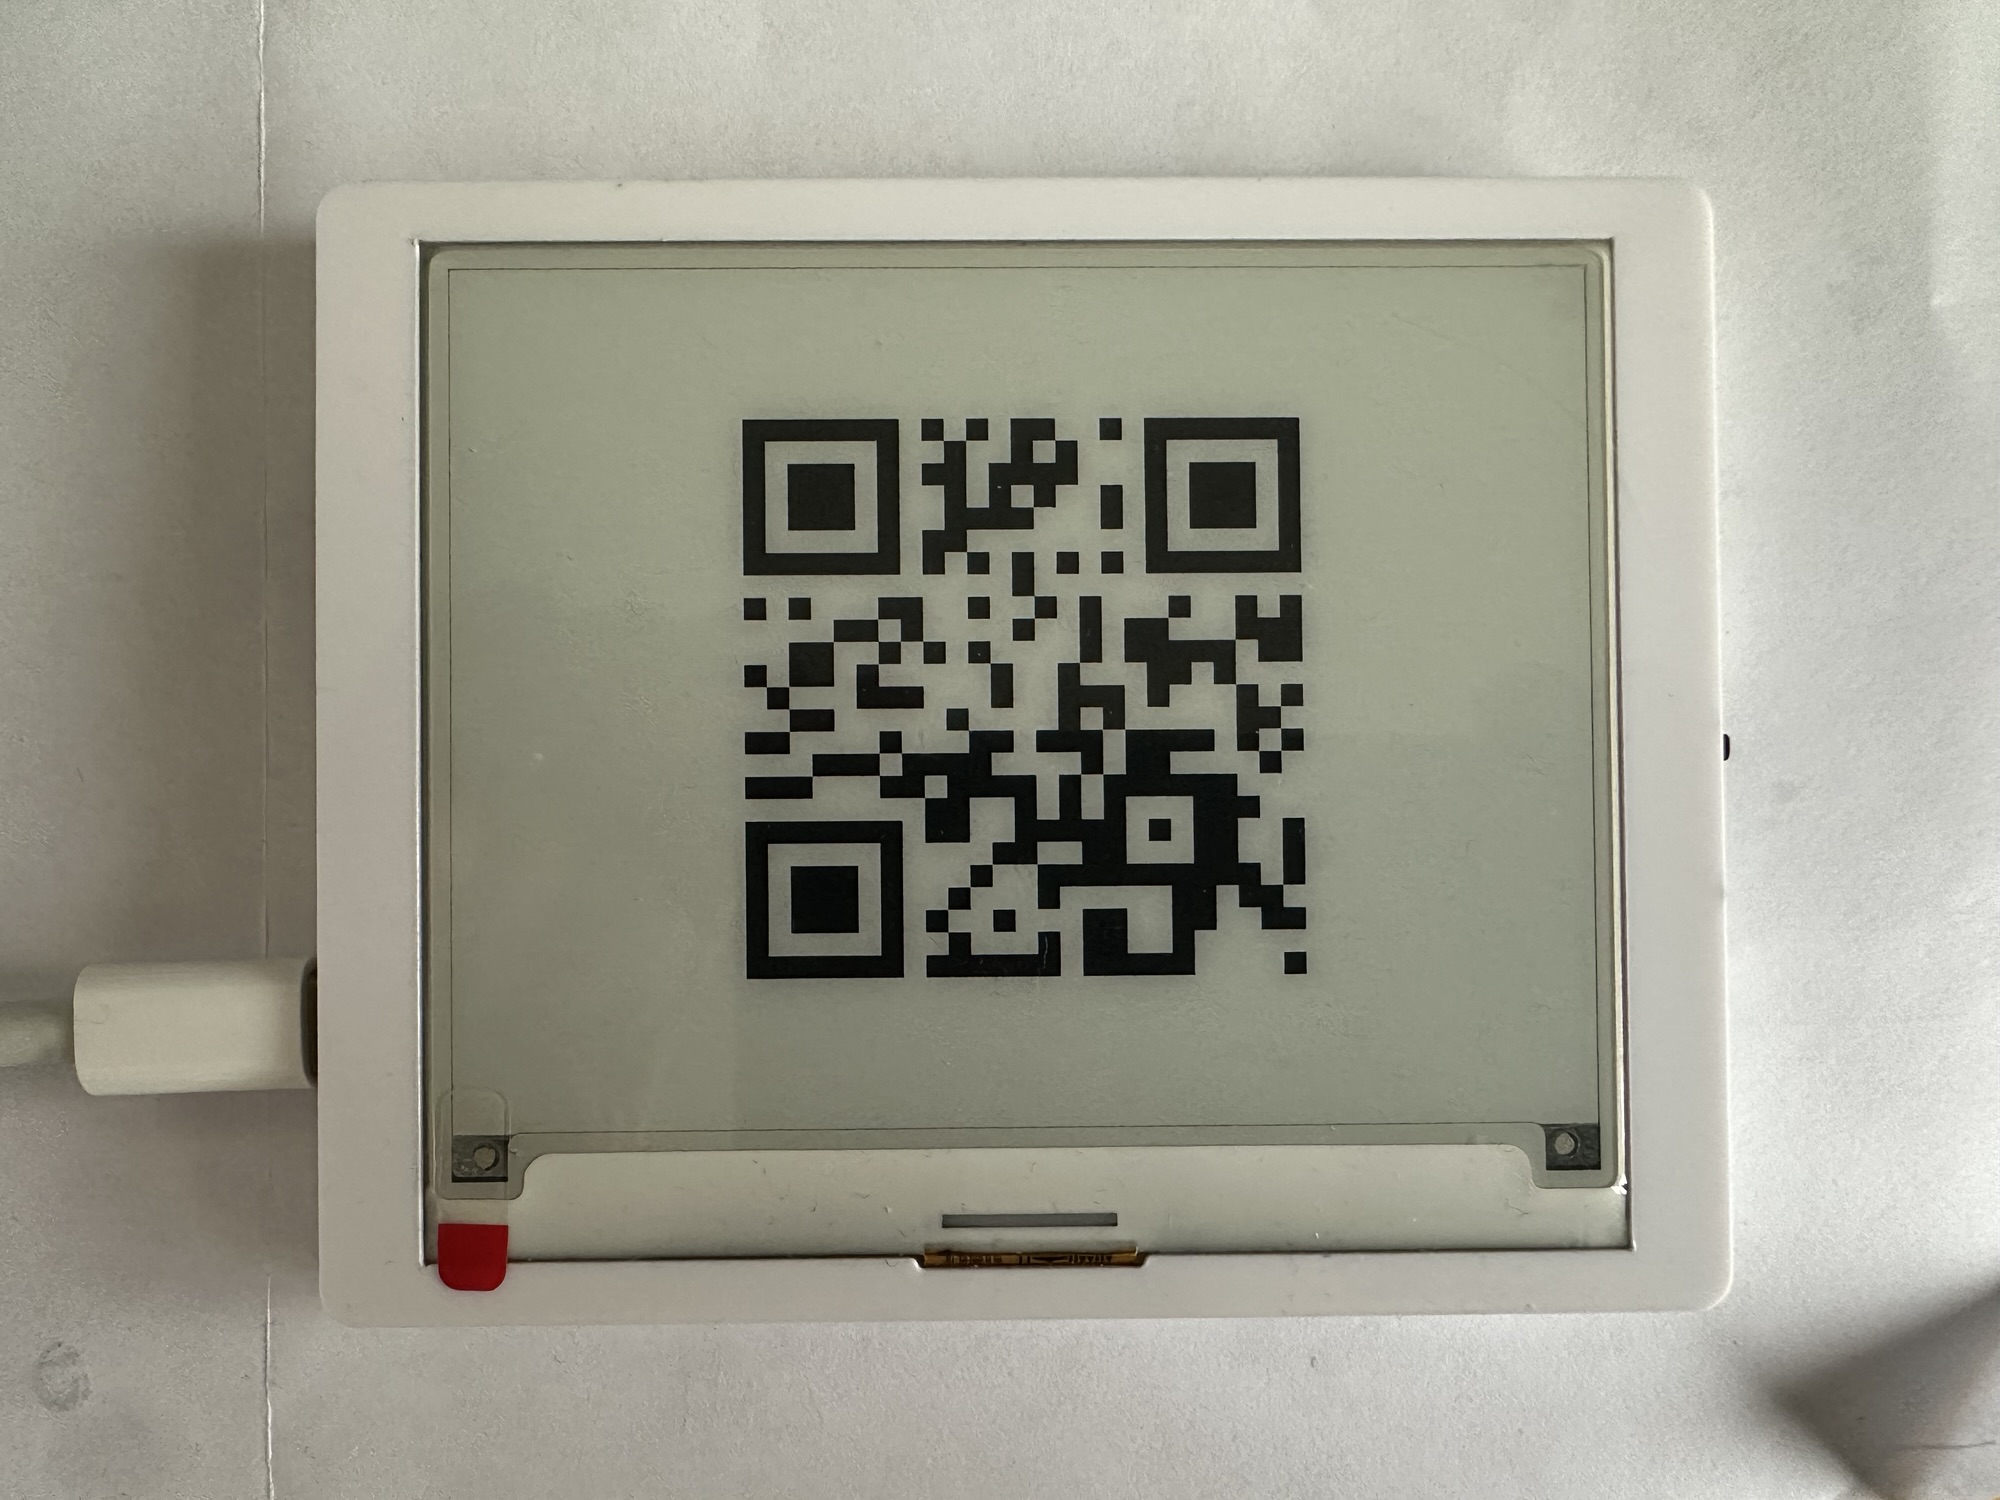
The Matter QR Code
When I build the first version of the dishwasher, I didn’t include any instructions in the display for pairing. Not a big issue for a demo application, but I thought it would be nice to show a QR Code. I never got around to doing that on the OLED display, but figured this was my chance.
The LVGL library includes code for drawing QR codes, so the process was relatively straight forward!
Memory Issues
With the QR code working, I immediately tried to commission the device and hit issues.

I found this issue https://github.com/espressif/esp-idf/issues/9935 and it described how to fix it by pushing TLS memory to the PSRam. I fixed that my setting this configuration item:
MBEDTLS_EXTERNAL_MEM_ALLOC=y
Setting this seemed to fix the commissioning memory issue.
LVGL Rendering Issues
As I continued my testing, I ran into this error, quite a lot:
_lv_inv_area: Asserted at expression: !disp->rendering_in_progress (Invalidate area is not allowed during rendering.)
This seemed to be a threading issue of some kind, where updates were happening in parallel. I tried increasing the time between the renders.
CONFIG_LV_DEF_REFR_PERIOD=150
This help marginally, but the “Invalidate area” cropped up again and again.
I eventually stumbled upon this strategy
 lvgl_port_lock(0);
 // Make my changes
 lvgl_port_unlock();
This seems to fix all the stability issues I was having!
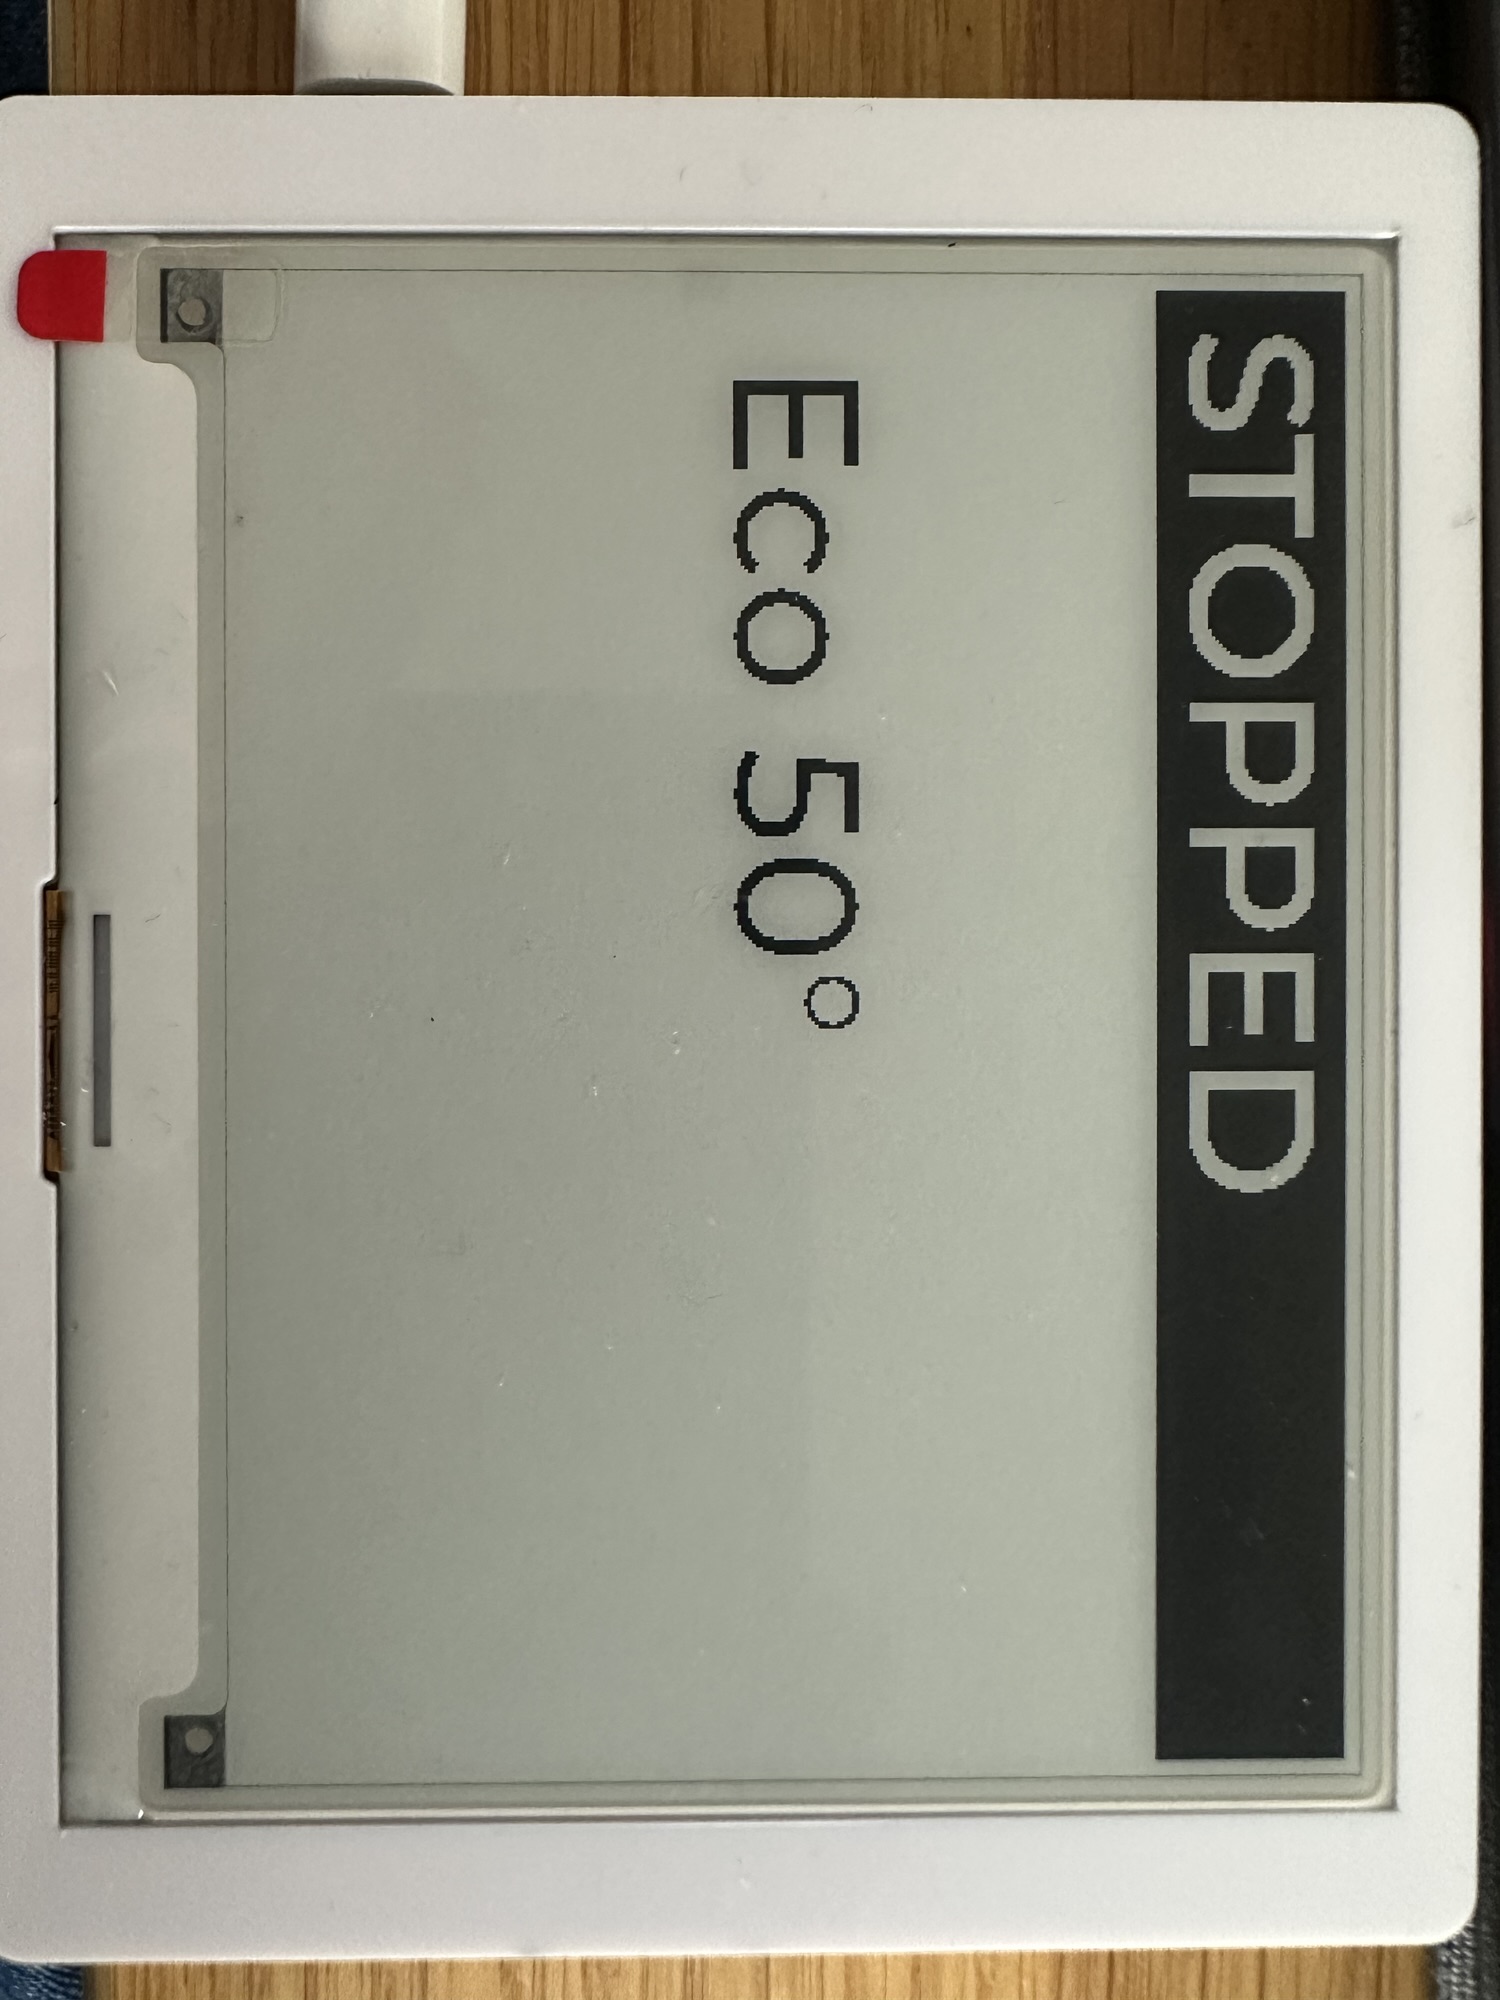
Slowing down the display
When I was using the OLED display, I used seconds to show the time remaining on a program. This was fine for that type of display, but for e-ink, refreshing every second isn’t really practical.
To get around this, I need to rework my display logic. First, I converted seconds into minutes. Second, I kept track of existing values and only triggered a render if something changed.
This worked pretty well.
Next Steps
There are a few bugs in the UI that I need to work out. The layout also needs improvement. The Energy Management code also needs to be restored as that didn’t work too well.
Otherwise, I think this is a solid step forward.
I hope that putting the code into a self-contained package will make it easier for others to try out. Having to have breadboards, OLED displays and various other parts is a high barrier to entry.
If you’re interested in buying one of the CrowPanels, please use my Affiliate link – https://tidd.ly/4aaE0M8
Under this “ACME” name, I can also try different Matter devices, like EV chargers and Hot Water cylinders.
I can also reuse the Display code for my Matter Home Connect Proxy too, which is nice. That code can’t even render the letter m at present!
If you’re interested in this stuff, do subscribe to my blog so you don’t miss new posts.
Did you enjoy this post?
If you found this blog post useful and want to say thanks, you’re welcome to buy me a coffee.
Be sure to check out my YouTube Channel too – https://youtube.com/tomasmcguinness
Thanks,
Tom!

Leave a comment