
In this post, I look at how I added group commands to my ESP32 Matter Controller.
Matter Grouping allows different devices to be logically grouped together so they can all be controlled together. For example, you have multiple smart bulbs in your kitchen, and you want them to all turn on or off at the flick of a switch.
Normal Matter commands are sent directly between nodes. For example, if you want to toggle a light bulb, you could send a toggle command from your Matter controller directly to the node. These are essentially unicast commands.
If you have ten bulbs to control, you *could* send ten individual commands, but that’s cumbersome and slow. Instead, you want to send a multicast command, which floods across the entire network. Any device that is part of the target group can pick up and read the command.
This is far more efficient when dealing with multiple nodes. However, unlike unicast commands, multicast commands require more setup. In the Matter Core Specification, you’ll find details in section 4.16.
Testing Manually
To help me understand the mechanics of Matter grouping, I started with the trusty chip-tool, the command line tool provided by the CHIP SDK. Their documentation even provides the steps required. You can find that here: https://github.com/project-chip/connectedhomeip/blob/master/examples/chip-tool/README.md.
Before running these commands, I have commissioned a freshly reset Nanoleaf essentials A19 bulb using chip-tool. It is node 0x57 and you’ll see that in the commands shown below. If you want to know how to do that, I’ve written up this post
As I do in the post above, we can toggle the light on and off using the chip-tool and targetting node 0x57
chip-tool onoff on 0x57 1
With that working, we return to the group setup. The first step we need to take is creating a Group Key Set. This key is used to for security. Keys are written to the groupkeymanagement cluster. The KeySetId is 42
chip-tool groupkeymanagement key-set-write '{"groupKeySetID": 42, \ "groupKeySecurityPolicy": 0, "epochKey0": \ "d0d1d2d3d4d5d6d7d8d9dadbdcdddedf", "epochStartTime0": 2220000,"epochKey1": \ "d1d1d2d3d4d5d6d7d8d9dadbdcdddedf", "epochStartTime1": 2220001,"epochKey2": \ "d2d1d2d3d4d5d6d7d8d9dadbdcdddedf", "epochStartTime2": 2220002 }' 0x57 0
Running that should result in success
With our epoch keys installed, we next want to assign this keyset to a particular group. From the example, the group is 0x4141 or 16705 (chip-tool is annoying in how we interchange hex and decimal).
chip-tool groupkeymanagement write group-key-map '[{"groupId": 16705, "groupKeySetID": 42}]' 0x57 0
This should yield the same type of SUCCESS message as the previous command.
We have our keys, we have our group-key mappings, we now need to associate the group with a given endpoint. As we’re using a bulb, Endpoint 0x01 the Extended Color Light device we want to control in the group!
chip-tool groups add-group 0x4141 Light 0x57 1
Here we are adding group 0x4141 to endpoint 1 on node 0x57 and calling it Light
Last, but not least, is adding permission. This is a big vague in the README.md, but we need to add an entry to the ACL (Access Control List).
chip-tool accesscontrol write acl '[{"privilege":5,"authMode":2,"subjects":[112233],"targets":null}, {"privilege":3,"authMode":3,"subjects":[16705],"targets":null}]' 0x57 0
In this call, we add *two* entries. The first is the original *admin* entry (privilege 5) for our controller, node 112233. We do this because the “write acl” will overwrite the previous entry. If we don’t specify out controller’s admin privilege, we’d lose it! The jSON we’re adding is this
{"privilege":3,"authMode":3,"subjects":[16705],"targets":null}
Privilege 3 means we can perform primary actions. AuthMode 3 means it’s Group authenticated (using the keys) and lastly the subject 16705 you’ll recognise as the GroupId.
Our Nanoleaf bulb is now configured. We have successfully added a keyset, assigned the keyset to a group and added endpoint 1 to the group.
The next step involves setting our the chip-tool with the same group keys, so we can send group commands. The order is different, but the basic steps are the same. We creat a group called TestName and, importantly, give it the same group id of 0x4141
chip-tool groupsettings add-group TestName 0x4141
We create a keyset, 0xAAAA, using the same epochKey (starting d0d1d2…)
chip-tool groupsettings add-keysets 0xAAAA 0 0x000000000021dfe0 hex:d0d1d2d3d4d5d6d7d8d9dadbdcdddedf
Finally, we associate the group 0x4141 with the keyset 0xAAAA
chip-tool groupsettings bind-keyset 0x4141 0xAAAA
Our chip-tool now has the keys it needs to send commands securely to group 0x4141 and we do that by using the same onoff command we did at the start, with one difference. Instead of targeting node 0x57 directly, we’re going to target the group. When you run this, the light bulb should turn on!
chip-tool onoff on 0xffffffffffff4141 1
0xffffffffffff4141 is a special NodeId called a Group Node ID (see section 2.5.5 of Core Specification)

If we break down 0xffffffffffff4141 it reads like this: 0xFFFF_FFFF_FFFF_4141
You might also notice that a group command is faster than the direct command using chip-tool. This is because the chip-tool doesn’t have to establish a CASE session with the bulb to execute the command. If you also look at Wireshark, you can see IPv6 multicast packets on the network going to ff35:40:fd00::100:4141

Address ends in 4141 which matches our Group Id!
Groups Commands in Code
With our group up and running on the chip-tool, the next step is mirroring this behaviour with the esp-matter SDK on an actual ESP32.
Unlike the chip-tool, we’re going things in a slighly different order to the example. We’re going to start with the groupsettings and add a keyset. Then we add a group and then we assign the keyset to the group.
chip::DeviceLayer::PlatformMgr().LockChipStack();esp_err_t err = esp_matter::controller::group_settings::add_keyset(kAppKeysetId, kGroupKeyPolicyTrustFirst, 0, key_hex);if (err == ESP_OK){ err = esp_matter::controller::group_settings::add_group(name_buf, group_id);}if (err == ESP_OK){ err = esp_matter::controller::group_settings::bind_keyset(group_id, kAppKeysetId);}chip::DeviceLayer::PlatformMgr().UnlockChipStack();
I’m only adding one keyset here, unlike chip-tool, where we added three.
Next, we need to add our target device to this group. This will also mirror the chip-tool flow, where we add the keyset. First, we load the keyset.
uint8_t key[kEpochKeyLen];if (!keyset_key_load(keyset_id, key)) { ESP_LOGE(TAG, "No stored epoch key for keyset %u", (unsigned)keyset_id); return ESP_ERR_NOT_FOUND;}
This uses the persisted storage to load the key
static bool keyset_key_load(uint16_t keyset_id, uint8_t key[kEpochKeyLen]){ char k[16]; snprintf(k, sizeof(k), "%s%u", kKeysetKeyPrefix, (unsigned)keyset_id); size_t read_size = kEpochKeyLen; return chip::DeviceLayer::PersistedStorage::KeyValueStoreMgr().Get(k, key, kEpochKeyLen, &read_size) == CHIP_NO_ERROR && read_size == kEpochKeyLen;}
CAUTION: This bit of code was done by Claude. I’m not sure going directly to PersistedStorage is the right option. I will revisit this.
Once we have the key, we base64 encode it and then pass the configuration in JSON using the `key-set-write` command.
unsigned char b64[32];size_t b64_len = 0;if (mbedtls_base64_encode(b64, sizeof(b64), &b64_len, key, kEpochKeyLen) != 0){ return ESP_FAIL;}char data[192];snprintf(data, sizeof(data), "{\"0:OBJ\":{\"0:U16\":%u,\"1:U8\":%u,\"2:BYT\":\"%.*s\",\"3:U64\":\"1\"," "\"4:NULL\":null,\"5:NULL\":null,\"6:NULL\":null,\"7:NULL\":null}}", (unsigned)keyset_id, (unsigned)kGroupKeyPolicyTrustFirst, (int)b64_len, b64);ESP_LOGI(TAG, "KeySetWrite keyset %u on node 0x%llx: %s", (unsigned)keyset_id, (unsigned long long)node_id, data);esp_err_t err = blocking_invoke_cmd(node_id, 0, kGroupKeyMgmtCluster, kKeySetWriteCommand, data);
The function blocking_invoke_cmd looks like this
static esp_err_t blocking_invoke_cmd(uint64_t node_id, uint16_t endpoint_id, uint32_t cluster_id, uint32_t command_id, const char *command_data){ chip::DeviceLayer::PlatformMgr().LockChipStack(); esp_err_t err = esp_matter::controller::send_invoke_cluster_command(node_id, endpoint_id, cluster_id, command_id, command_data); chip::DeviceLayer::PlatformMgr().UnlockChipStack(); if (err != ESP_OK) { ESP_LOGE(TAG, "Invoke node 0x%llx cluster 0x%lx cmd 0x%lx failed: 0x%x", (unsigned long long)node_id, (unsigned long)cluster_id, (unsigned long)command_id, err); } return err;}
One the key has been added, we must next bind the key to the group. Since this operation overwrites any existing values, we make sure to do a “read” first and then append out values, if not already there.
err = blocking_read_attr(node_id, 0, kGroupKeyMgmtCluster, kGroupKeyMapAttribute, on_oupkeymap_read_attr);std::vector<group_key_map_t> entries = (err == ESP_OK) ? s_group_key_map : std::vector<group_key_map_t>{};bool exists = false;for (const auto &e : entries){ if (e.group_id == group_id) { exists = true; break; }}if (!exists){ entries.push_back({group_id, keyset_id});}std::string json = build_groupkeymap_json(entries);ESP_LOGI(TAG, "GroupKeyMap write on node 0x%llx: %s", (unsigned long long)node_id, json.c_str());blocking_write_attr(node_id, 0, kGroupKeyMgmtCluster, kGroupKeyMapAttribute, json.c_str());
The group is now setup and we can move to permissions. Remember how the ACL needs to preserve existing entries?
for (const acl_entry_t &e : s_acl_entries) { if (e.privilege == kAclPrivilegeAdminister && e.auth_mode == kAclAuthModeCase) continue; // folded into the canonical controller entry above if (e.privilege == kAclPrivilegeOperate && e.auth_mode == kAclAuthModeGroup) { acl_entry_t g = e; if (std::find(g.subjects.begin(), g.subjects.end(), group_id) == g.subjects.end()) g.subjects.push_back(group_id); entries.push_back(std::move(g)); group_present = true; } else { entries.push_back(e); }}
This code will check the exiting ACL entries and check if the subject, our Group Id, is present. If not, it will insert it.
if (!group_present) entries.push_back({kAclPrivilegeOperate, kAclAuthModeGroup, {group_id}}); std::string acl_json = build_acl_entries_json(entries);ESP_LOGI(TAG, "add_group_member: writing ACL to node 0x%llx (%u entries): %s", (unsigned long long)node_id, (unsigned)entries.size(), acl_json.c_str());err = blocking_write_attr(node_id, 0, kAclCluster, kAclAttribute, acl_json.c_str());if (err != ESP_OK) return err;
Lastly, we need to put the endpoint into the group.
snprintf(data, sizeof(data), "{\"0:U16\":%u,\"1:STR\":\"%s\"}", (unsigned)group_id, (name && *name) ? name : "");err = blocking_invoke_cmd(node_id, endpoint, kGroupsCluster, kAddGroupCommand, data);if (err != ESP_OK) return err;
And that’s it. Easy as cake. Assuming all of the commands were successful, our light bulb should now be a member of our group!
Testing a group command
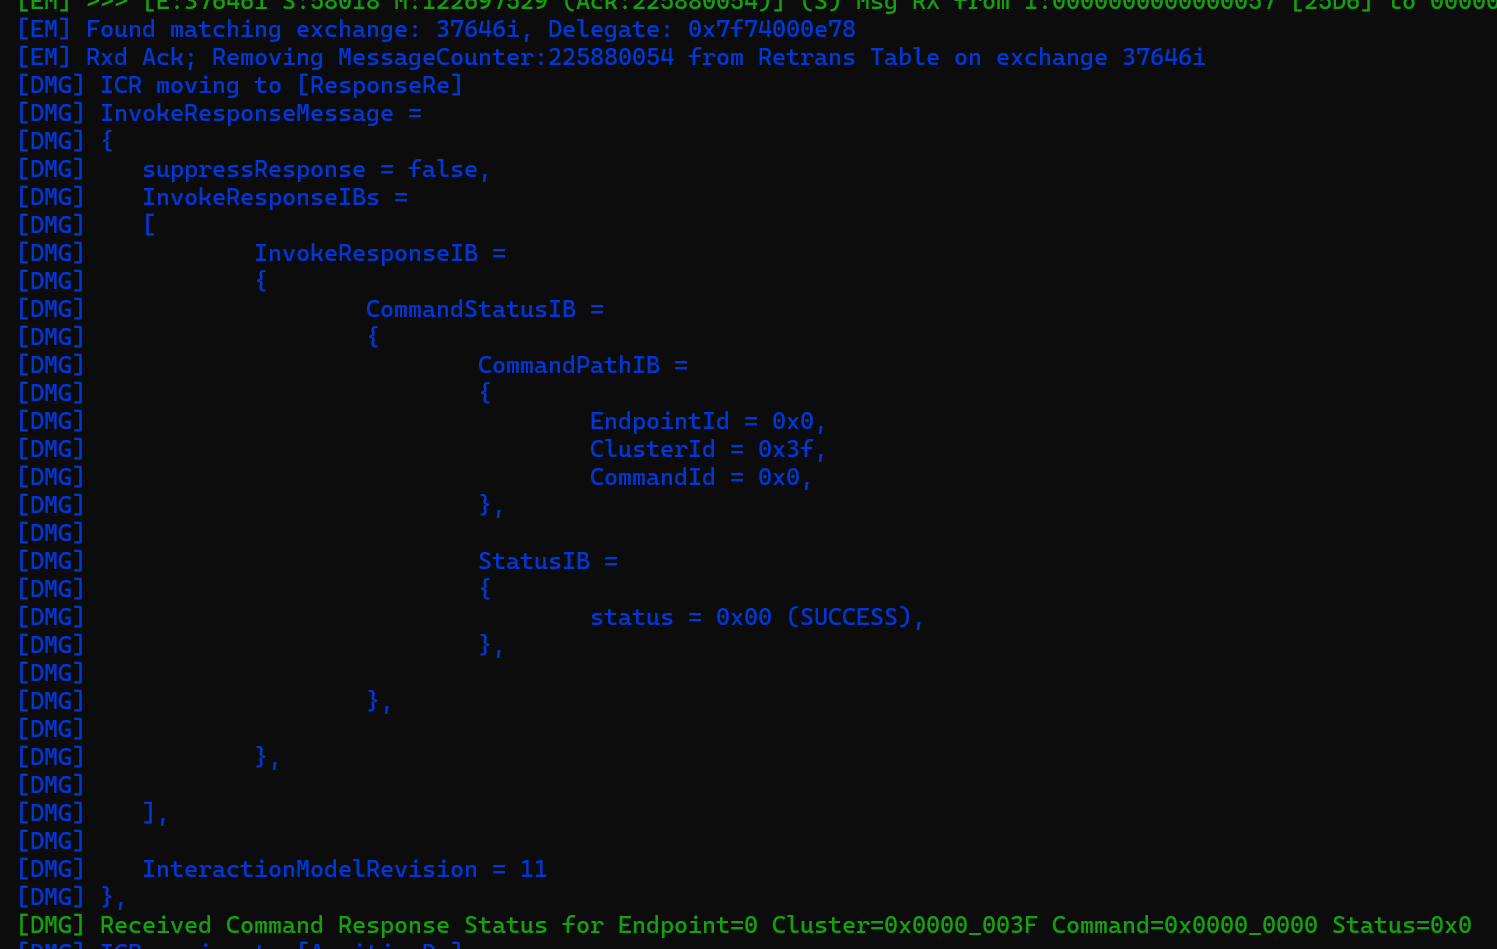
To ensure it’s all working, we can now send a group command. In my application, I wired this using a Toggle button.
Clicking the Toggle button will generate the command.
To direct the command, we set the destination as the same special node id, like we did with the chip-tool
uint64_t dest = 0xFFFFFFFFFFFF0000ULL | (uint64_t)group_id;blocking_invoke_cmd(dest, 0, kOnOffCluster, kOnOffCmdToggle, "{}");
A multicast payload is picked up on Wireshark, like we say with the chip-tool and …

…the light bulb dutifully turns on and off!
Binding to a group
Sending a toggle command from the controller is all well and good, but in reality, we want to use bindings.
Bindings allow client clusters to be connected directly to server clusters. Think of a light switch being connected to a light bulb. No need for a hub or controller to be involved. The light switch can talk directly to the bulb.
The process we need to follow is very similar. We need to install the keyset on our light switch, map the keyset to a group, add a group and then add a binding. Since we haven’t added a binding before, here is the general code. We create a JSON array and like the target to the client cluster. In this case, we would use the group.
static std::string build_binding_json(const std::vector<binding_target_t> &targets){ char buf[128]; std::string json = "{\"0:ARR-OBJ\":["; for (size_t i = 0; i < targets.size(); ++i) { const binding_target_t &t = targets[i]; if (t.is_group) // Group target: Group (tag 2) + Cluster (tag 4), no Node/Endpoint. snprintf(buf, sizeof(buf), "%s{\"2:U16\":%u,\"4:U32\":%lu}", i ? "," : "", (unsigned)t.group, (unsigned long)t.cluster); else snprintf(buf, sizeof(buf), "%s{\"1:U64\":\"%llu\",\"3:U16\":%u,\"4:U32\":%lu}", i ? "," : "", (unsigned long long)t.node, (unsigned)t.endpoint, (unsigned long)t.cluster); json += buf; } json += "]}"; return json;}
We then write this JSON to the Binding cluster of the Switch endpoint.
std::string binding_json = build_binding_json(targets);err = blocking_write_attr(switch_node_id, switch_endpoint, kBindingCluster, kBindingAttribute, binding_json.c_str());
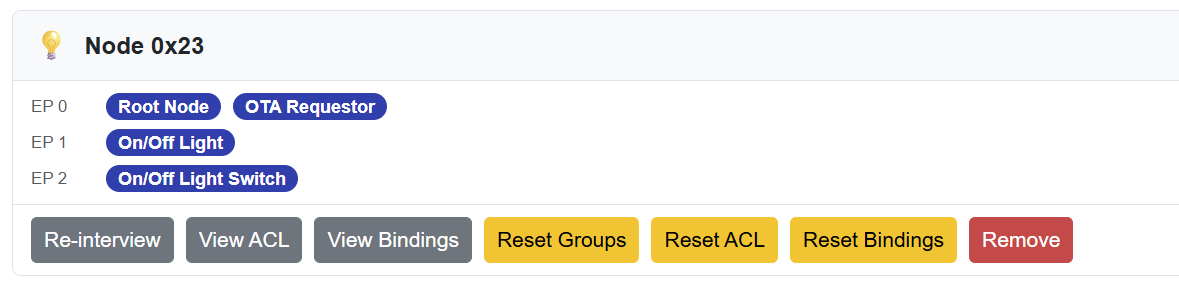
In my tests, I’m using a special Shelly 1 (https://github.com/automatous-io/shelly-1-gen4-matter-thread/), which exposes a relay and switch.
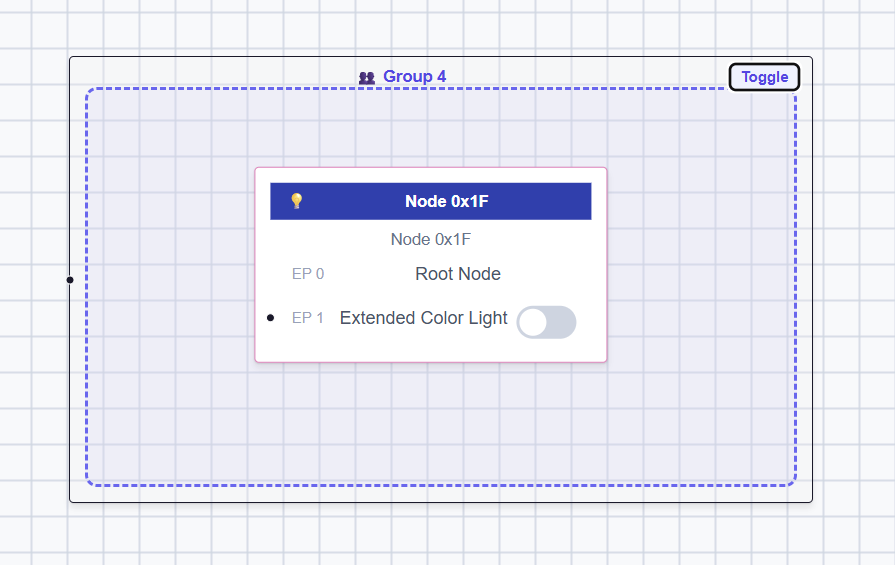
In my UI, I join the On/Off Light Switch endpoint to the group.

When I then toggle the Shelly relay, the light will toggle! Amaze! Amaze!
The code for all this isn’t shared yet, since it’s a work in progress, but if you need help, please get in touch via the comments.
Summary
In this post, I look at how Matter groups are created using the esp-matter SDK. I look at how nodes are added to groups and how bindings can be used with groups.
Did you enjoy this post?
If you found this blog post useful and want to say thanks, you’re welcome to buy me a coffee.
Be sure to check out my YouTube Channel too – https://youtube.com/tomasmcguinness
Thanks,
Tom!

Leave a comment