With Den Automation facing immanent demise, I’ve been looking at alternatives.
I came across the Shelly 1 relay, quite by accident, whilst looking at some Sonoff stuff. It immediately piqued my interest, mostly because it taught me that I didn’t know anything about lighting circuits in the UK.
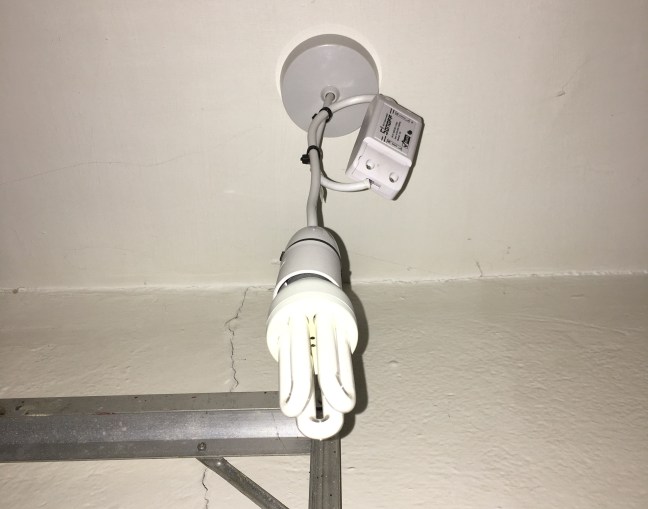
I’ve installed my fair share of lighting fixtures during the renovation of my home and whilst I was astonished at the number of connections in a ceiling rose, I never really took any time to investigate why.

I had made my own attempts at automating lighting when I first moved in. This was a crude affair, which involved putting a Sonoff Basic relay in between the rose and bulb.
Whilst functional, the downside was that flipping the physical switch turned the relay off. Bye, bye, remote switching.
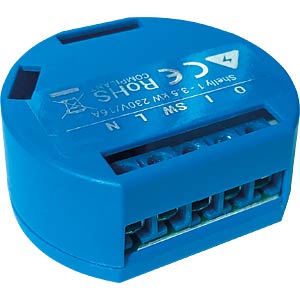
This is where the Shelly 1 comes into play.
I came across an excellent post, which explained how to connect the little unit to a UK ceiling rose, which is well worth checking out – https://gist.github.com/lordneon/aecf24035a4dc5e6b950977e37aeb930
Essentially, the Shelly 1 is connected to the permanent supply, so it’s always on, regardless of the physical switch. The Shelly is also connected to the physical switch, so it knows when it’s been flipped.
This means that the light can be turned on and off via an API *and* by the existing light switch! I immediately ordered some.
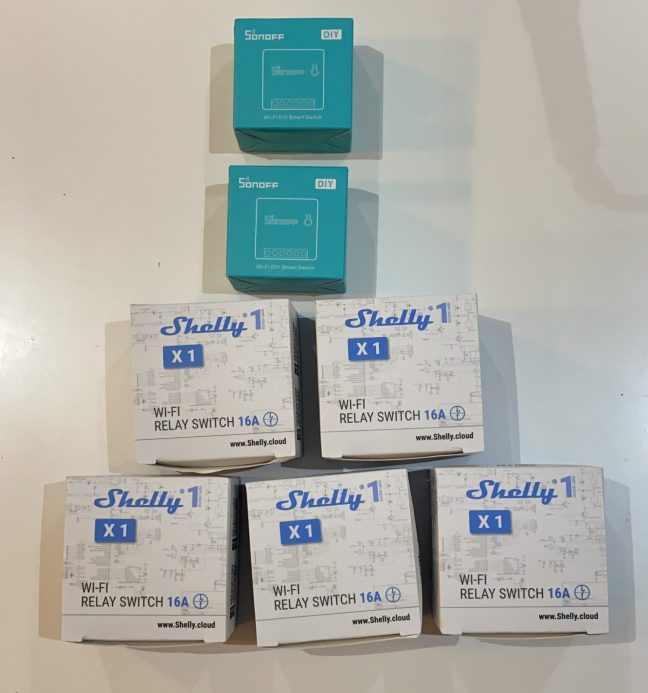
My order included two Sonoff Minis, but I choose the Shelly1 to begin with as it supports MQTT control out of the box (which bypasses the Shelly Cloud – local control all the way). I know the Minis have to be flashed with Tasmota firmware to support MQTT and I didn’t want to get distracted!
Installation
WARNING! Please don’t attempt anything related to mains electricity unless your confident in your ability. Always remember to isolate circuits from the fuse board before doing anything!! I am not responsible if anything happens.
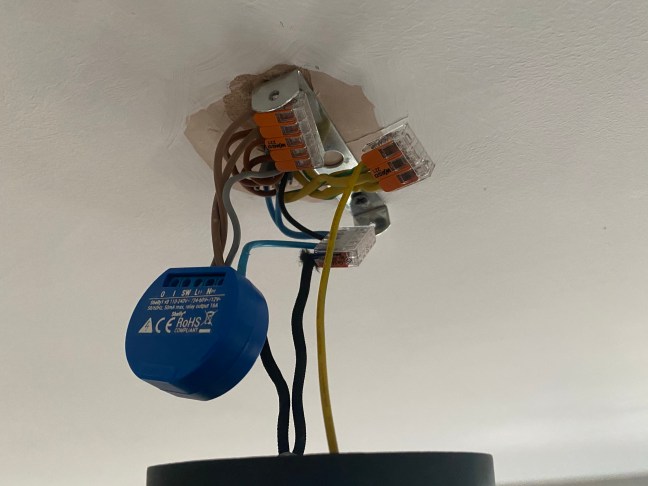
Installation was very straight forward with the help of the excellent WAGO connectors. Following the diagram, I installed the Shelly 1.
Once I’d restored power from the fuse board, I went through the configuration process. This followed the standard pattern of connecting to the Shelly’s WiFi network, connecting to my own WiFi network and then entering the MQTT server address and credentials.
It worked first time!
I set it’s Switched Live mode to edge, so that means that any change in the physical switch will turn it on or off, perfect for my needs.
Adding the Shelly to my Home Assistant required the addition of an MQTT entity with the appropriate topics.
  - platform: mqtt
    name: "Shelly-1"
    state_topic: "shellies/shelly1-B8B728/relay/0"
    command_topic: "shellies/shelly1-B8B728/relay/0/command"
    payload_on: "on"
    payload_off: "off"
I repeated the process on another light in my house.
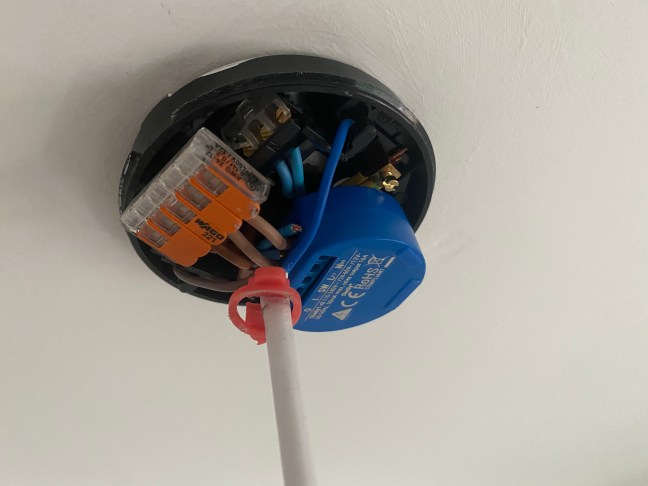
This was installed into a standard plastic ceiling rose, but unfortunately the cover wouldn’t close due to the thickness of the Shelly.
As this is pretty unsightly, I’ve decided to find a nice ceiling rose with the space to hold the Shelly before I install any more.
I’m so happy with these, they are a perfect replacement for my defunct Den switches. I’ll be replacing all of Den’s switches with these Shelly 1s once I find a good rose.

Leave a comment