
When we purchased our house, one thing that we didn’t really like was the small bathroom.
The layout is pretty standard for the type of house, with an airing cupboard and W.C. over the garage.

We knew we wanted to retain the bath, for the kids mostly, and we knew we wanted a separate shower. The airing cupboard was redundant as the hot water tank was moving down to the garage.
With that, we formulated a plan. Knock the walls between the toilet and the bathroom and move the wall between the bathroom and bedroom 4, removing the airing cupboard in the process. Bedroom four was going to become an office, so losing some space wasn’t a big deal. We did check it would still fit a single bed, in the event we needed to return it to a bedroom.

This seemed straight forward on paper, but we have some considerations:
- Position of all the waste pipes for bath, shower, sink and toilet
- Different floor levels between bedroom 4 and the bathroom
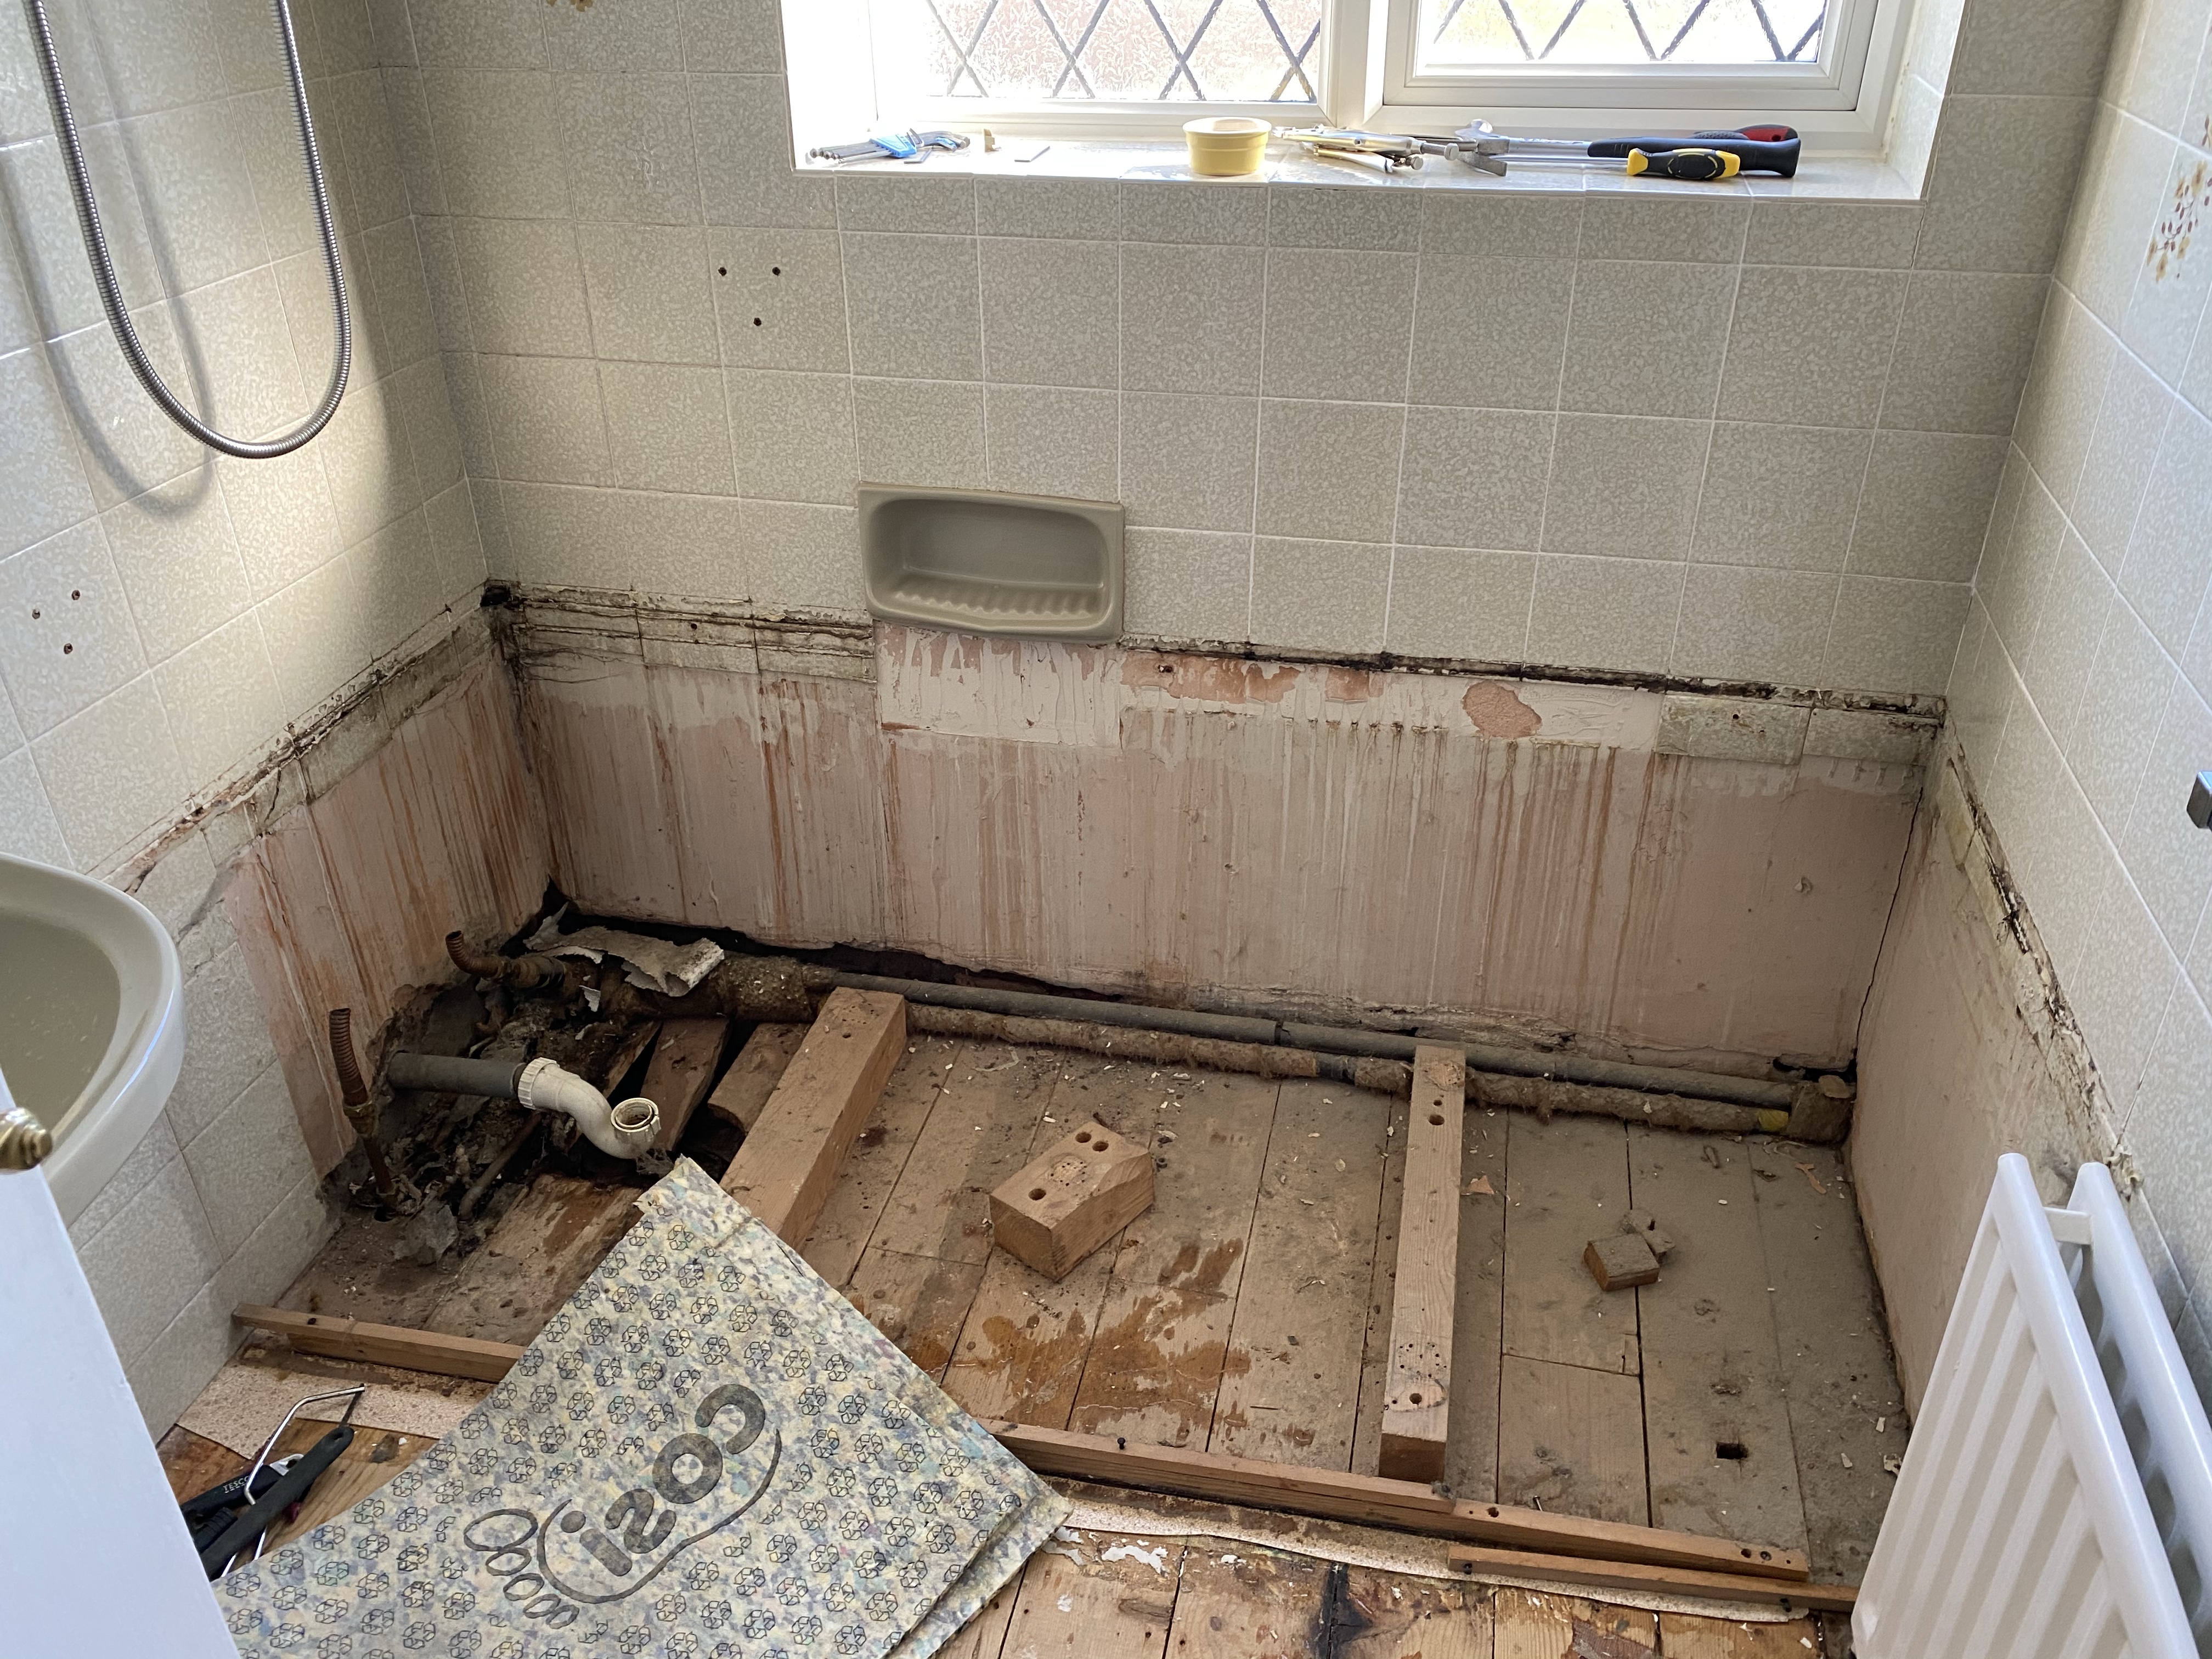
The waste and floor levels
We spoke to the several plumbers about the waste and were assured that once the toilet was on the outer wall, the rest of the waste was no issue as there was enough of a fall across the floor for the other waste.
The floor levels turned out to be simple too. The floor joists of the bedroom were sitting on a wall and provided no support to the bathroom. We knew we could safely cut back the floor joists, which was great news!
Getting Started
Getting started is always both exciting and terrifying. First thing, was removing the bath.


My father in law helped with capping the water feeds going to the bath, so we could keep the water turned on.
With the bath taken out, we tackled the shower and the plumber removed the radiator and existing pipework. We left the sink in place as it was handy to have in the short term.
Taking down the walls
With the bath gone, it was time to take down the bedroom wall. I checked with both the builder and a structural engineer to ensure the wall wasn’t load bearing before we tackled it.
I enjoyed this part as I basically took a hammer to the wall 🙂
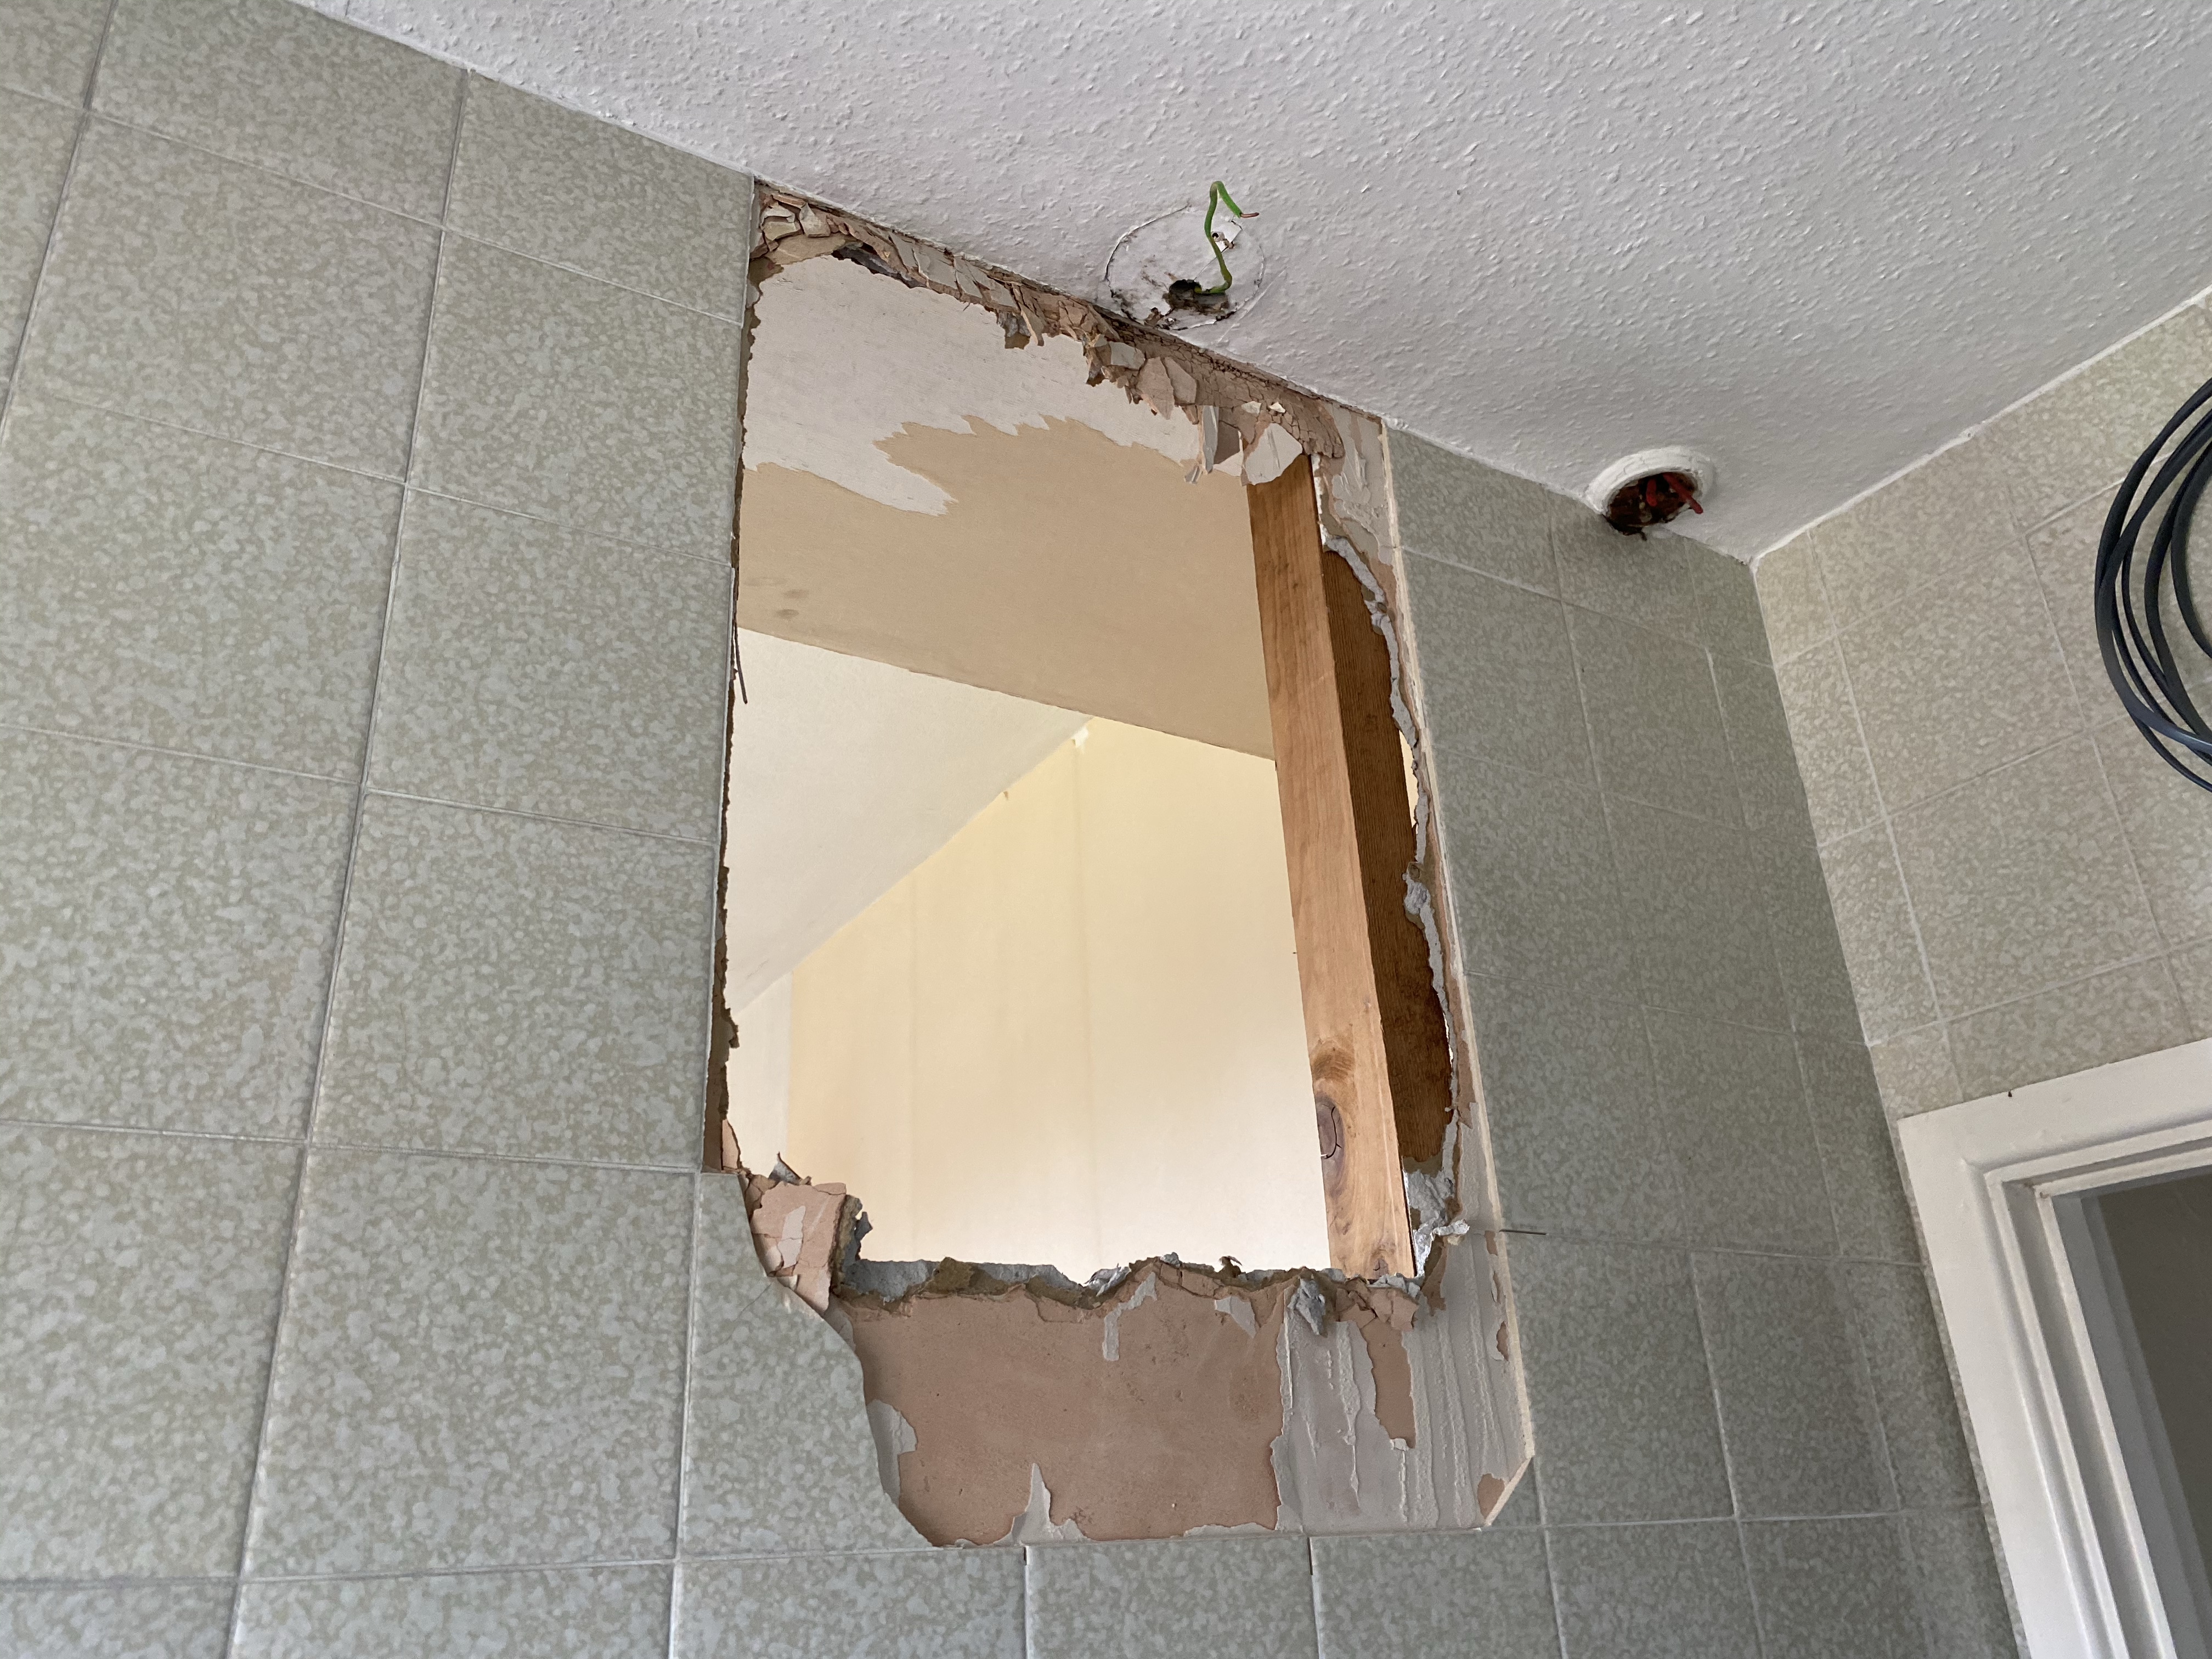
I then just cut and pulled off the plasterboard on the bedroom side, exposing the studwork, before moving to the bathroom side and finishing the job. It was more involved on the bathroom side as the tiles made it more difficult.

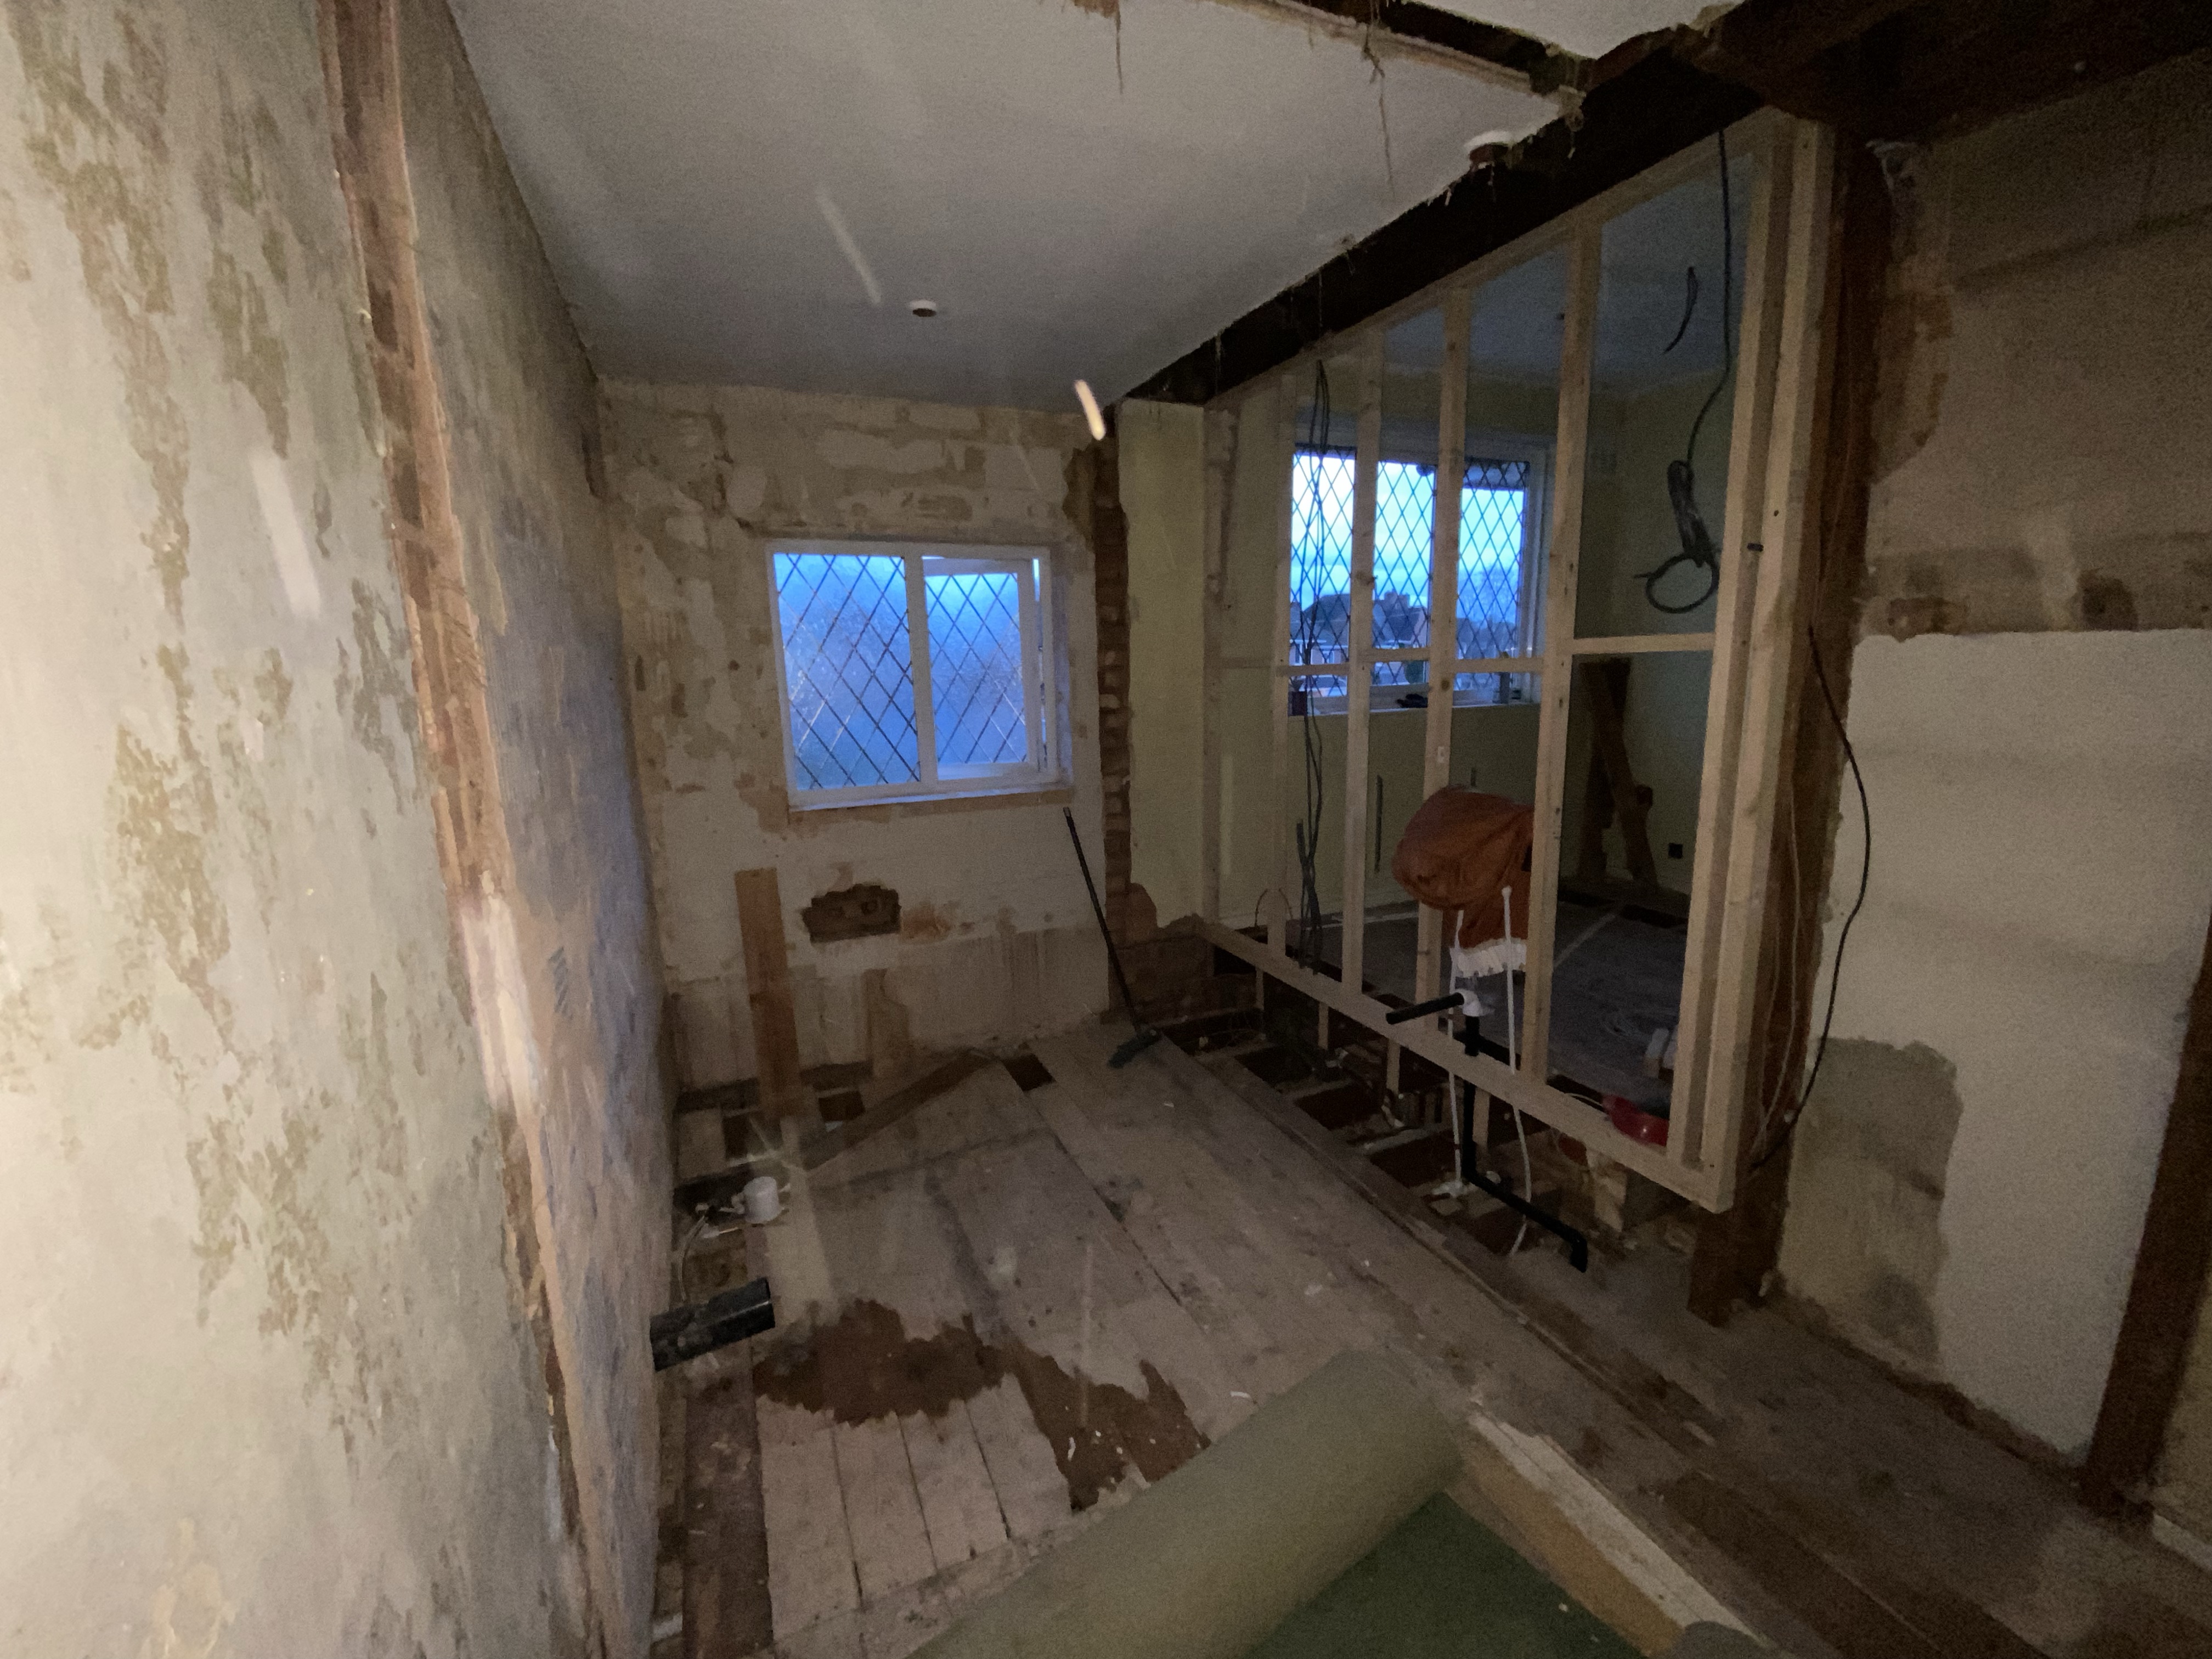
With the plasterboard all removed, we had a much better understanding of the structure of the floor. We then picked the position for the new wall, which was under the “crank”, visible at the top of the picture. This made the bedroom smaller, but actually resulted in the window being centered in the room. It did leave a small “kick” in the bathroom, but we needed that as the electricians and plumbers had taken all their wires and pipes up from the garage below.
The plumber and electrician were great in how they ensure all pipes and wires remained inside this little space and made sure that we could move the wall without issue.
Removing the WC
With the bedroom wall taken back to the stud work, we then moved onto the toilet walls. We followed a similar process, removing all the tiles and plasterboard first. The loo was easy to remove, thankfully.

We then removed all the remaining studwork. I didn’t set my time lapse up for this unfortunately, but it proved a little tricky due to the way it was holding up part of ceiling. We took our time and slowly, but surely, we removed the rest of the timbers.


Then came time to cut back the joists. I must have measure this ten times!
With the joists cut back and all the walls gone, the bathroom did feel very big!
The new wall
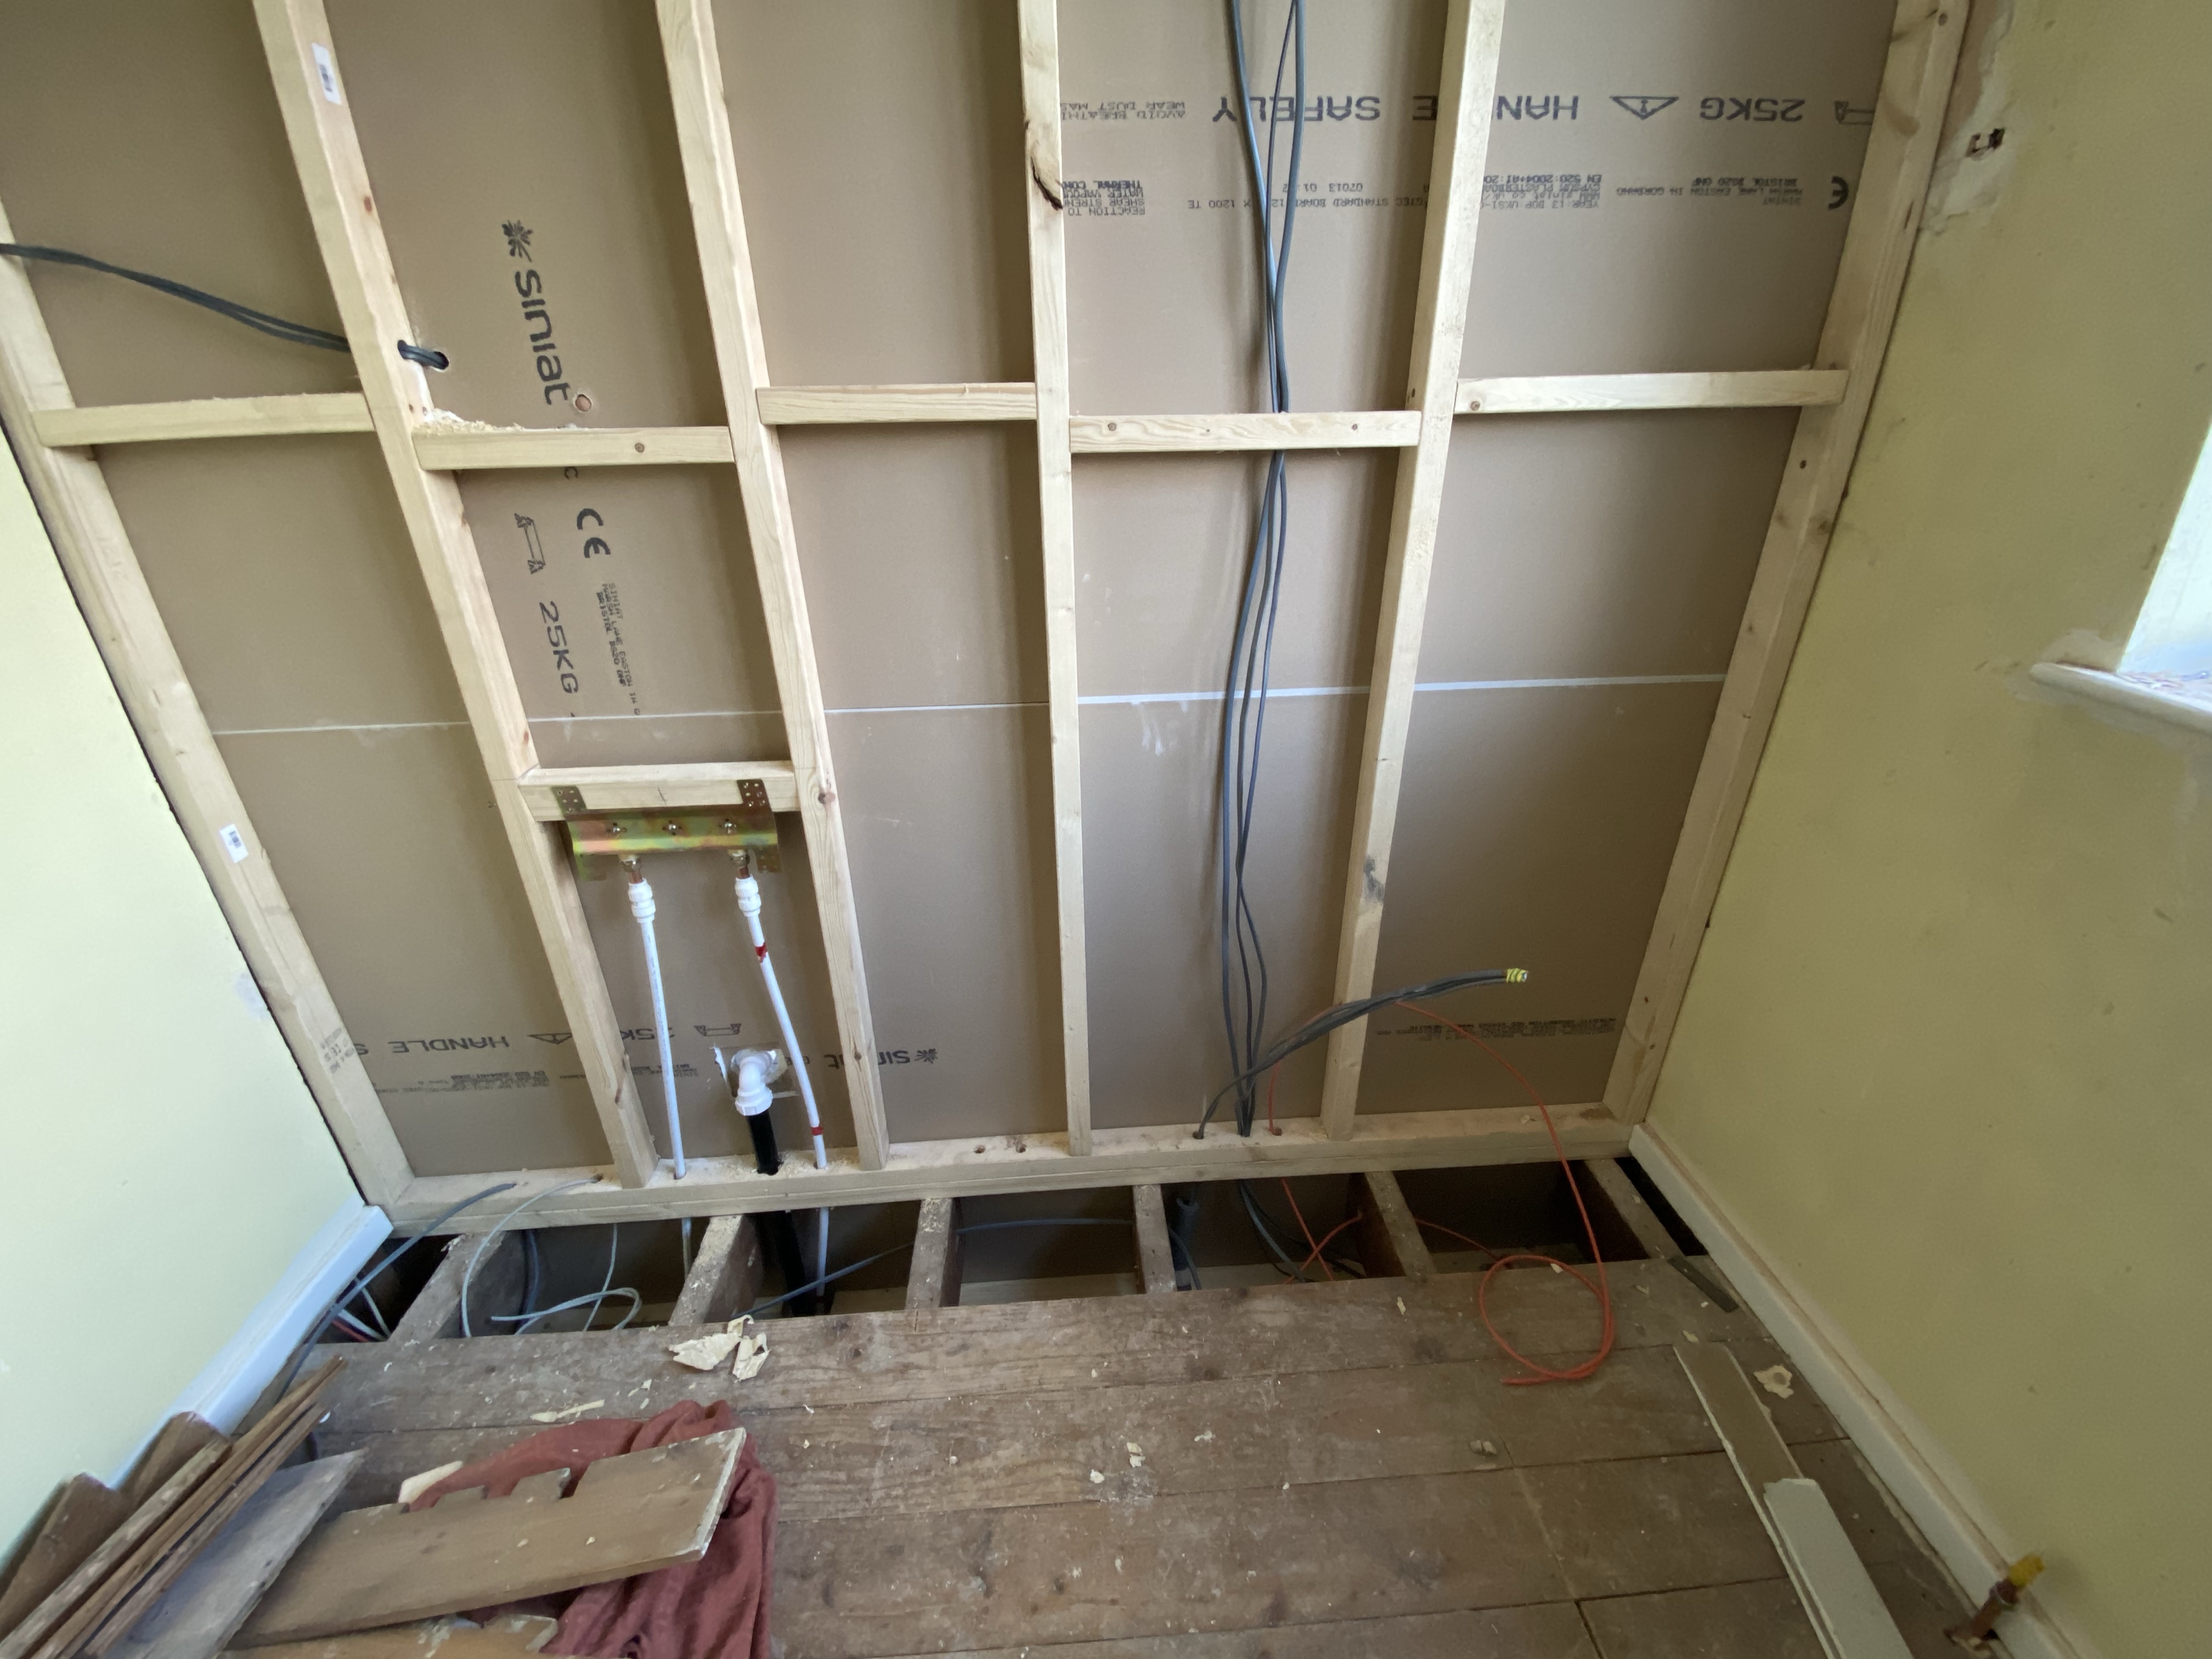
Putting up the new stud wall was straight forward, with only one tricky part in the corner to deal with. We created a simple frame and then put the studs and noggins in, trying to space them out as best we could.

You can see in the image above the large timber along the top, which is holding up the roof. We were able to attach to that and the joists below. We then fixed one side into the wall.
The problem!
As no DIY can go without a problem, we hit ours. I’d chosen 38mm thick timber for the studwork, but during the first fix, the plumber pointed out that the concealed taps need a depth of 50mm. This mean they would protrude more than 10mm off the tiles!
The builder offered a simple solution, which was to use two sheets of plasterboard to make up the difference. I’ll post some pics of the bathroom once it’s tiled and fingers crossed this will work!
Plastering the bathroom
With the wall in place, we removed all the timber and took out the sink and remaining odds and ends.
The plasterer then boarded and skimmed the walls. We were tiling half height around the room, so we didn’t need it all skimmed. He also pulled down the old ceiling and put in some extra noggins to sure up the ceiling.
I also created a little channel in part of the stud work, which ran from the ceiling to the floor, essentially connecting the garage to the loft. I thought this might be handy in the future if I ever need to run more cables into the loft.

Sound Proofing
The builder mentioned it would be worth putting some insulation into the new wall to give some sound proofing. I hadn’t considered that but it was a good idea. The lack of a brick wall would have meant you’d hear everything between the two rooms.
The plumber had finished his first fix and the electrician had done all the wiring they required, so I was free to go ahead.
I picked up a roll of acoustic insulation from Wickes and installed into the walls. It was Knauf earthwool.
The acoustic insulation came in a roll, so I just measured and each strip with a pair of scissors. I pushed it in behind the cables and pipes.

Final plastering
Insulation done and wires pulled into the right places etc, the plaster came back and finished the wall.

All Done
When we stand in the (unfinished) bathroom now, we’re happy with our decision. It means we can have a free standing bath that we want and we can have a walk in shower.
Aside from the mistake with the studwork not being thick enough, the project went off without any major hitches.
Again, a big thank you to my brother-in-law and father-in-law for helping with the work and giving me the confidence to give it a go.
I’ll do another post covering the tiling and fixtures in the bathroom. I’m going to be putting down some underfloor heating too and I’ll do a post covering that.

Leave a comment