I recently installed a Mixergy smart hot water tank into my new house, as part of a total renovation. I’ve been very impressed and wanted to share my thoughts on the product after using it for a few weeks.
The problem with hot water tanks
For me, the problem with hot water tanks two fold.
- You’ve no idea how much how water you actually.
- You don’t know how hot the water in the tank actually is.
My previous arrangement had a 210L unvented cylinder connected to a system boiler and controlled using a Nest Thermostat. In a setup which is repeated around the world, my boiler turned on at 5AM and heated the water for 30 minutes.
During the summer months, the water that came out of the tap would burn your hand. Sometimes we’d have water for two showers and a kids bath and other times, my shower would run cold towards the end. Never a great start to the day.
I tried to get a handle on this myself, by installing two temperature problems on the inlet and outlet of the tank and using the temp of the hot outlet to try and guess how much hot water we had. It worked pretty well, as it took some of the guess work out at bath time. That said, I still had to boil the kettle to top up the water as it ran cold from the tap.
I wanted to install more probes, so I could measure the temp at a few places, but the best I could manage was the positions of the various outlets. In the end, I had four probes attached to my tank, which helped, but it was never just accurate enough.
Why not just keep heating the water?
This is a solution that most people suggest – just heat the water for another thirty minutes in the afternoon, or boost it before you give the kids a bath.
For me, this just wasn’t what I wanted to do. Burning gas is something we need to stop doing for the environment and besides, why waste money heating water that’s already hot enough?
Enter the Mixergy!
I stumbled across the Mixergy tank quite by accident, whilst watching an episode of the YouTube show Fully Charged. The brilliant Robert LLewlyn had one of the tanks installed in his home as part of a trial and during the show he interviewed the creator of the product.
What makes the Mixergy tank different from other unvented cylinders is that it can tell you roughly how much hot water you have, as a percentage of the tank’s overall volume. It will also give you the inlet and outlet temperatures (like my crude attempt!).
In addition, it also heats the water by volume, meaning you only heat the amount of water you want, rather than trying to heat all the water in the tank at one go. This gives you much greater control. If you only need 100L of water during a normal day, the Mixergy tank will heat that amount. Better for the environment and my pocket.
The design also enables the tank to heat water more quickly, so in the event you do run out, you won’t have to wait too long.
Cost
Mixergy offer a few variations on the base tank, allowing you to access different heat sources.
Solar PV – The tank has an electric element installed as standard and you can have a dual element installed, which allows you to power the element using Solar power
Solar Thermal – The tank can come with a secondary coil inside, which enables you to use Solar Thermal
Heat Pump – All the tanks are heat pump ready and they require an exchange to be installed. This can be added in the future.
Hydrogen Boilers – As it’s an unvented cylinder, the primary heating coil will work whether connected to a gas boiler or a hydrogen boiler, so again, the tank is future proofed.
I vacillated between the solar PV and solar thermal options. In the end, I opted to just have the Solar PV version. I figured that Solar PV offered more flexibility and is something I’d be more likely to invest in, combined with a home battery. Mixergy also offer integration with Timer-Of-Use electricity tariffs and that offers a little more flexibility too.
When it came down to cost, the 210L Solar PV Ready Tank I ordered was a little over £1200. An equivalent 210L unvented cylinder can cost anywhere from £300 to £800, depending on all sorts of factors. The Mixergy tank itself is close to the top end in terms of size, insulation etc. so I reckon it was around £400 more.
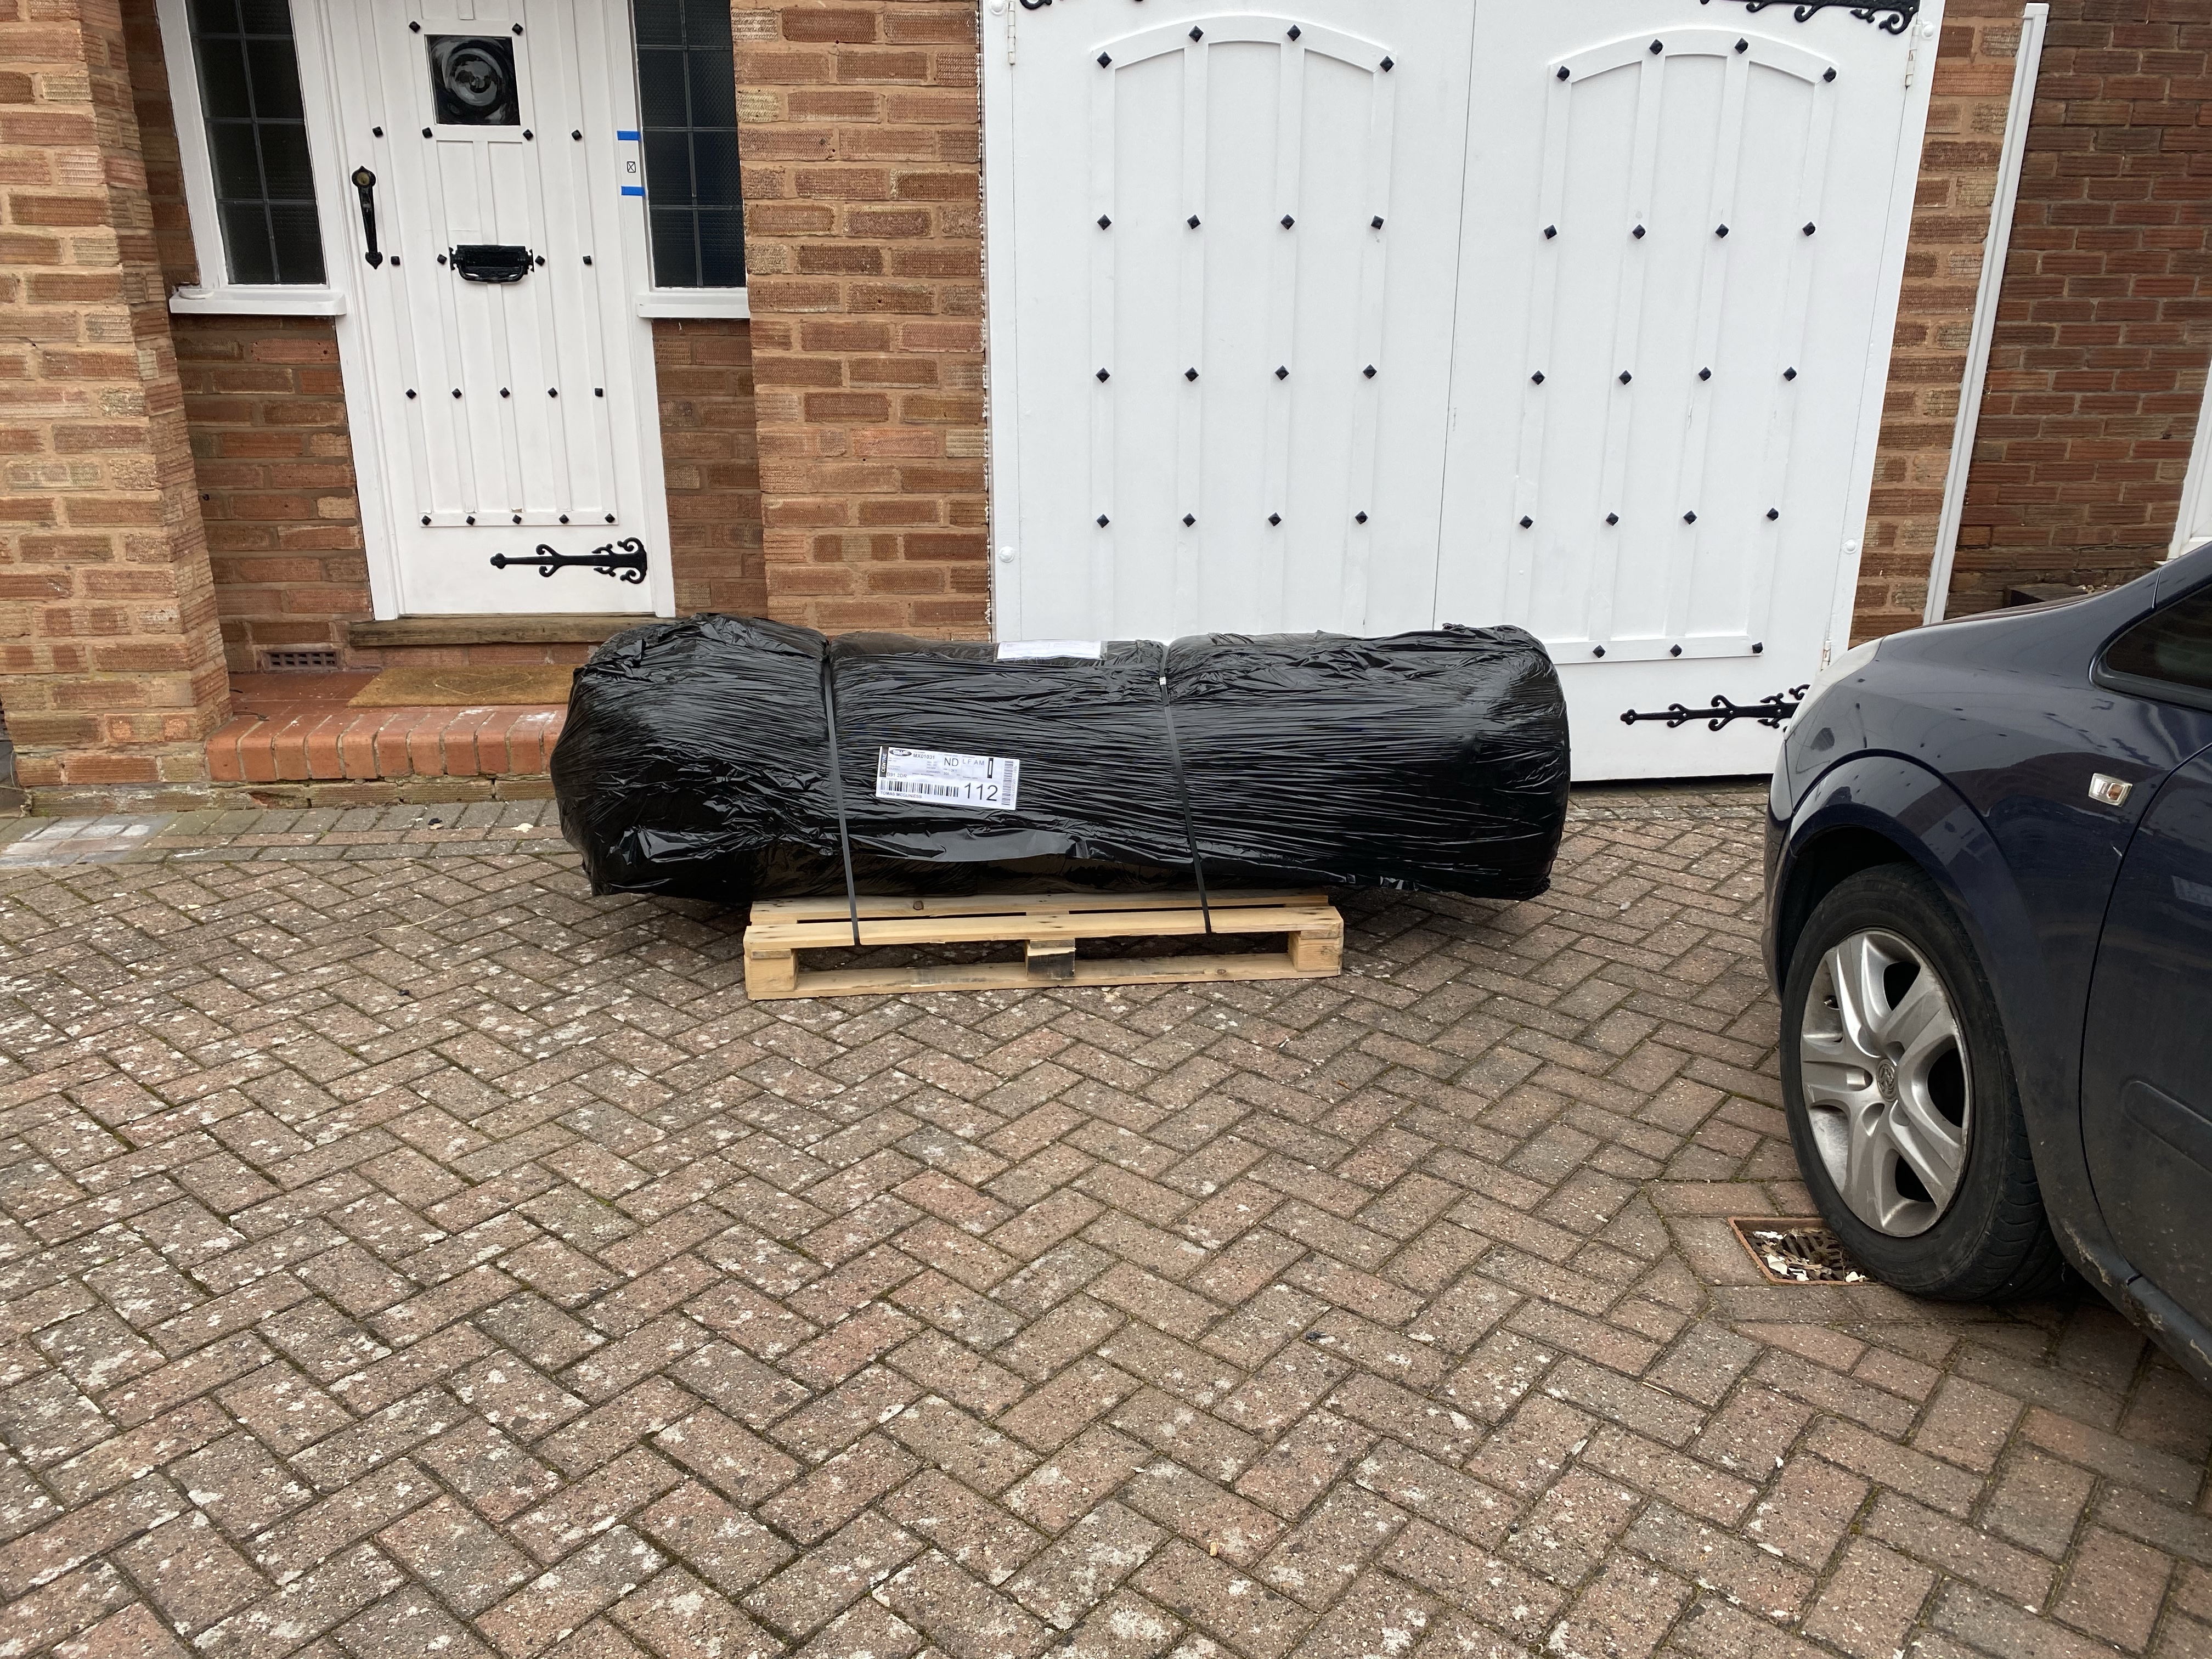
Ordering and Delivery
I ran into a few bumps here. When I got in touch with them originally, they confirmed they could make delivery on my desired date, to coincide with the plumbing work. However, as we got closer to the dates, they reached out to tell me they wouldn’t make it in time. I was pretty annoyed to say the least.
They reached out again a day or two later to say I could have the slimline version of the tank, delivered on the original date at no extra charge. I rushed over to the house with an inch tape to confirm it would fit, with the required clearance. Thankfully it did and the order was confirmed.
Installation
The Mixergy tank is essentially just an unvented cylinder with some additional technology built into it. This means the installation of the tank is the same as any other unvented tank. Our heating engineer installed it without any issue. We were short a few capping nuts and because they were a very unusual size, we had to contact Mixergy to get them. They did provide them, but fortunately, the engineer found a few he had and finished the job..
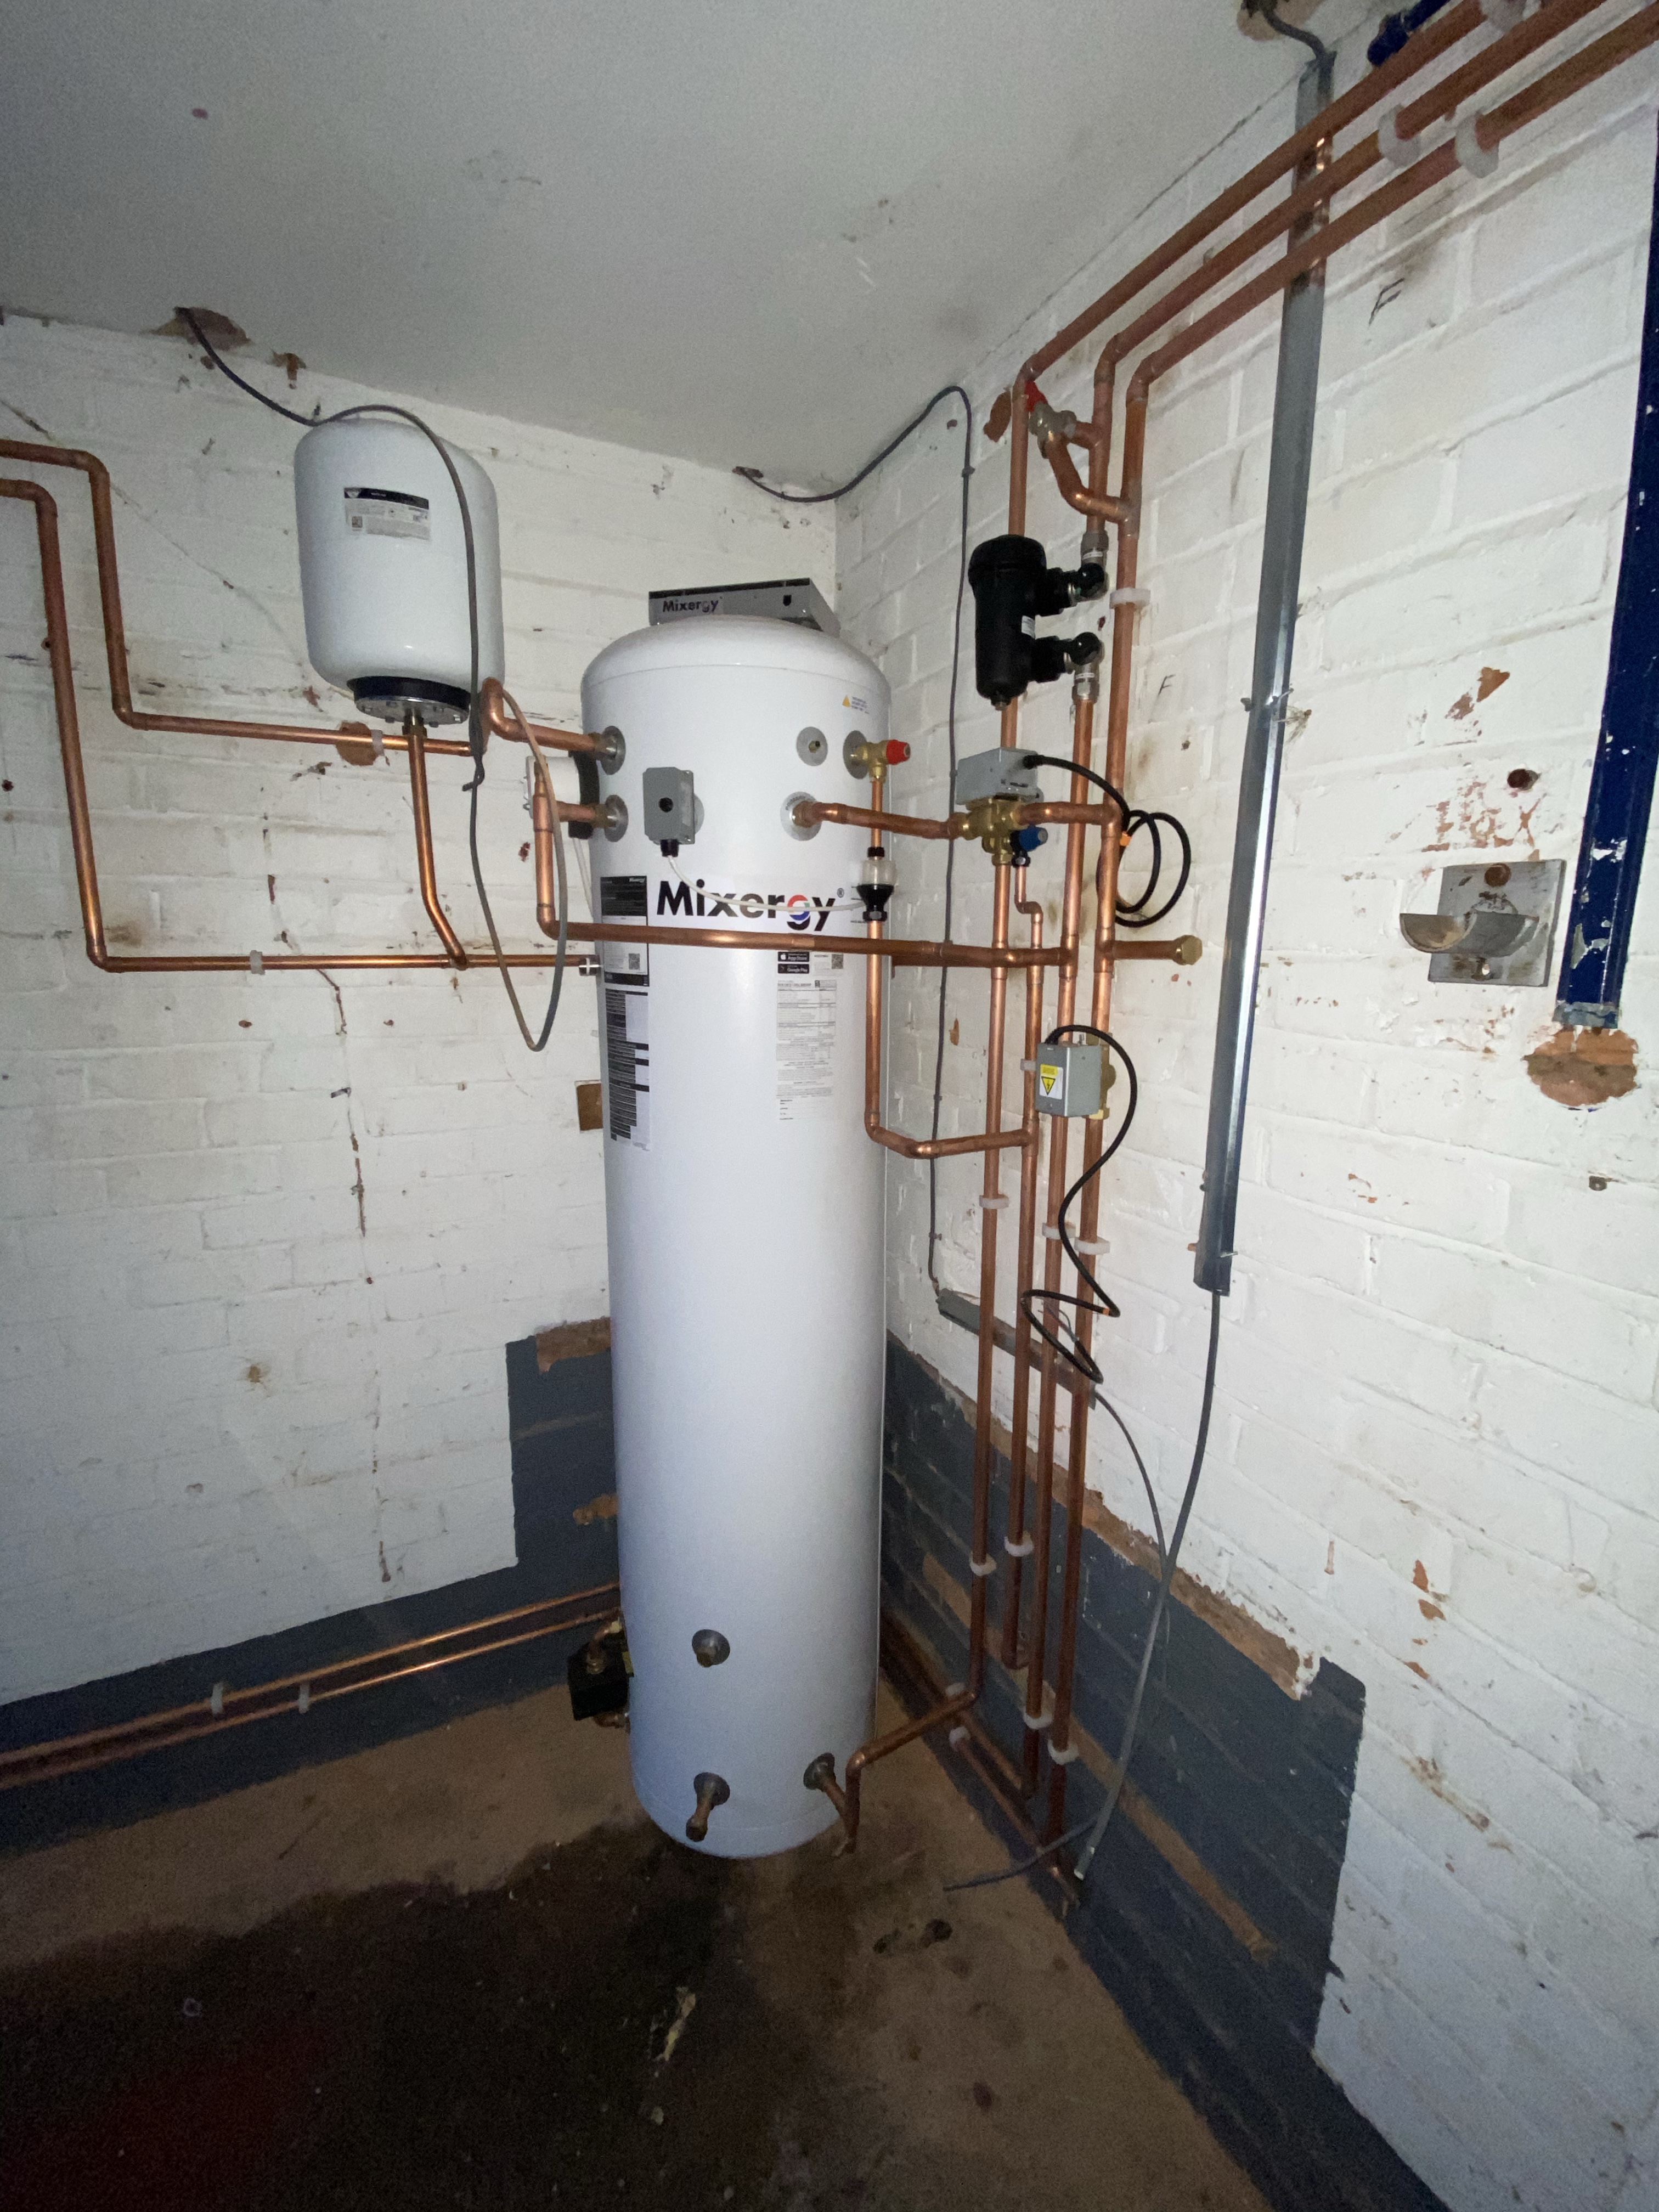
Being a smart home enthusiast, the heating engineer didn’t connect the thank to any heating controls. This is something I wanted to tackle myself.
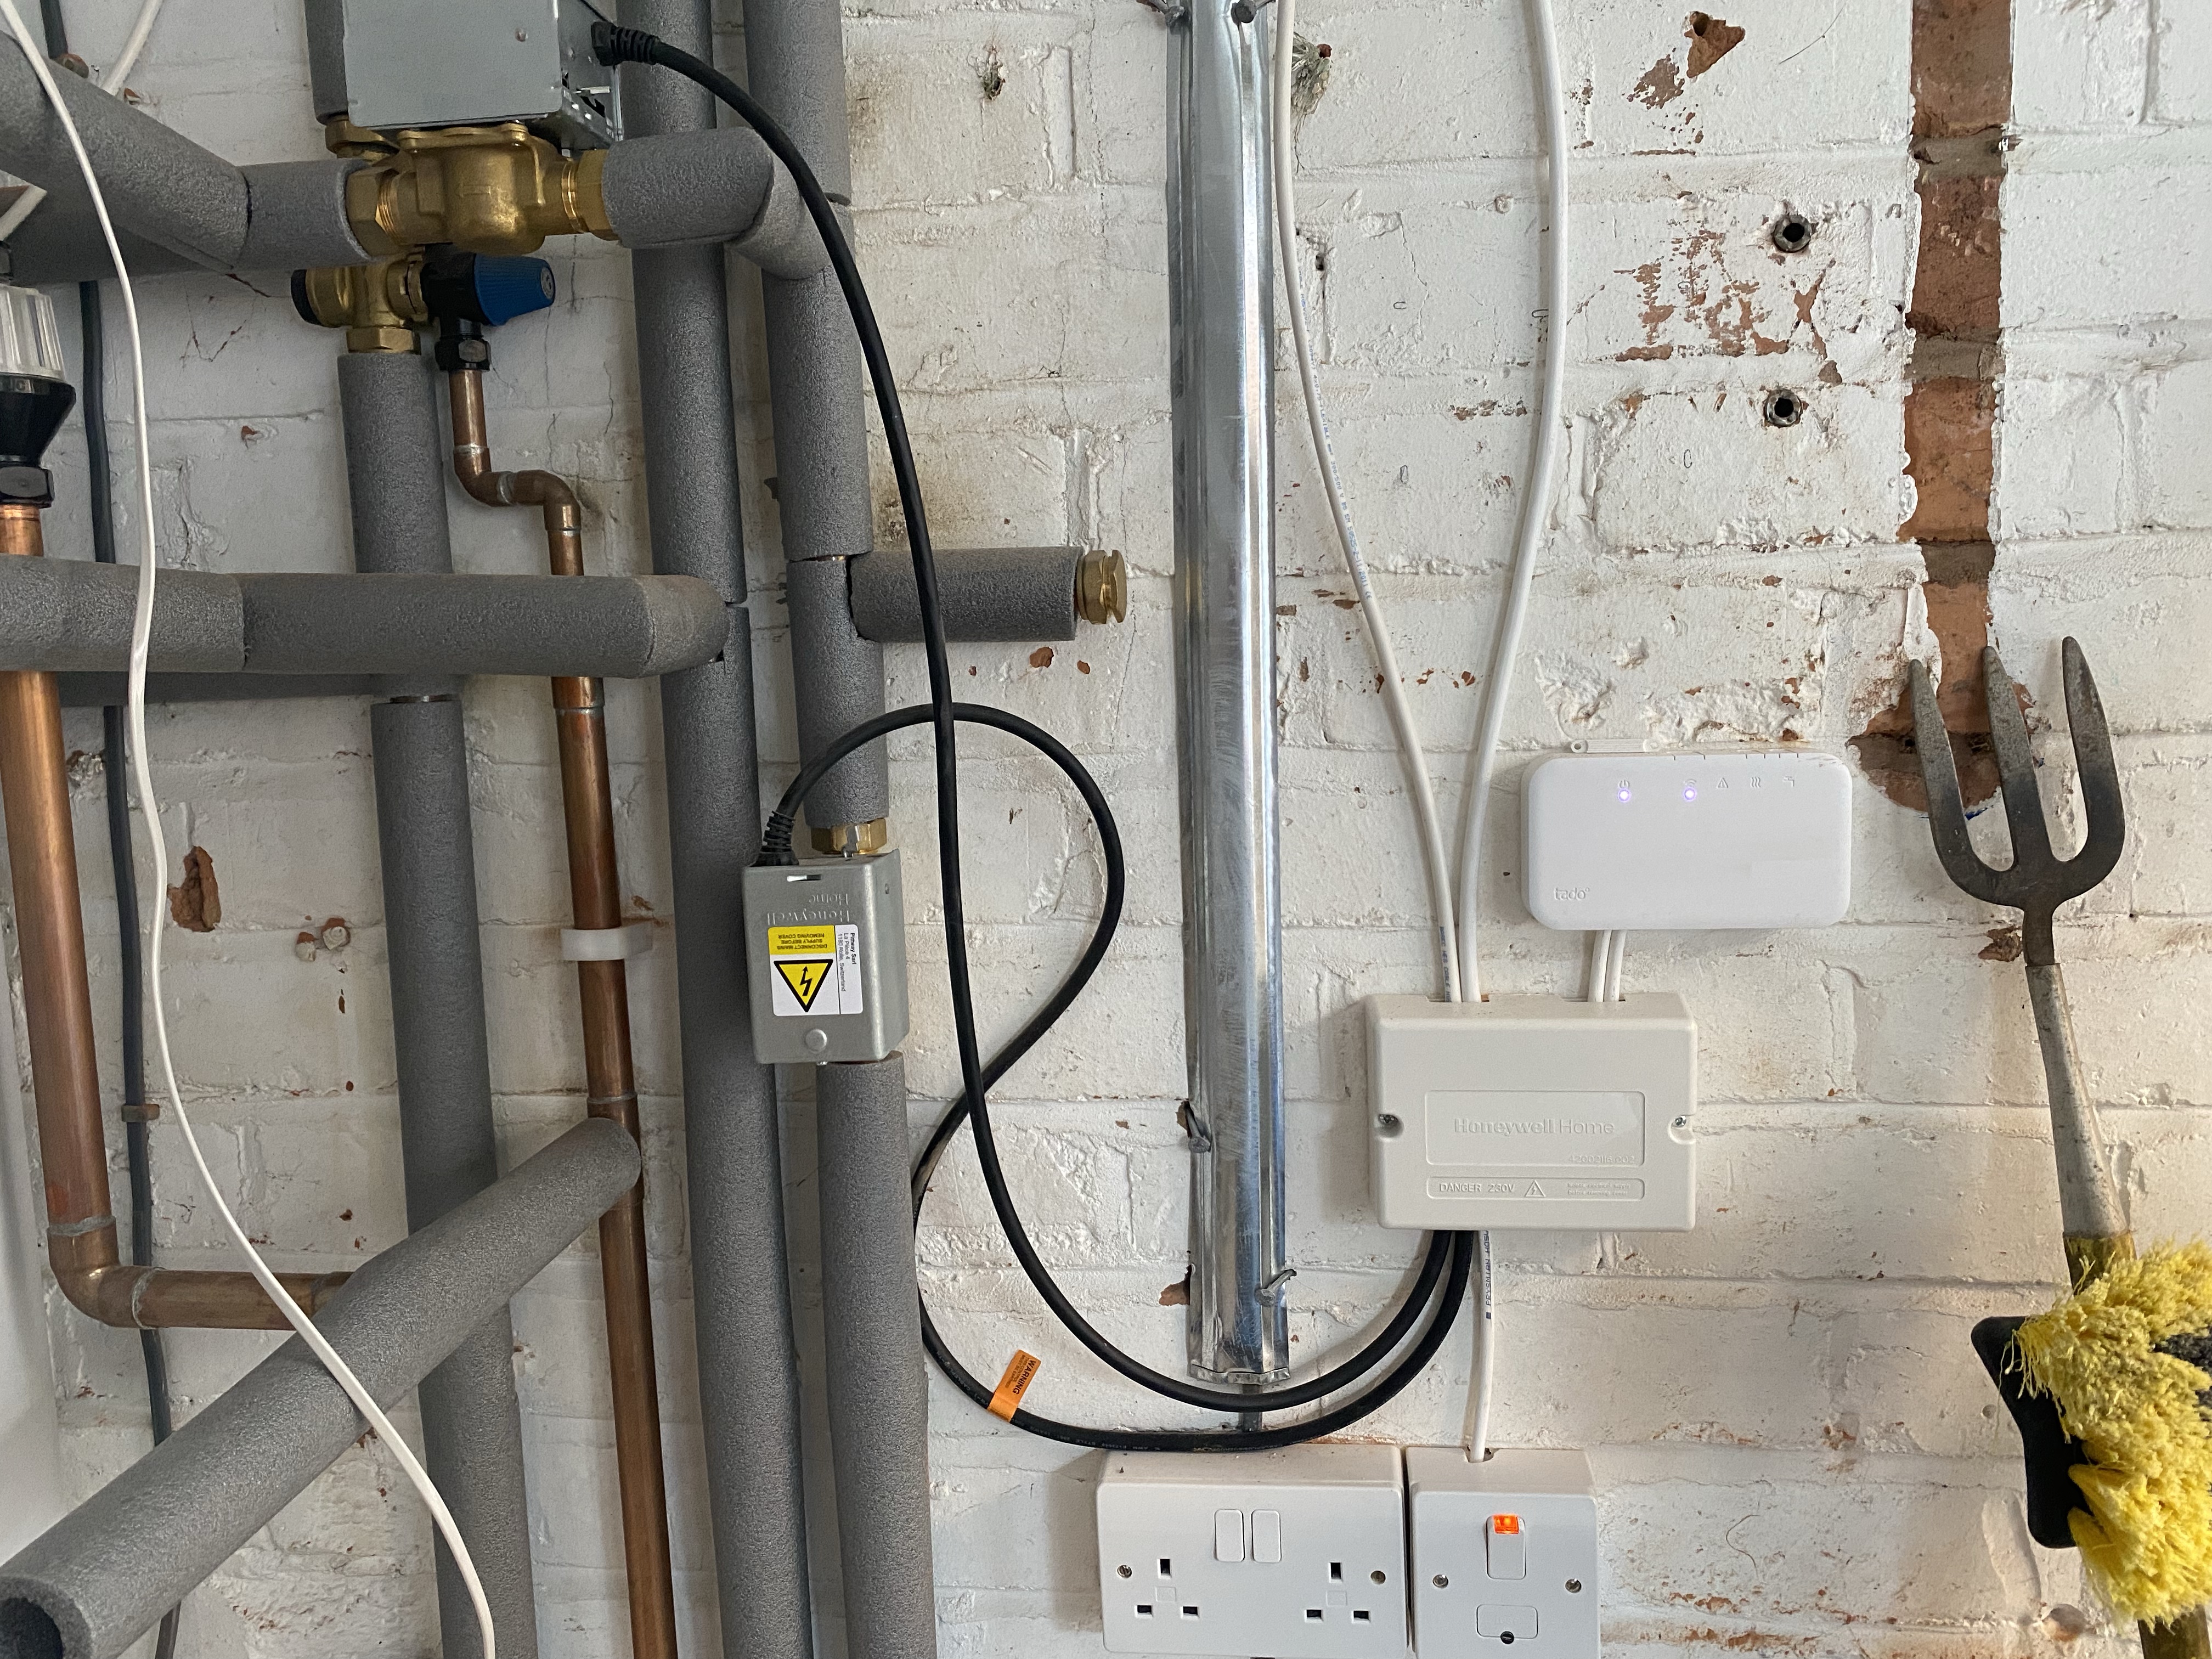
I chose Tado for my central heating. This was for two reasons – it offers HomeKit integration and they have an API that HomeAssistant can use. They also have nifty smart thermostatic valves, so individual rooms can be controlled as zones.
As plumber installed my central heating in an Y-Plan configuration, I knew that control of the valves would be split, with the Mixergy tank controlling the hot water valve and the Tado would control the heating. The setup was straight forward and after a lot of reading and some triple checking, it worked. Thankfully.
The App
With the tank wired into the boiler and fully commissioned, it was time to connect the app with the tank.
This was very simple, thankfully. The tank comes with a Power Line adapter, so it was a case of plugging in the powerline adapter and connect that to my router. I then scanned a QR code on the adapter and the app connected to the tank.
I went through the settings and configured things like target temperature (how how you want the water) and the schedules. You can set the tank to simple heat a certain amount of water or you can have it maintain a minimum amount of how water. You can also boost the tank to a certain amount of water on an ad-hoc basis! Very nifty.
As it’s unvented, you can also setup the cleansing of the tank. If you don’t already know, unvented cylinders need to be heated to a certain temperature every few weeks to kill any and all bacteria in the tank. With my old tank, I just left the boiler temp very high to ensure that the water was always hot enough. To maintain a lower temperature and do a manual cleansing every few weeks would have required going into the loft, boosting the boiler temperature and running the water for an hour. It was simply easier to take the lazy approach. Mixergy solves this by automatically managing this process. You choose the days and times that you want it to occur and it will use it’s best judgement to run automatically. They recommend you do it on days when you might want a lot of hot water anyway, so I opted for the days we bath the kids.
Another nice feature of the app is that it can give you energy consumption information!
First Showers
After our first night at the house, I fired up the app the following morning and boosted the water to 30%. I really had no idea how much water we’d actually need. 30%, as my wife will tell you, was not enough as her shower ran cold.
I think it was a combination of the flow rate being at maximum on the shower, the thermostatic valve not being calibrated and the fact that 60L isn’t enough water for two showers!
By reducing the showers flow rate just a little, we now get by on a charge around of 60%. We do too thi
The API + Home Assistant
Another factor in favor of Mixergy is the fact that they offer an API for interacting with the tank. Once I had the tank installed and connected, I spend an hour exploring the API and seeing what sort of information it returned. I was able to add a basic integration into Home Assistant that returned some basic information about the tank’s status.
I’m hoping to get this added into the Home Assistant platform, but I’ve a lot of work ahead of me!
You can check this integration at https://github.com/tomasmcguinness/homeassistant-mixergy
Final Thoughts
Overall, I’m very, very happy with the Mixergy tank. At this moment in time, I don’t have any figures to really see if I’m saving money.
My previous energy supplier, EON, only had bills available for three month blocks. For example, From 26th of April to the 26th of June, I used 112m3 of gas. I’m guessing we wouldn’t have had the heating on as we were into May, so basic division estimates around we used around 38m3 a month. Looking at my Octopus data, June for example, my gas usage was a little under 30. Of course, we had a gas hob in my previous property, which doesn’t factor in this time.
Of course, as we head into the winter, it will be ever harder to estimate, but my gas concern is over the entire house, and I hope the combination of the Mixergy tank and the Tado will reduce my overall gas consumption. Good for my pocked and good for my kid’s futures.

Leave a comment