As part of tinkering on my Matter and Zigbee projects, I want to support battery power.
Specifically, I want my Zigbee FART sensor to run for a few months on a battery. I’d love to box it up and hide away all the wires. My wife would love that too.
Supporting battery power is far more involved than mains power, since every milliamp is important. If your circuit is drawing 2mA and you have a 2000mAh battery, you’ll get about 40 days. Whilst that isn’t too bad, it’s not brilliant.
However, if you can get that down to 500µA, which is microamps, you’ll stretch that to 166 days!
Get that down to nA or nanoamps, and you’re talking years of life, even on coin batteries!
I’m an absolute amateur at this micro controller business though. If I can get one my devices lasting even a month on battery, I’ll consider it a great success!
Measuring tiny currents
As I mention in this blog post, I started out with a multi-meter to measure the consumption of my devices. I love my little multi-meter, but it’s not designed for reading tiny currents. The resolution is only 2mA and it has a large burden resistor which causes problems!
If I’m going to get a device working for 6 months on a battery, I need to up my game.
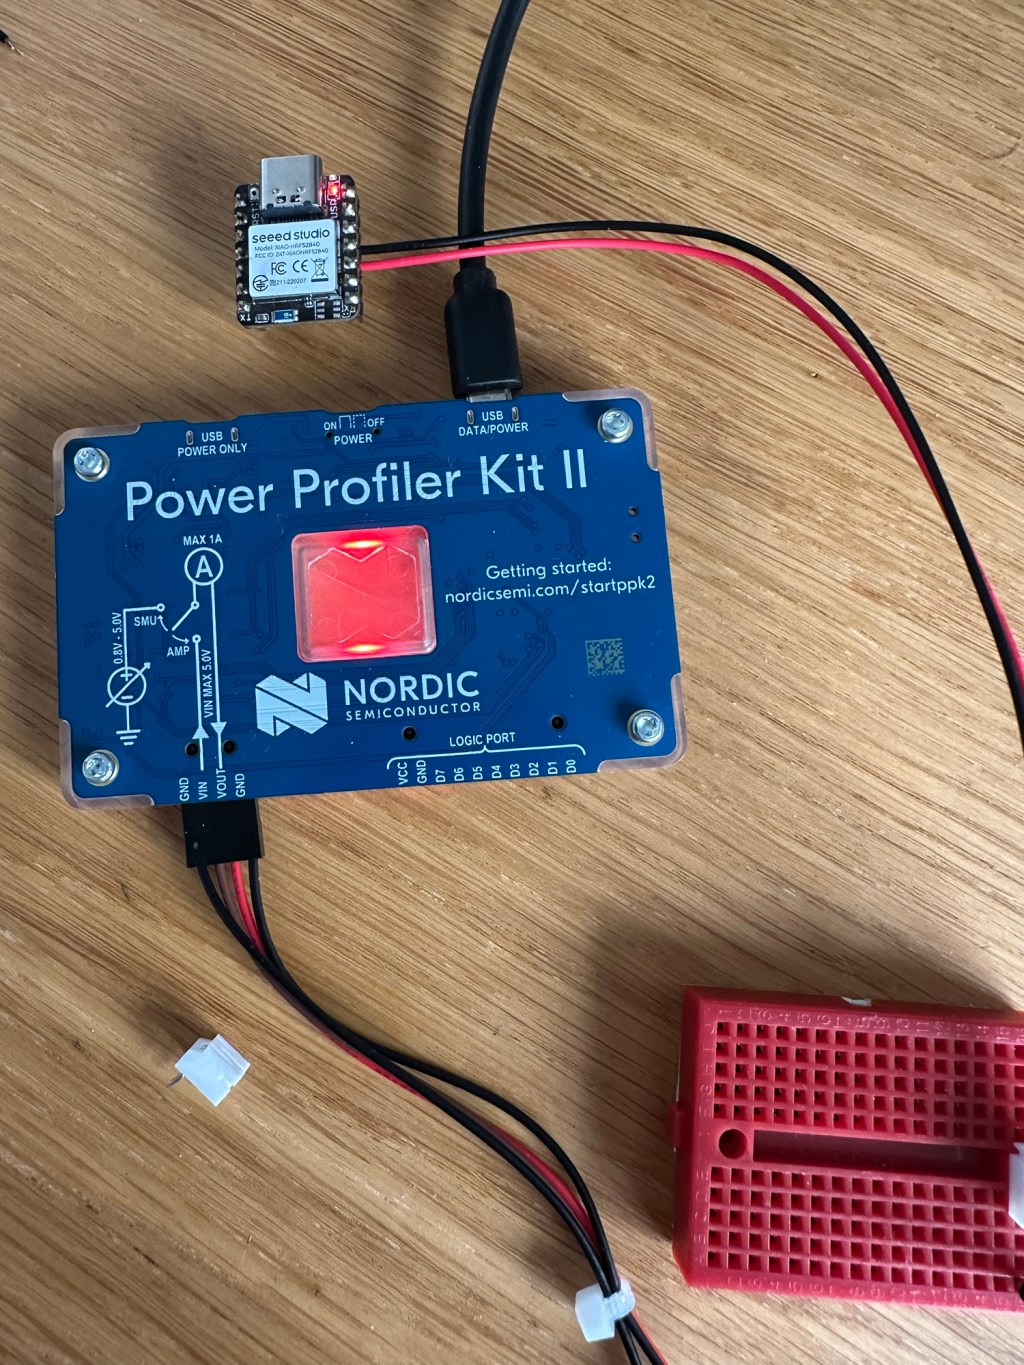
As a Christmas treat, I purchased a Nordic Semiconductor Power Profiler 2 Kit (PPK). This unit logs via a PC application and can measure down to around 200nA. Much better resolution than I’ll need.
Getting Started
I found this Nordic forum post on the Blinky sample (LED on/off) and figured it was a good starting place
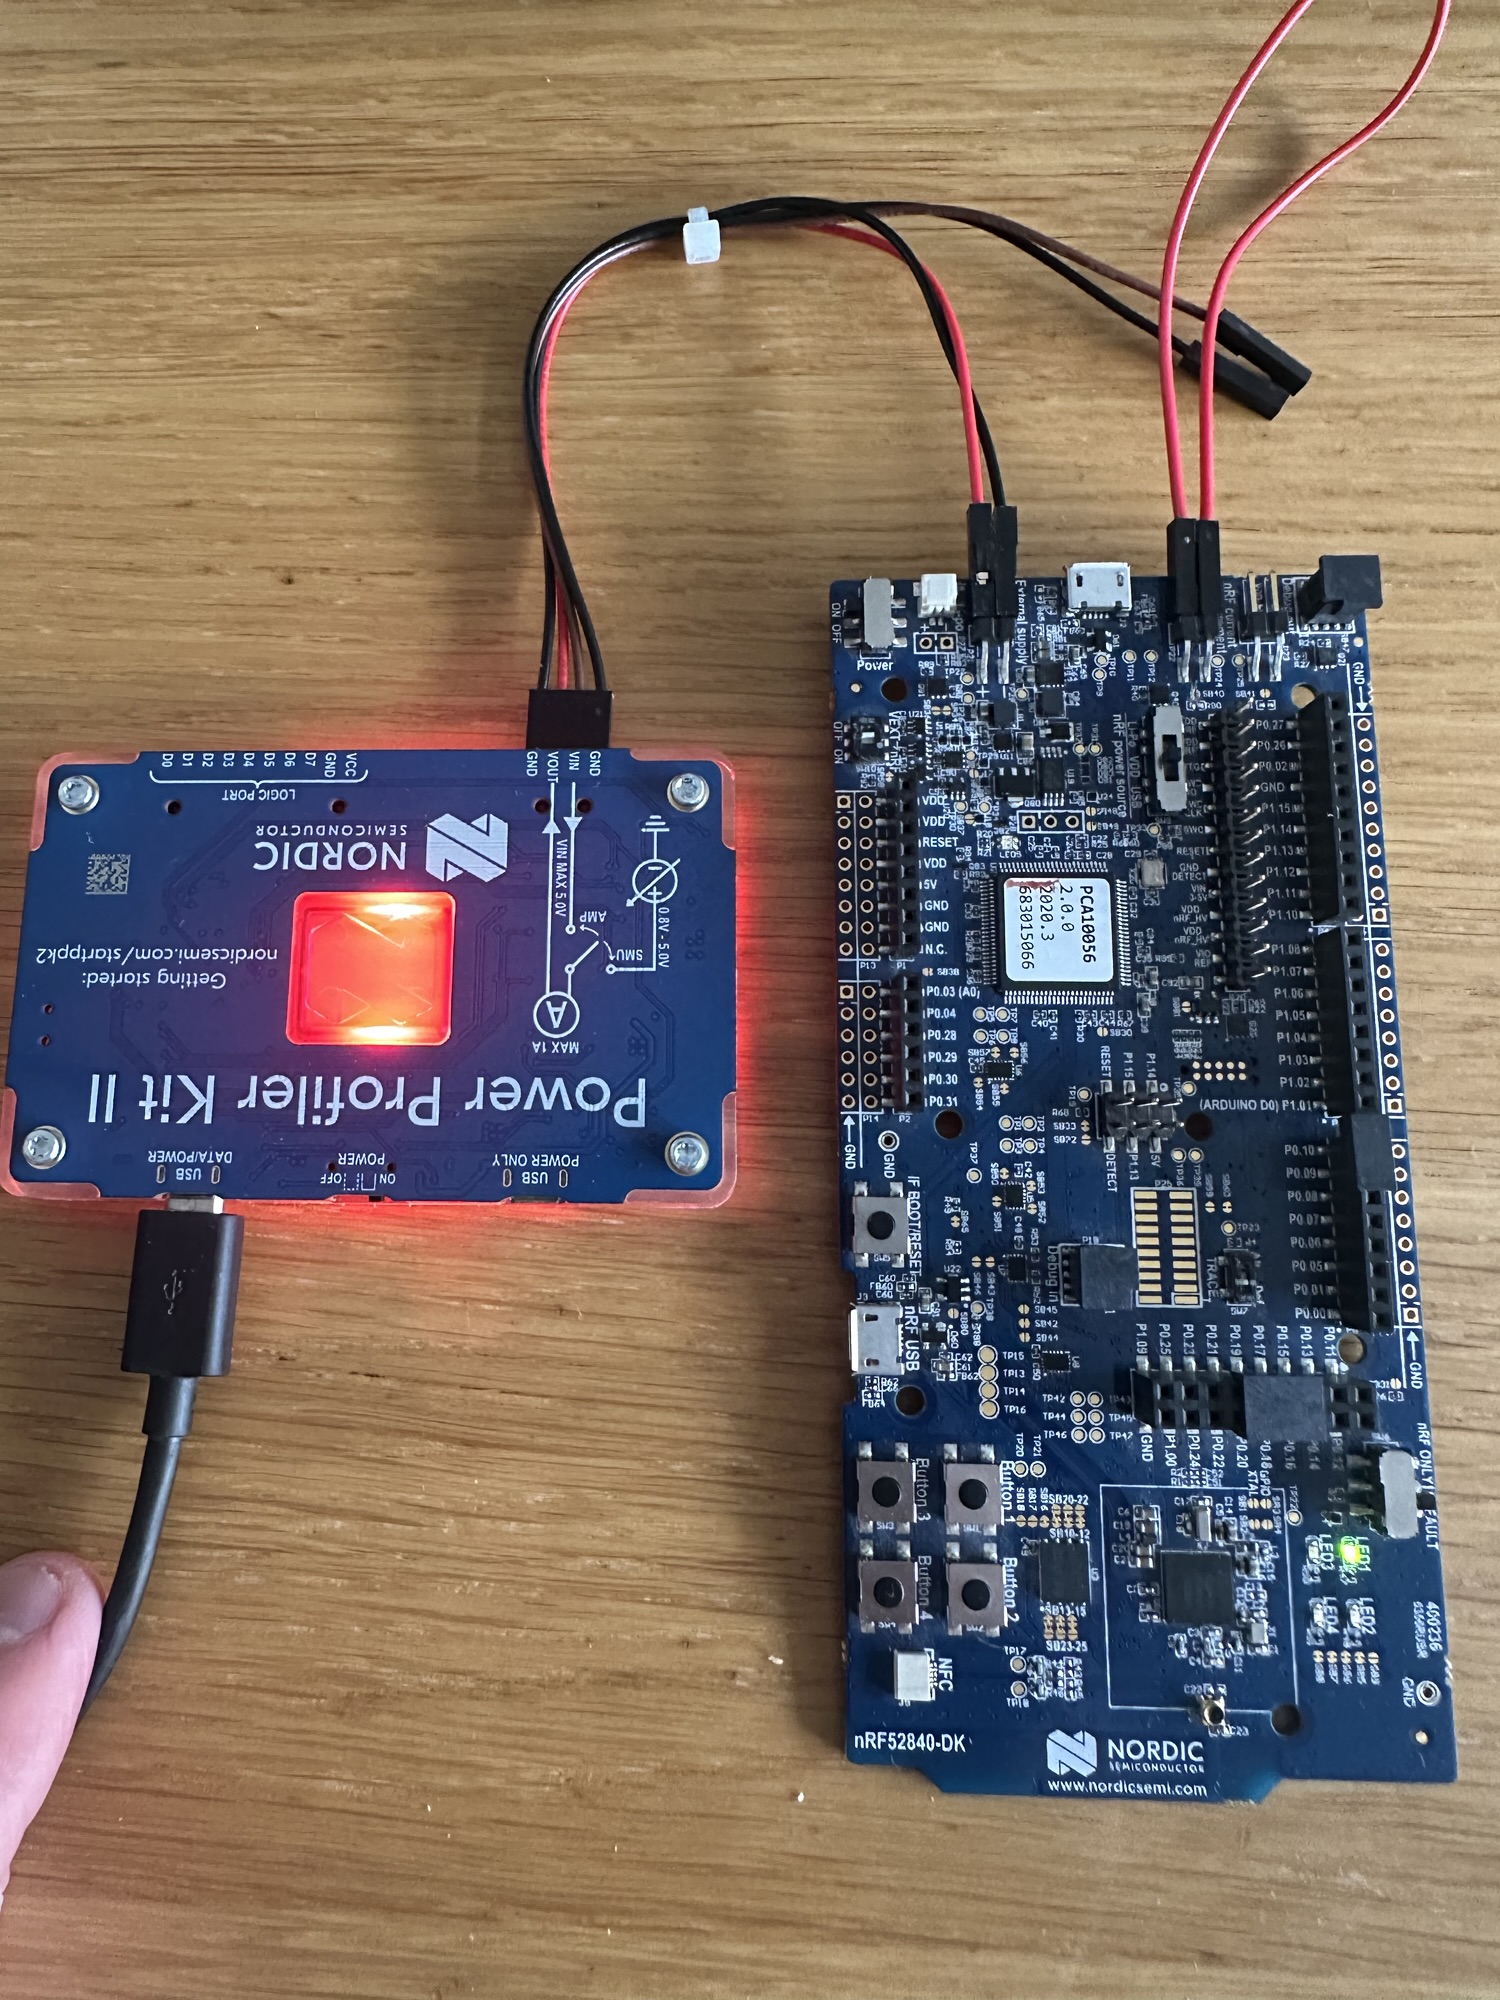
As I’m using the Nordic nRF52840DK board, you have to cut a copper track to allow current measuring. I did this with tip of a screwdriver and made *shit* of the board. I should have used a craft knife.

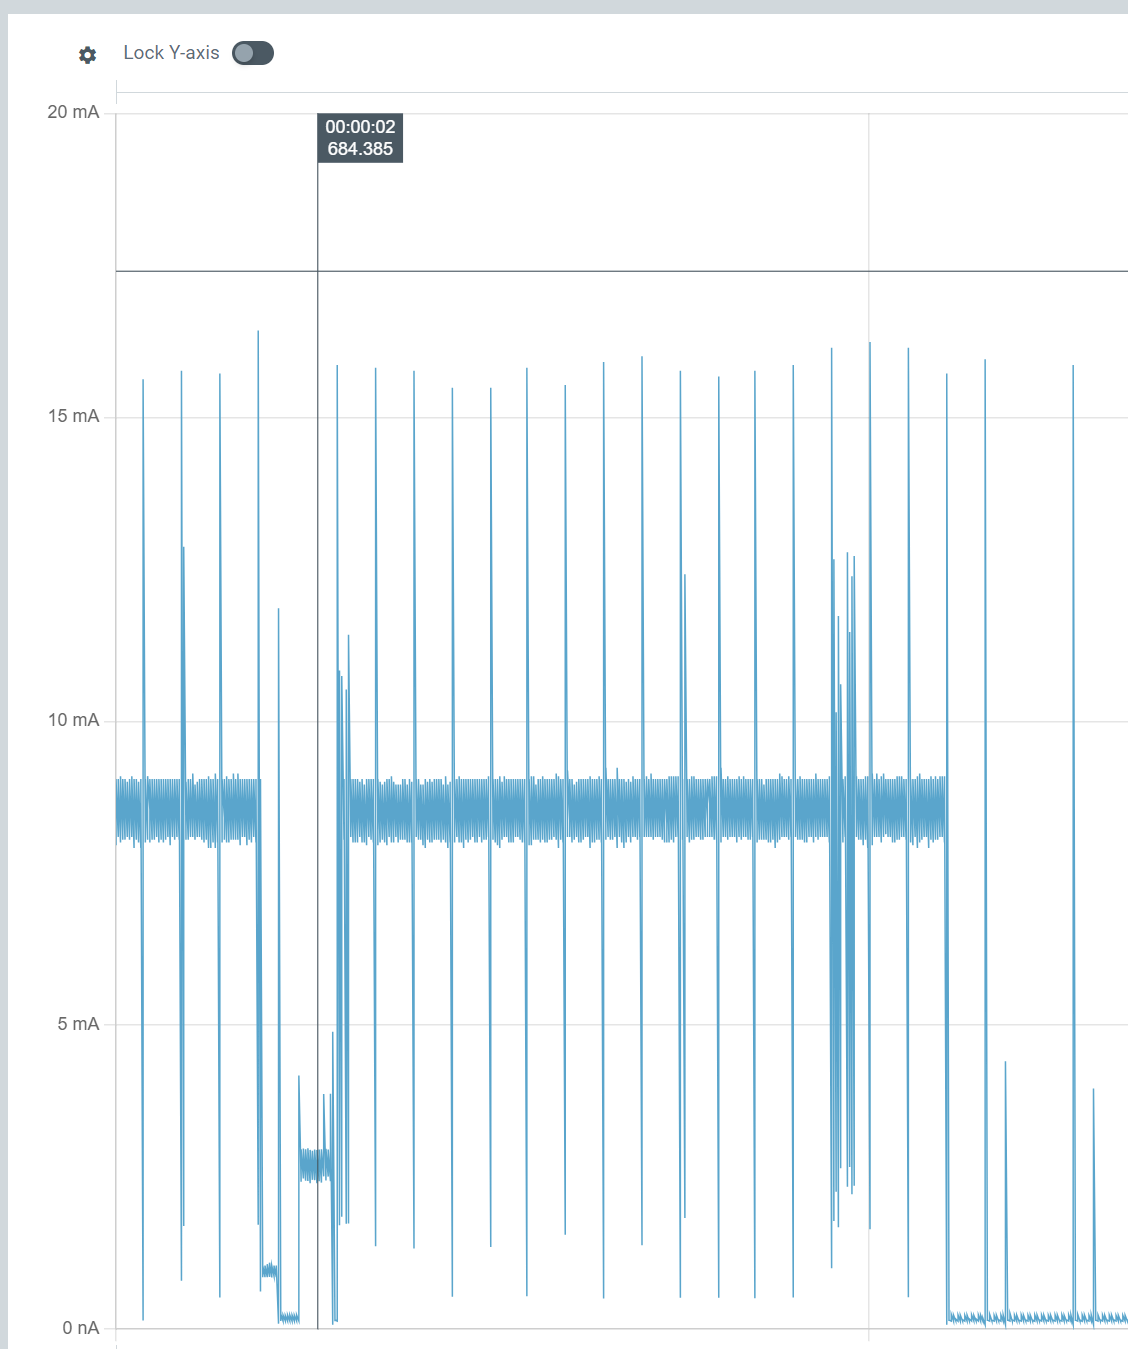
I got it all wired up anyway and hooking up the PPK. The graph I got after powering it up was nothing like I expected!

It averaged about 1mA, peaking to 5mA every second. The peaks kinda made sense with the LED, but they should have lasted 1 second. The 1mA draw when it was doing nothing seemed very high too.
The post also said to turn off CONFIG_SERIAL, which I did. This was supposed to reduce consumption, but it made no difference to what I saw.
I then switched the PPK over to “Source” mode, providing the 3v needed by the board and wired it into the DK.
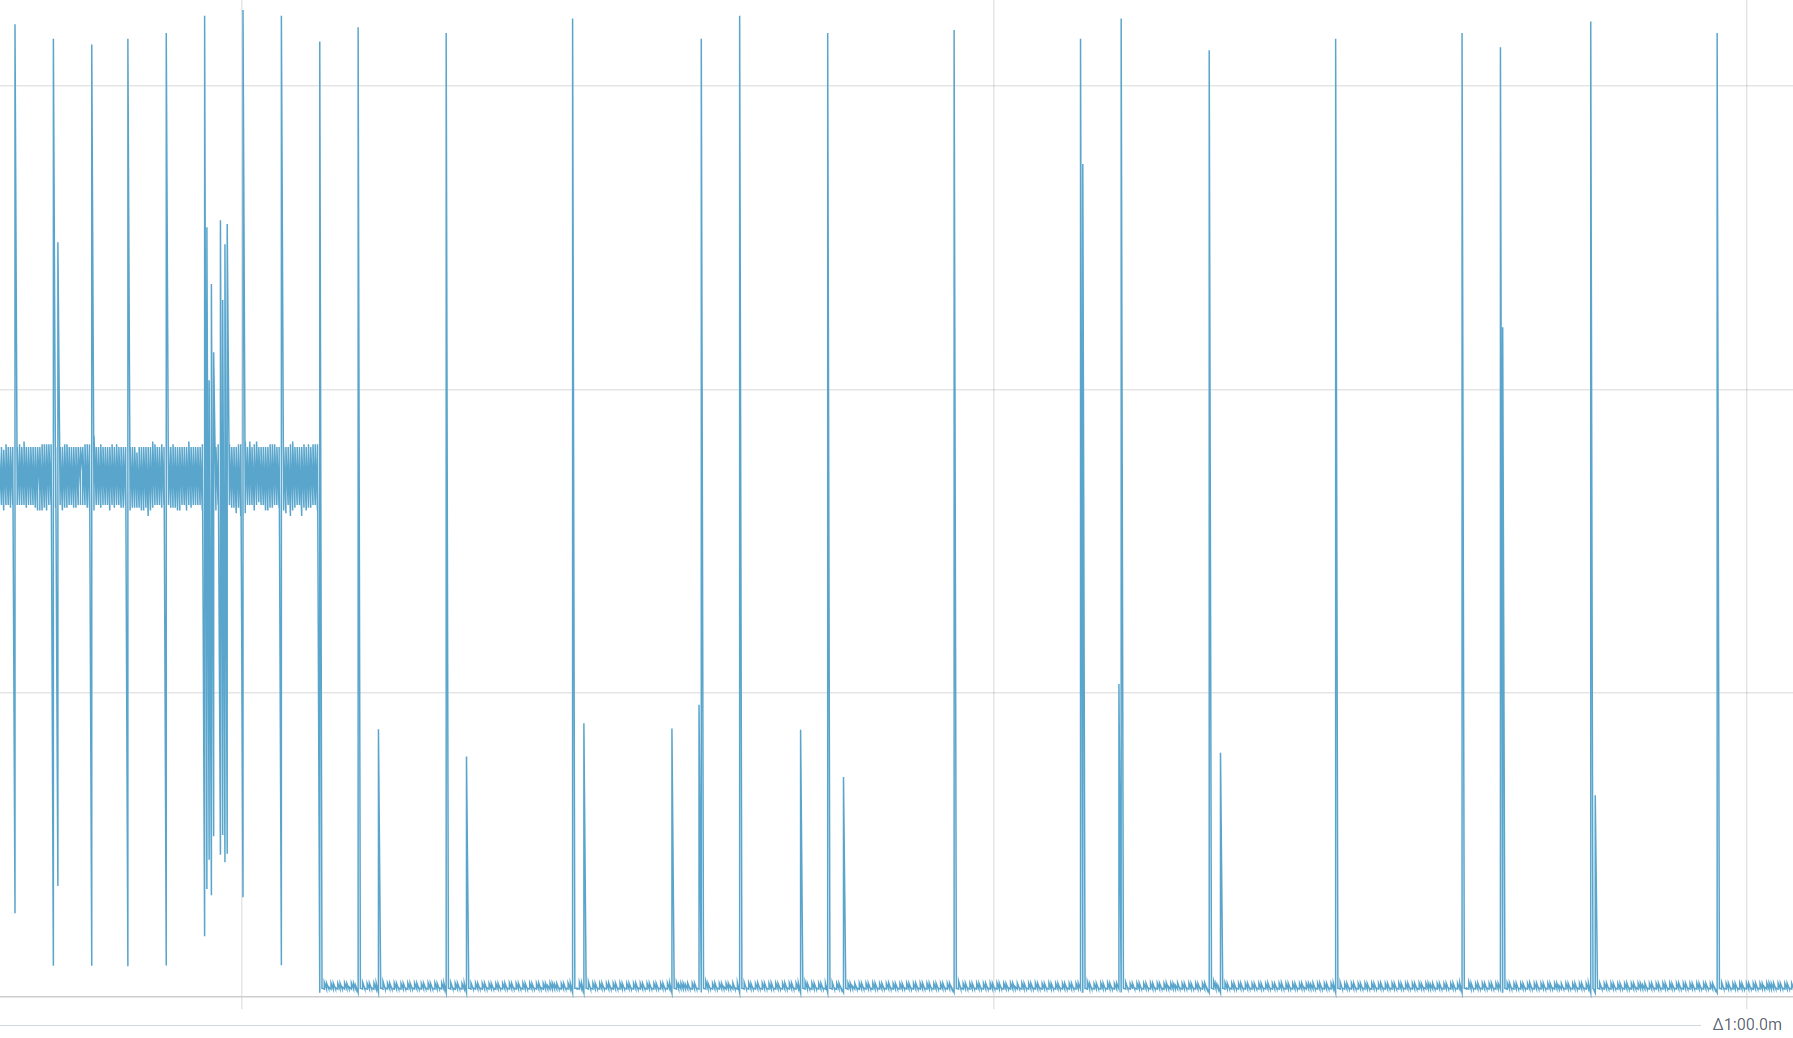
The light started to blink and the power consumption looked like this:
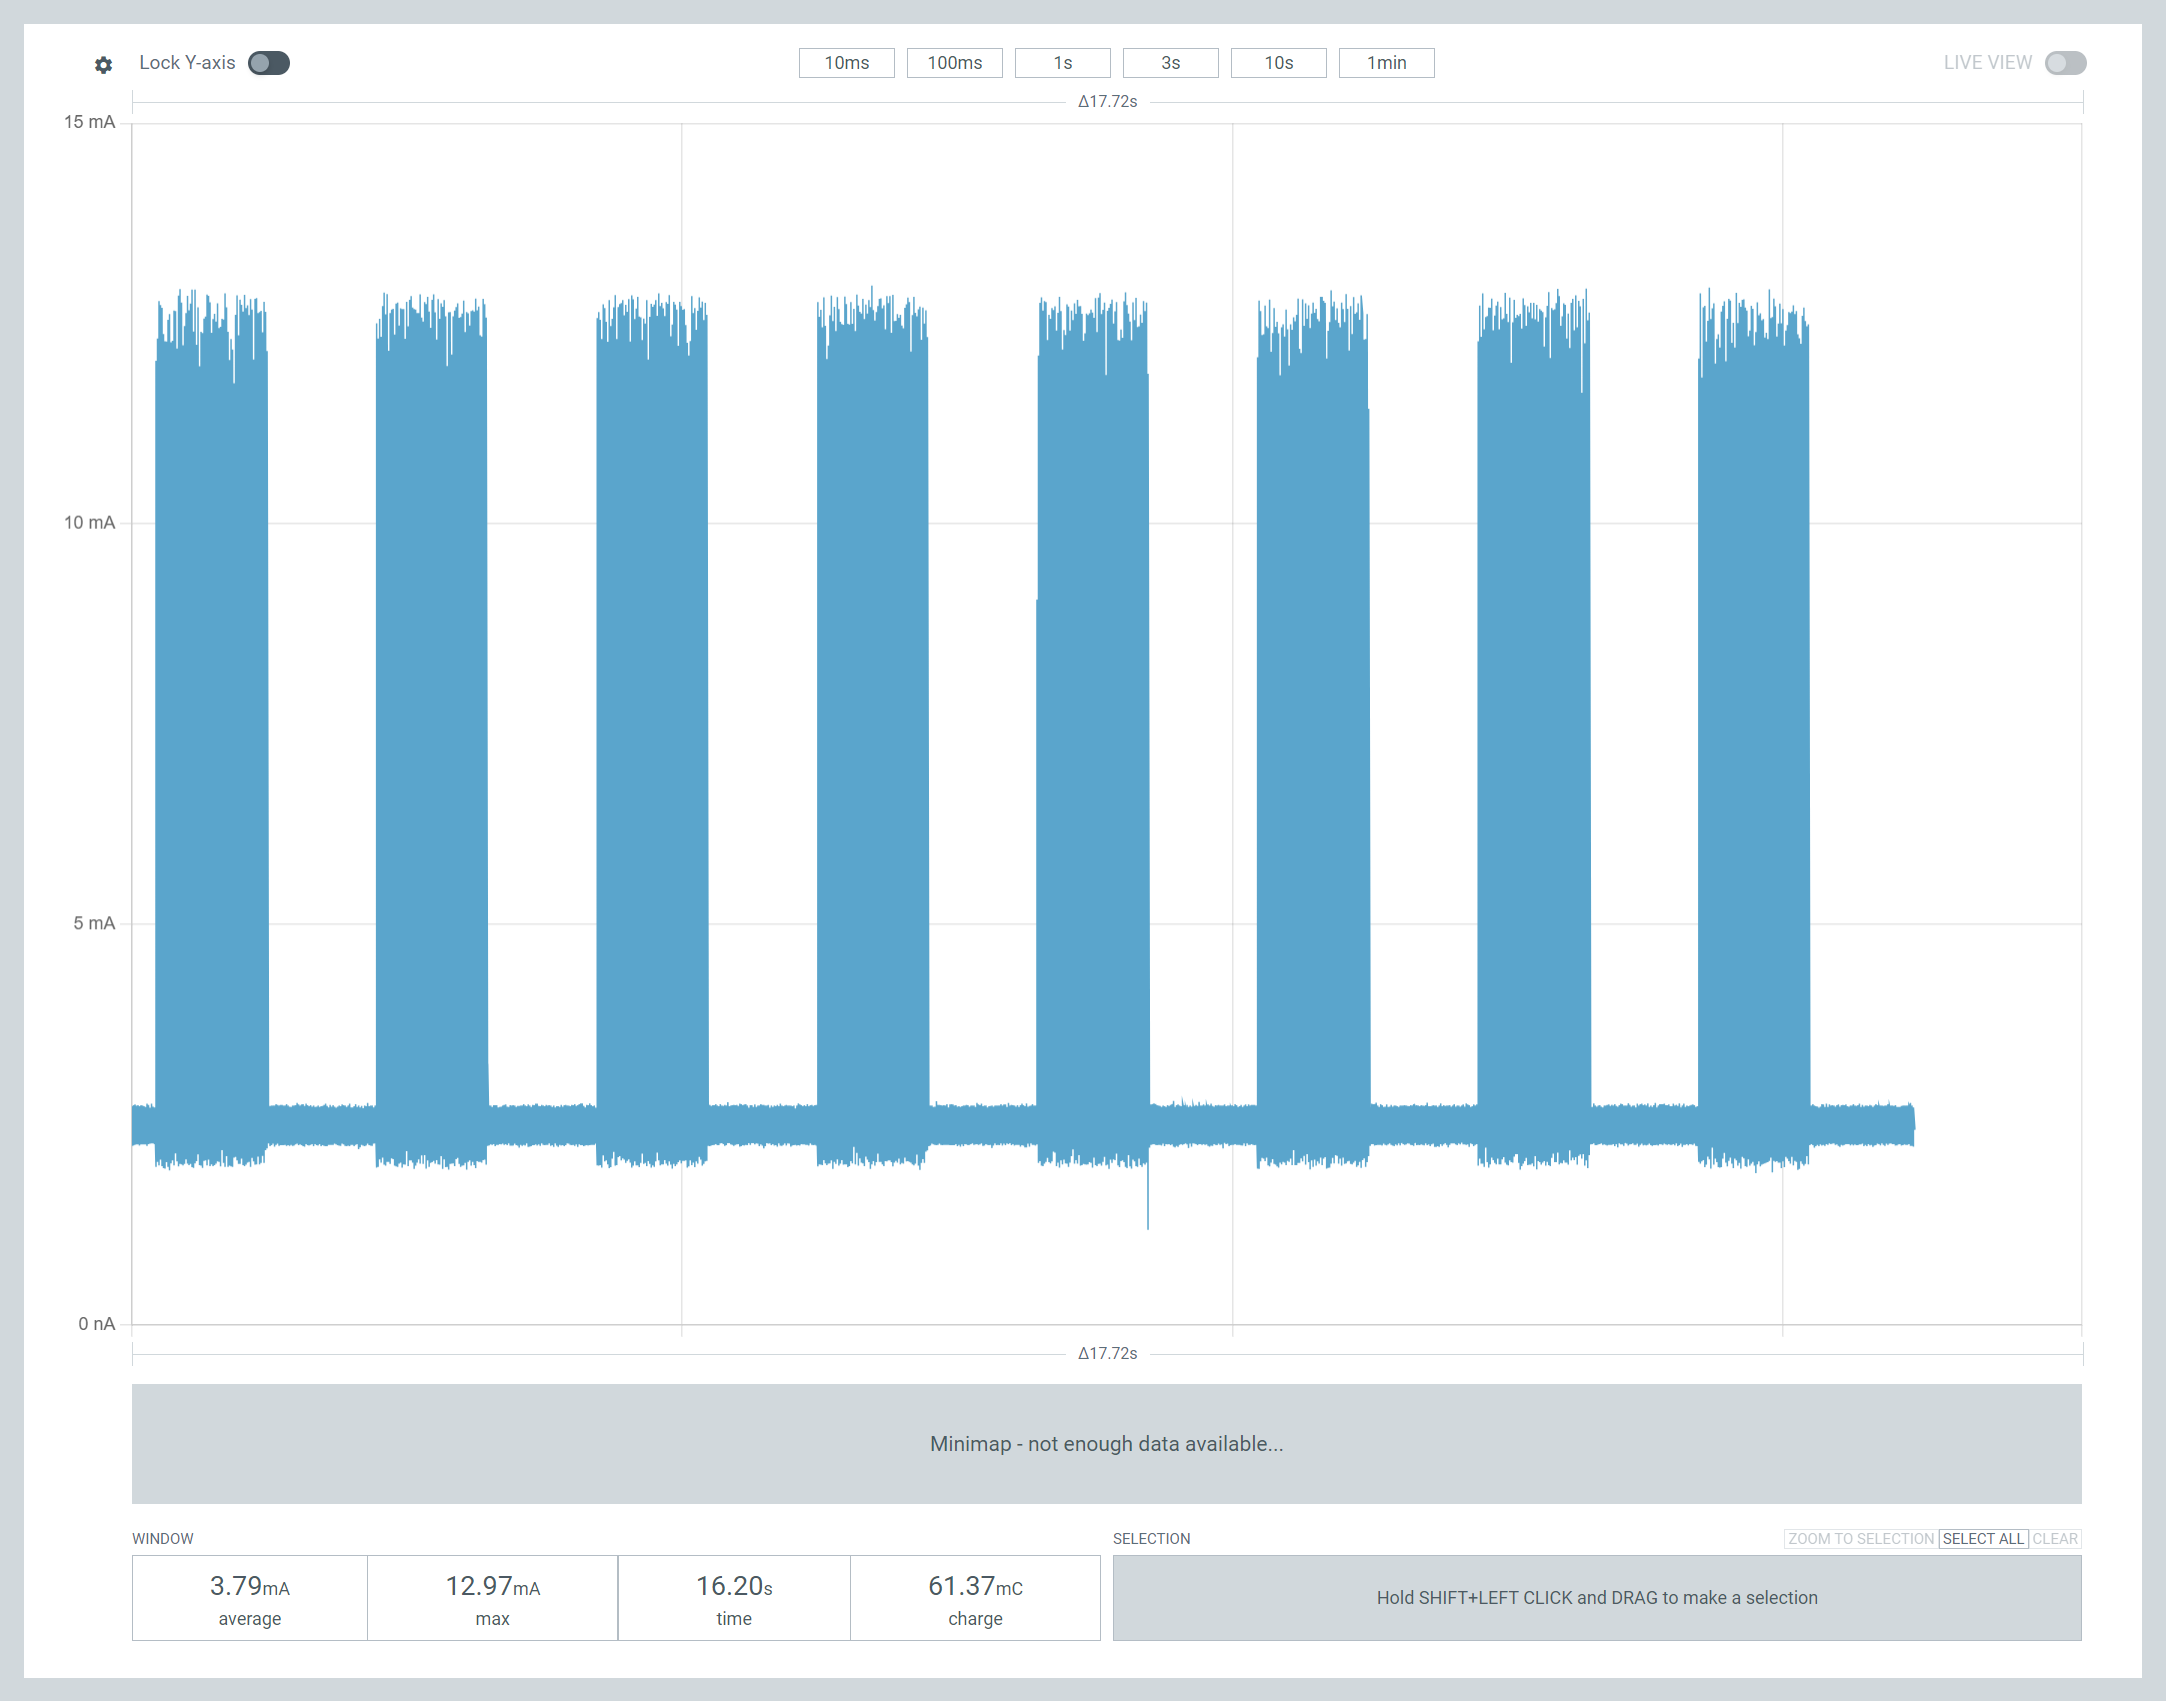
Much more in line with what I expected! The 12mA spikes corresponded with the LED being on. But the device was still using about 2.5mA when it was supposed to be asleep!
The average shown was 3.79mA, so a 2000mAh battery would run this device about 20 days. Not bad out of the box, but I wanted to get that sleep current down much, much further.
Down the rabbit hole

I played around for the sample a while and eventually admitted I didn’t have a clue what I was doing. I returned to google and found this nice forum post:
This gentleman was asking the same question I did.
Turns out the power consumption was so high because I was measuring the *entire* DK’s power use. The LED did pull a few mA, but the other odds and ends on the DK were using power too.
Reading the post also helped me finally understand what the nRF Only/Default switch was all about! You choose what got power by flicking that switch. When set to nRF Only, only the CPU got power. Everything else was cut off. This explained why the LED stopped blinking and why my PC would see the COM port vanish!
Once I flicked it over, the consumption changed massively! The average was now only 518µA or half a mA. It still spiking and I wasn’t sure why. It wasn’t the GPIO turning on and off, since the peaks were too close together.

At least I understood a little more about what I was actually measuring now.
Back to the Basics
Going back to the forum question, I just followed the suggested wiring and flashed system_on_demo.hex. Measuring the CPU gave me *tiny* readings.
Ok, so the sample didn’t actually do anything, but at only 3.36µA, it would run for like 70 years on a 2000mAh battery.

This proved that I was monitoring my DK correctly, as my measurement matched the Nordic engineer’s!
I copied some of the CONFIG settings from the sample blinky project into my own blinky copy, recompiled and flashed.
Progress!
At the start of this graph, the consumption has the familar pattern. But after a few seconds I switched to “nRF Only” and the consumption collapsed!! Huzzah!
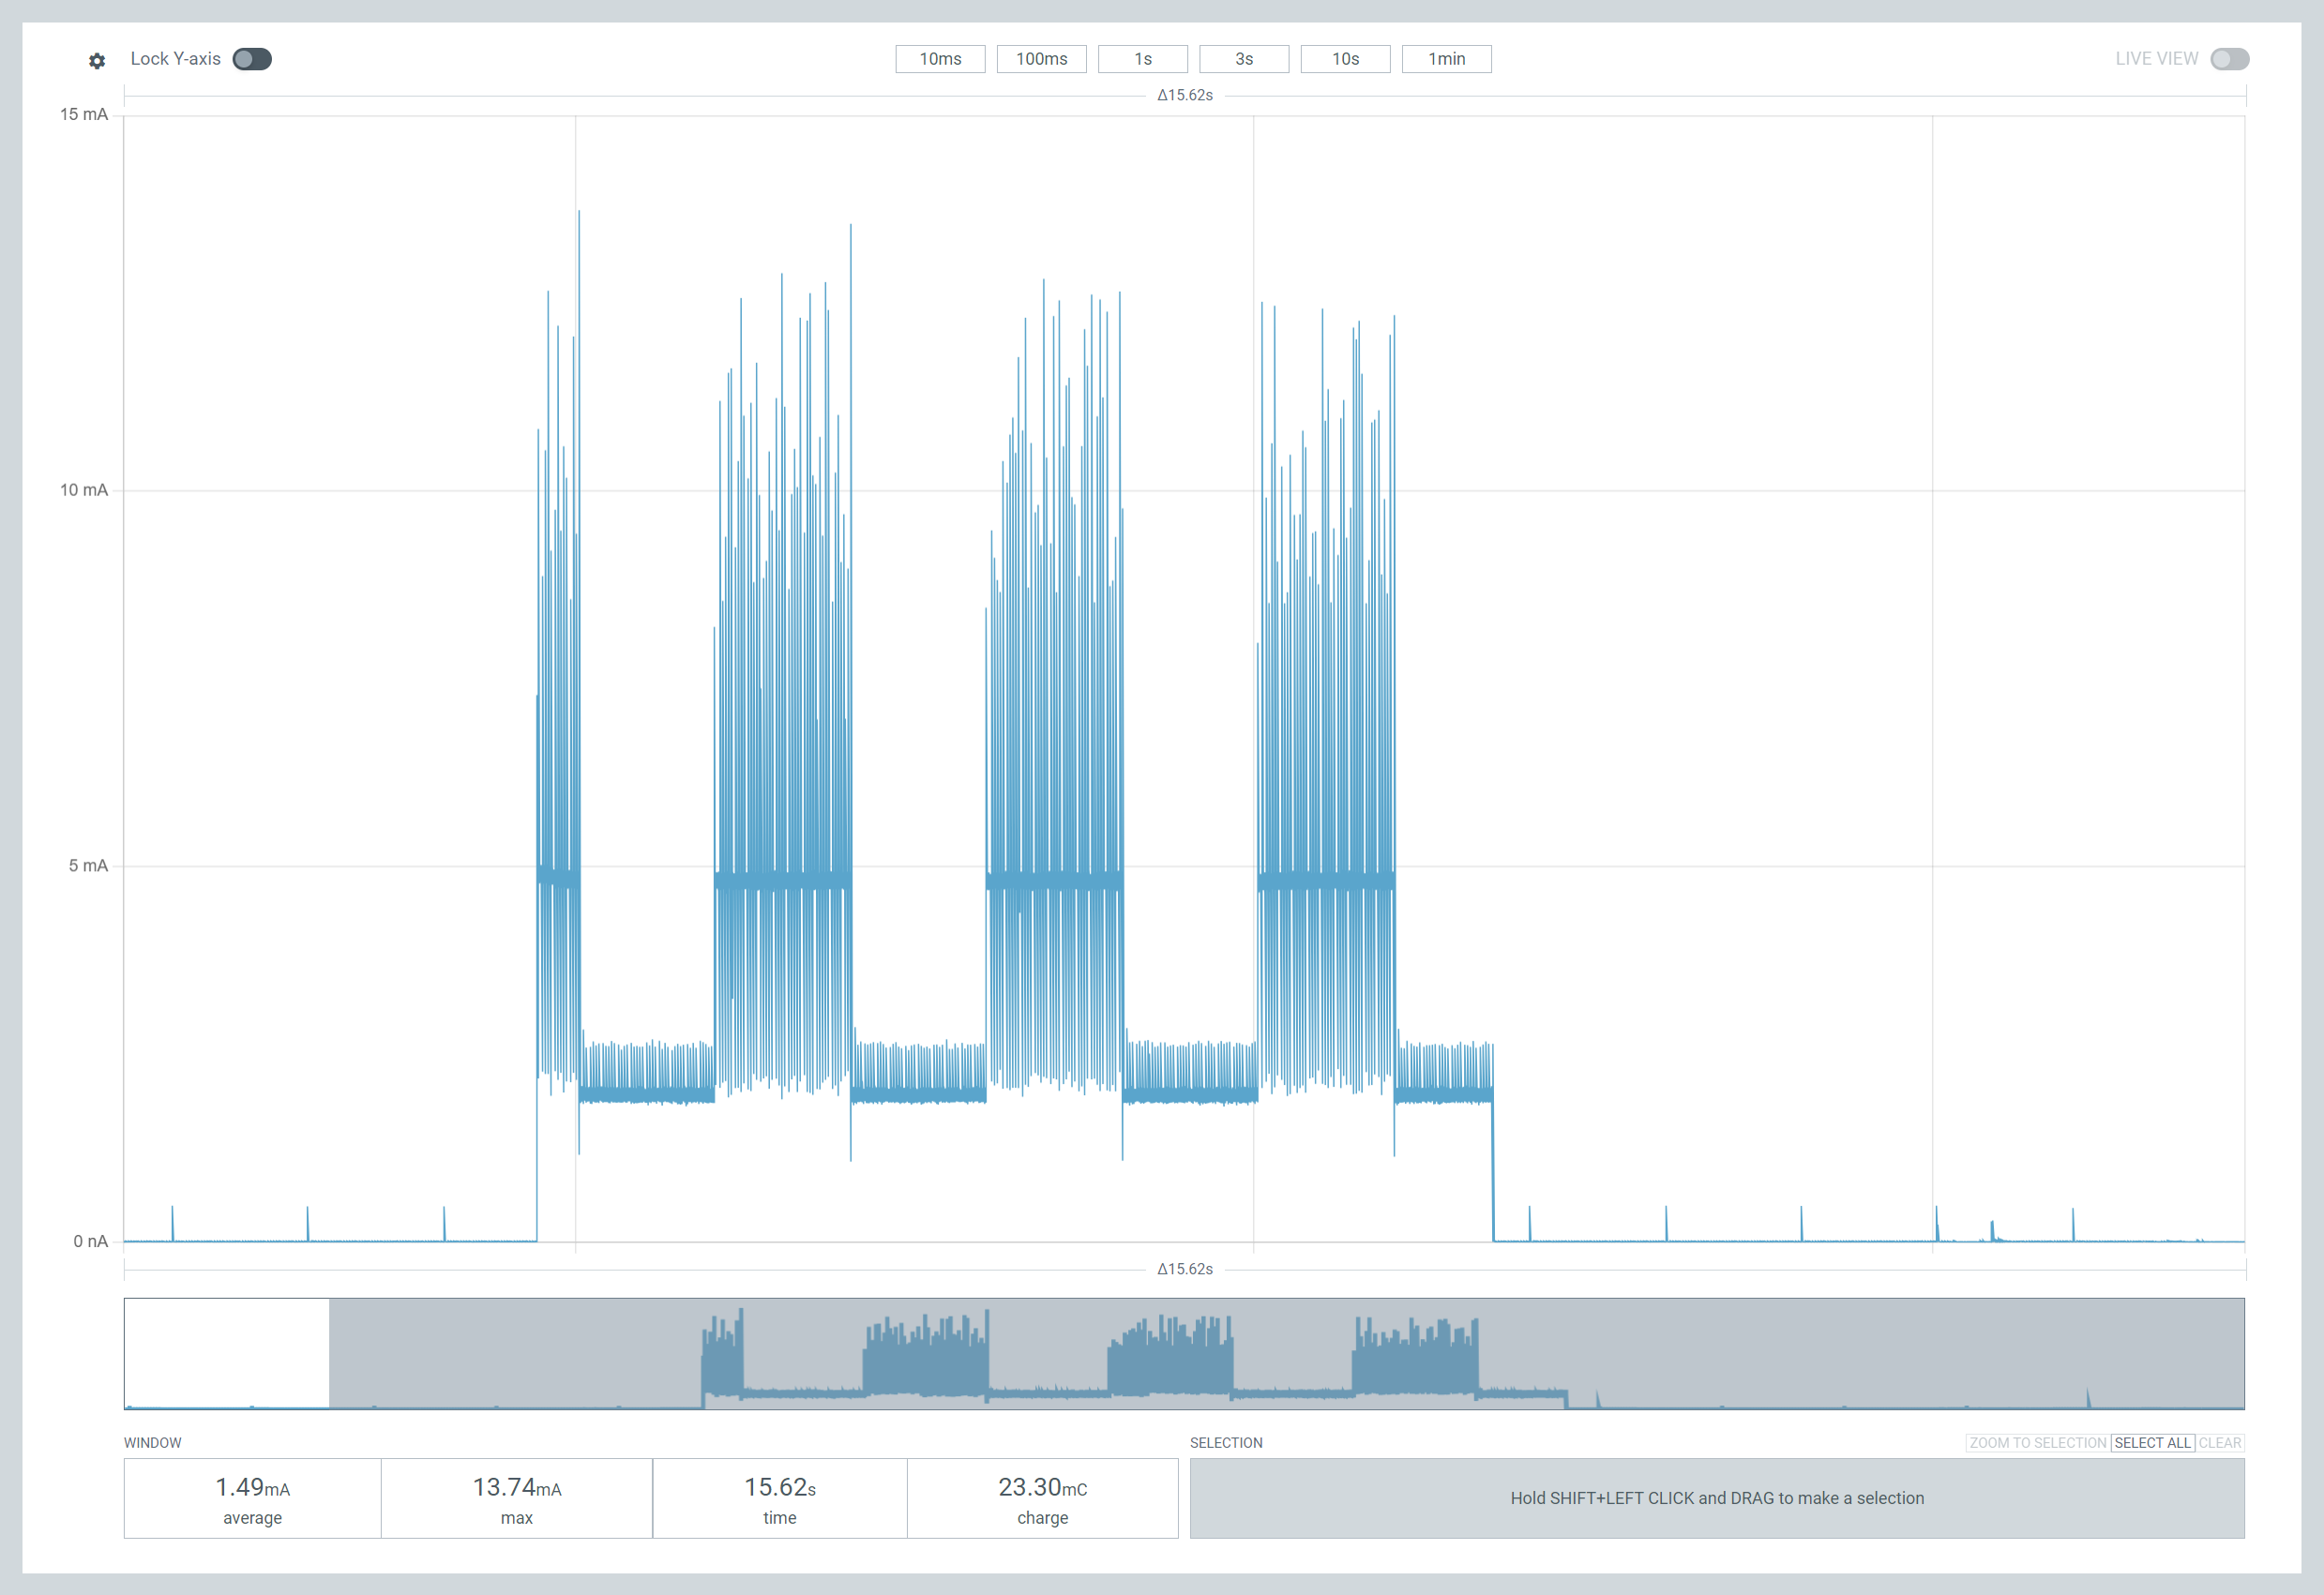
With Blinky using little or no power, I moved back to my Zigbee code. I added the same configuration settings and flashed it. I already refactored my code to enable Zigbee sleep and added threading too.
On booting the device, the consumption was high as it’s connecting to the Zigbee mesh. Consumption averaged around 6mA.
Once it’s finished connecting, the situation changed, dramatically!!
After the burst of radio traffic on startup, consumption dropped to an average of 230µA!
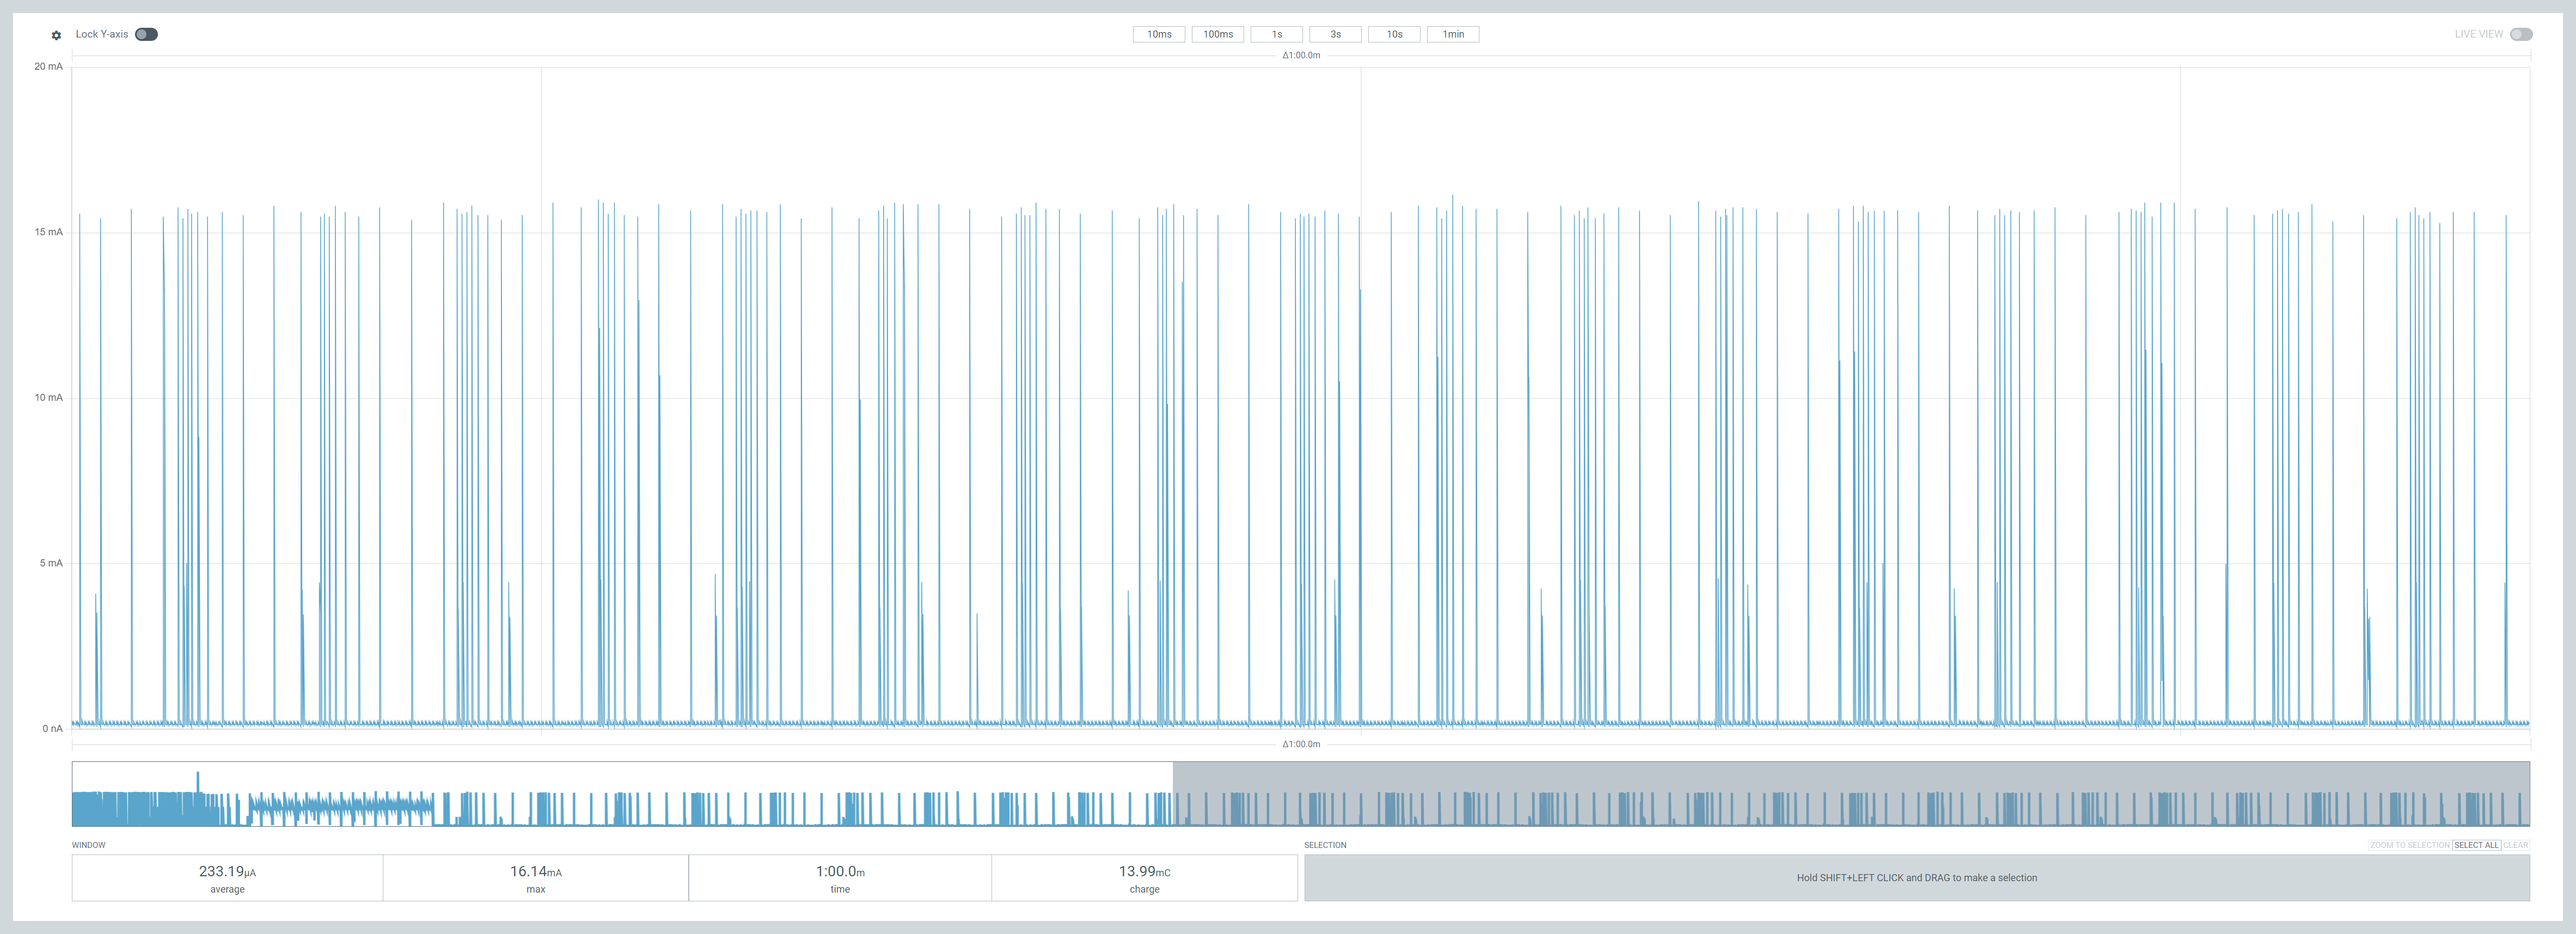
At 250µA, a 2000mAh battery would last almost one year, at about 330 days!!!
It’s worth noting that flicking the “nRF Only” to “Default” mode didn’t impact the consumption. This doesn’t make complete sense, but as the board isn’t connected to the PC, the debugger etc wouldn’t be running. Lots more to learn.
I call that a good start!
I’m staggered by these early results. I wasn’t expecting to make the Nordic work this efficiently after only a few hours of tinkering. I still have a long way to go, so I’m not popping champagne corks yet.
Firstly, these readings are for the nRF52840DK, whereas I’ll be running on a Seeed XIAO board. I’m sure this will throw up some surprises. I’m taking ADC readings every 5 seconds, yet the Zigbee reporting happens at most every 30 seconds. There is room for improvement, I think.
If the XIAO board runs at 250µA and I shave 50µA off, my sensor would work for over 400 days! 400 days! Put a 3200mAh battery in there and it’s over 600 days.
I’m getting ahead of myself of course, but this is a solid start!
Hopefully my Matter device will fare just as well!

Leave a comment