In this post, I detail how I use Modbus TCP to read some basic information from my Solax X1-G4 inverter and expose it via the Matter smart home protocol.
Why? Because ultimately, I want to expose my inverter via Matter, allowing me to add it to my Matter based home energy manager. In an ideal world my inverter would already support Matter, but I don’t see that happening for a while. Not because they don’t want to, but because there is no demand for it. No 3rd party apps support it, so it’s chicken and egg.
Whilst I wait for the hardware manufacturers to catch up, I’m going to fill that gap myself.
Matter’s Solar Power Device
The Matter specification includes a Solar Power device to represent Solar Inverters. List most of the complex devices in Matter, this is built up from a few, simple clusters. From the Matter Device Library, we can see how the this device is made up.
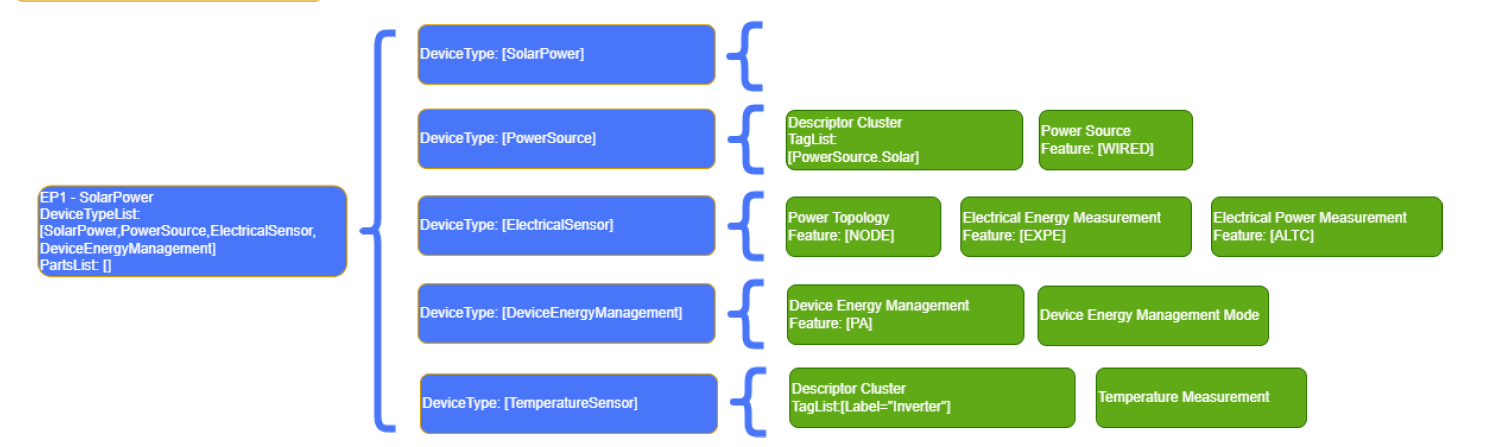
Of the five device types that make up a Solar Power device, only two are mandatory: Power Source and Electrical Sensor. Solar Power is a composed device type, so it has no clusters of its own.
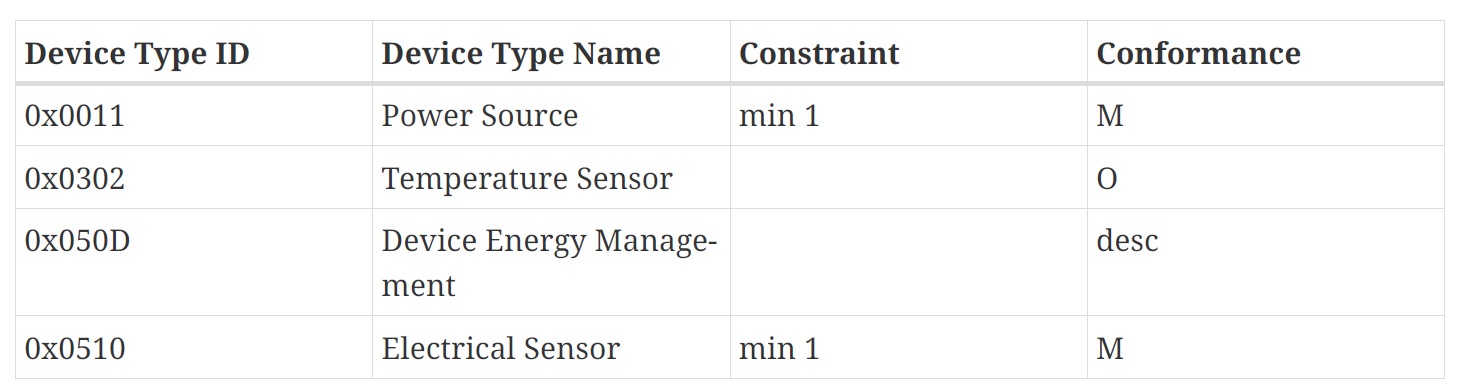
For the first pass, I’m going to worry about these mandatory clusters just the Power Source and Electrical Sensor. For the Electrical Sensor, I’m only going to worry about the Electrical Power Measurement cluster, which includes things like voltages and current.
Of course, there are many more attributes, but I want to keep it all simple! I will add the remaining clusters and attributes once I have something working end to end.
I’m also going to exclude the 5.8kWh battery that is attached to my inverter. The Matter specification does support batteries, but I’ll remain focused on just the inverter for now.
Reading from my Solar Inverter
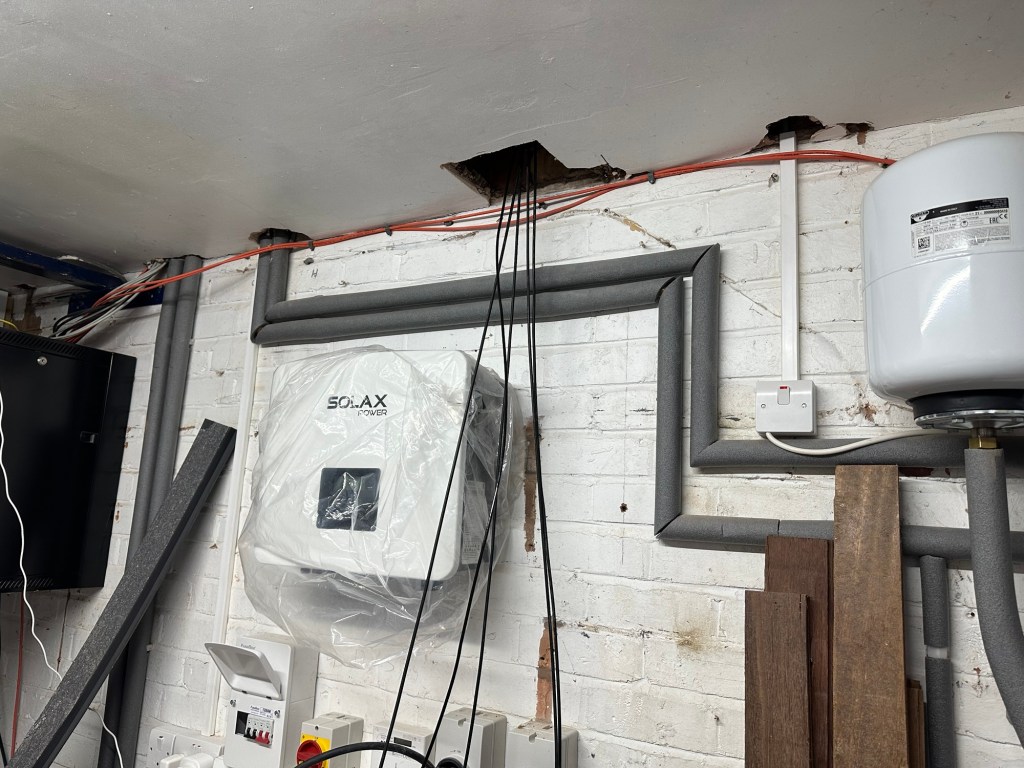
I have a Solax X1-G4 inverter. I had it installed back in 2024, and it’s been busy turning sunlight into electricity since then. Like any good smart home enthusiast, I immediately connected it to Home Assistant. I took a very manual approach to this, writing my own REST based integration using the inverter’s local API. Yes, it has its own REST API, which is quite impressive!
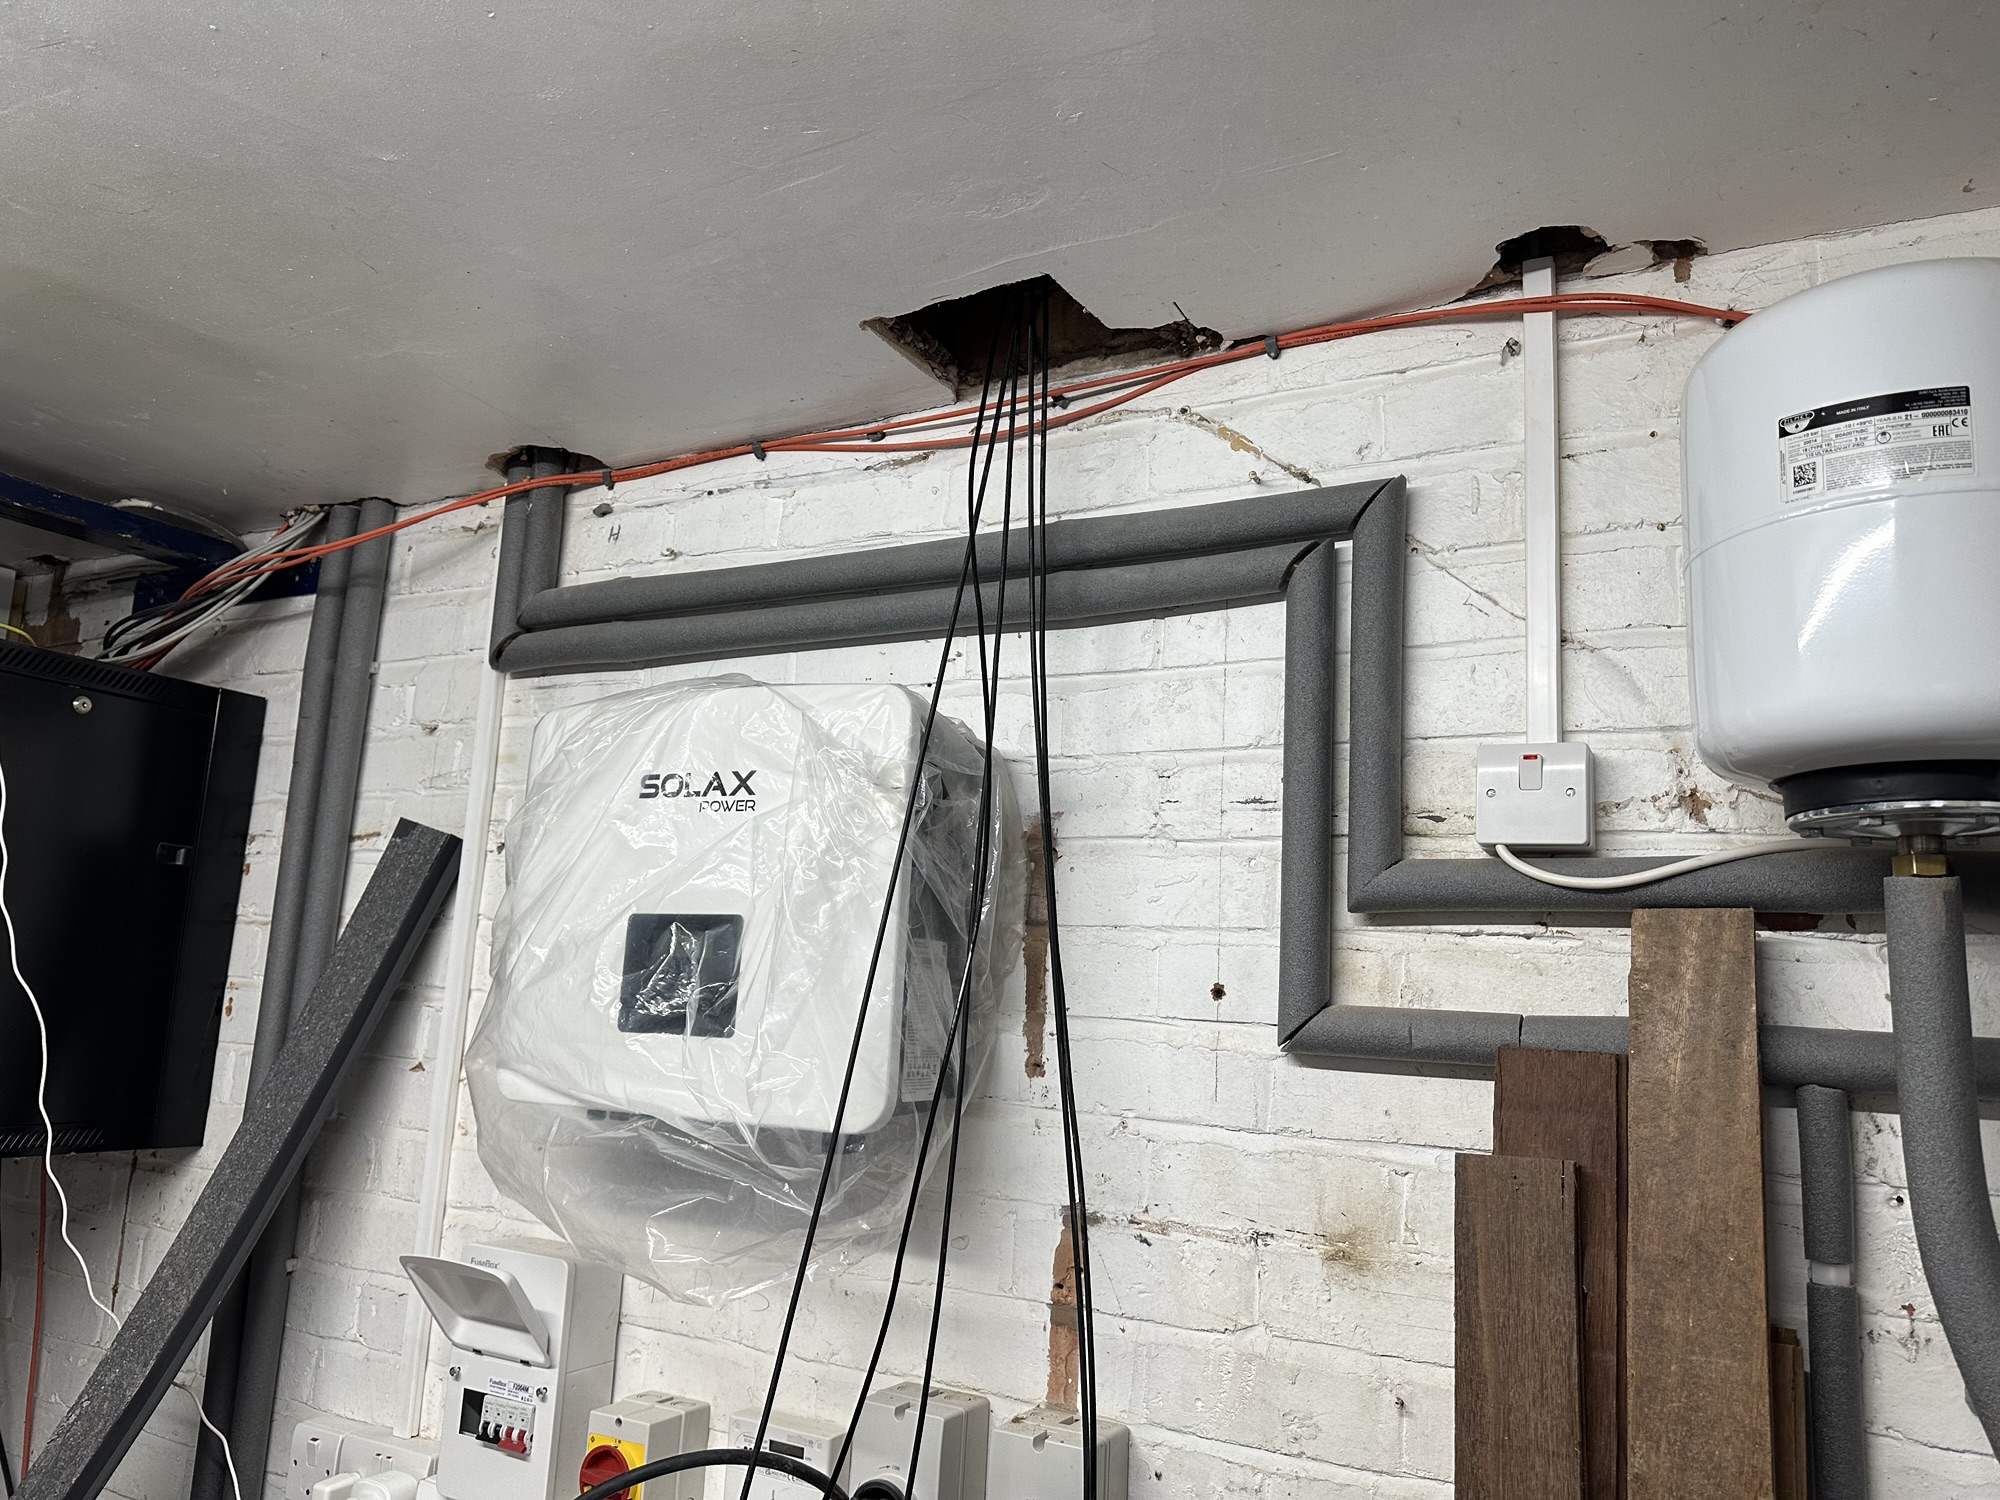
In addition to offering a REST API, the inverter also offers Modbus, a popular protocol for device management. This is available over IP/TCP and serial (using the COM port). I was tempted to build a dedicated serial module, like I did with my energy meter, but I figured this was a good Modbus TCP opportunity. Modbus serial and TCP use the same application protocol, but with a different transport.
A little bit of digging revealed the Modbus registers for the X1. The first few were grid related, which was perfect!
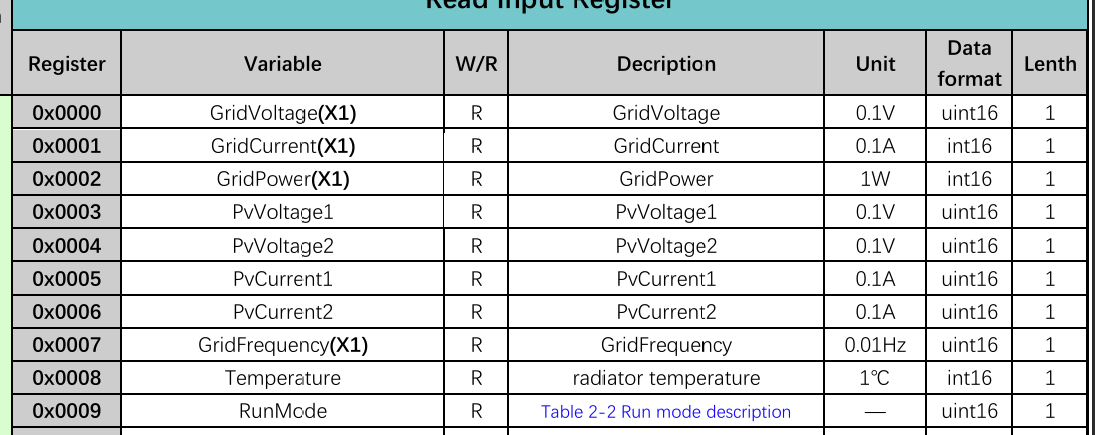
I just needed to read registers 0x0000, 0x0001 and 0x0002 and publish their values via the Electrical Power Measurement cluster.
Bridging
The plan formed in my head. I would need a web application running on an ESP32 that allowed me to enter an IP address for my inverter. The app would connect and start reading the register values. At the same time, it would need to create a Matter Solar Power device so the readings could be exposed.
As I was essentially exposing a non-Matter device via Matter, I decided to use Matter Bridging. This part of the specification (9.12) explains how non-Matter devices can be exposed via Matter. Essentially, you add a device to a Bridge and the Bridge handles the rest.
This was added so other devices (typically Z-Wave and Zigbee) could be exposed to a Matter ecosystem. Their example shows this, by using simple lights and switches. Thankfully, you can bridge anything!
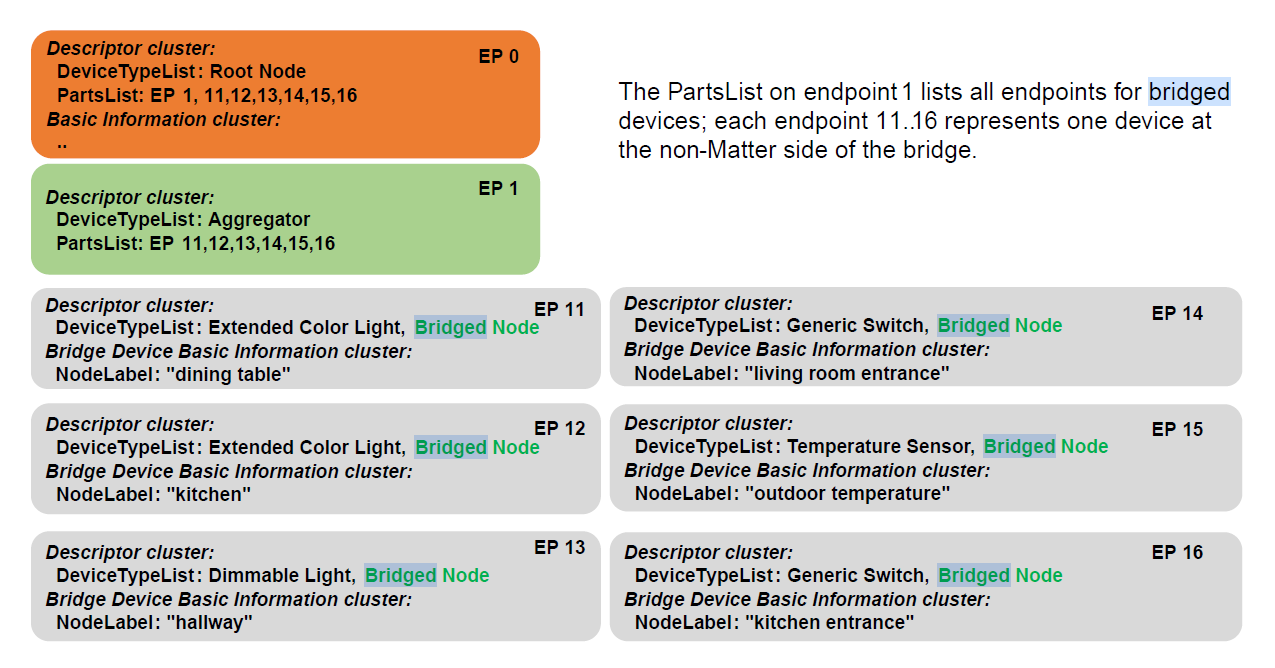
The bridge, by nature, is dynamic, so devices can be added to be bridge at any time, making it quite powerful.
This seemed ideal for my needs. I would be supporting my inverter to begin with, but as I added other Modbus TCP devices, they would slot in.
I’m using espressif’s esp-matter SDK, for ESP32, and they have a nice bridging API, designed to support this part of the spec.
Implementation
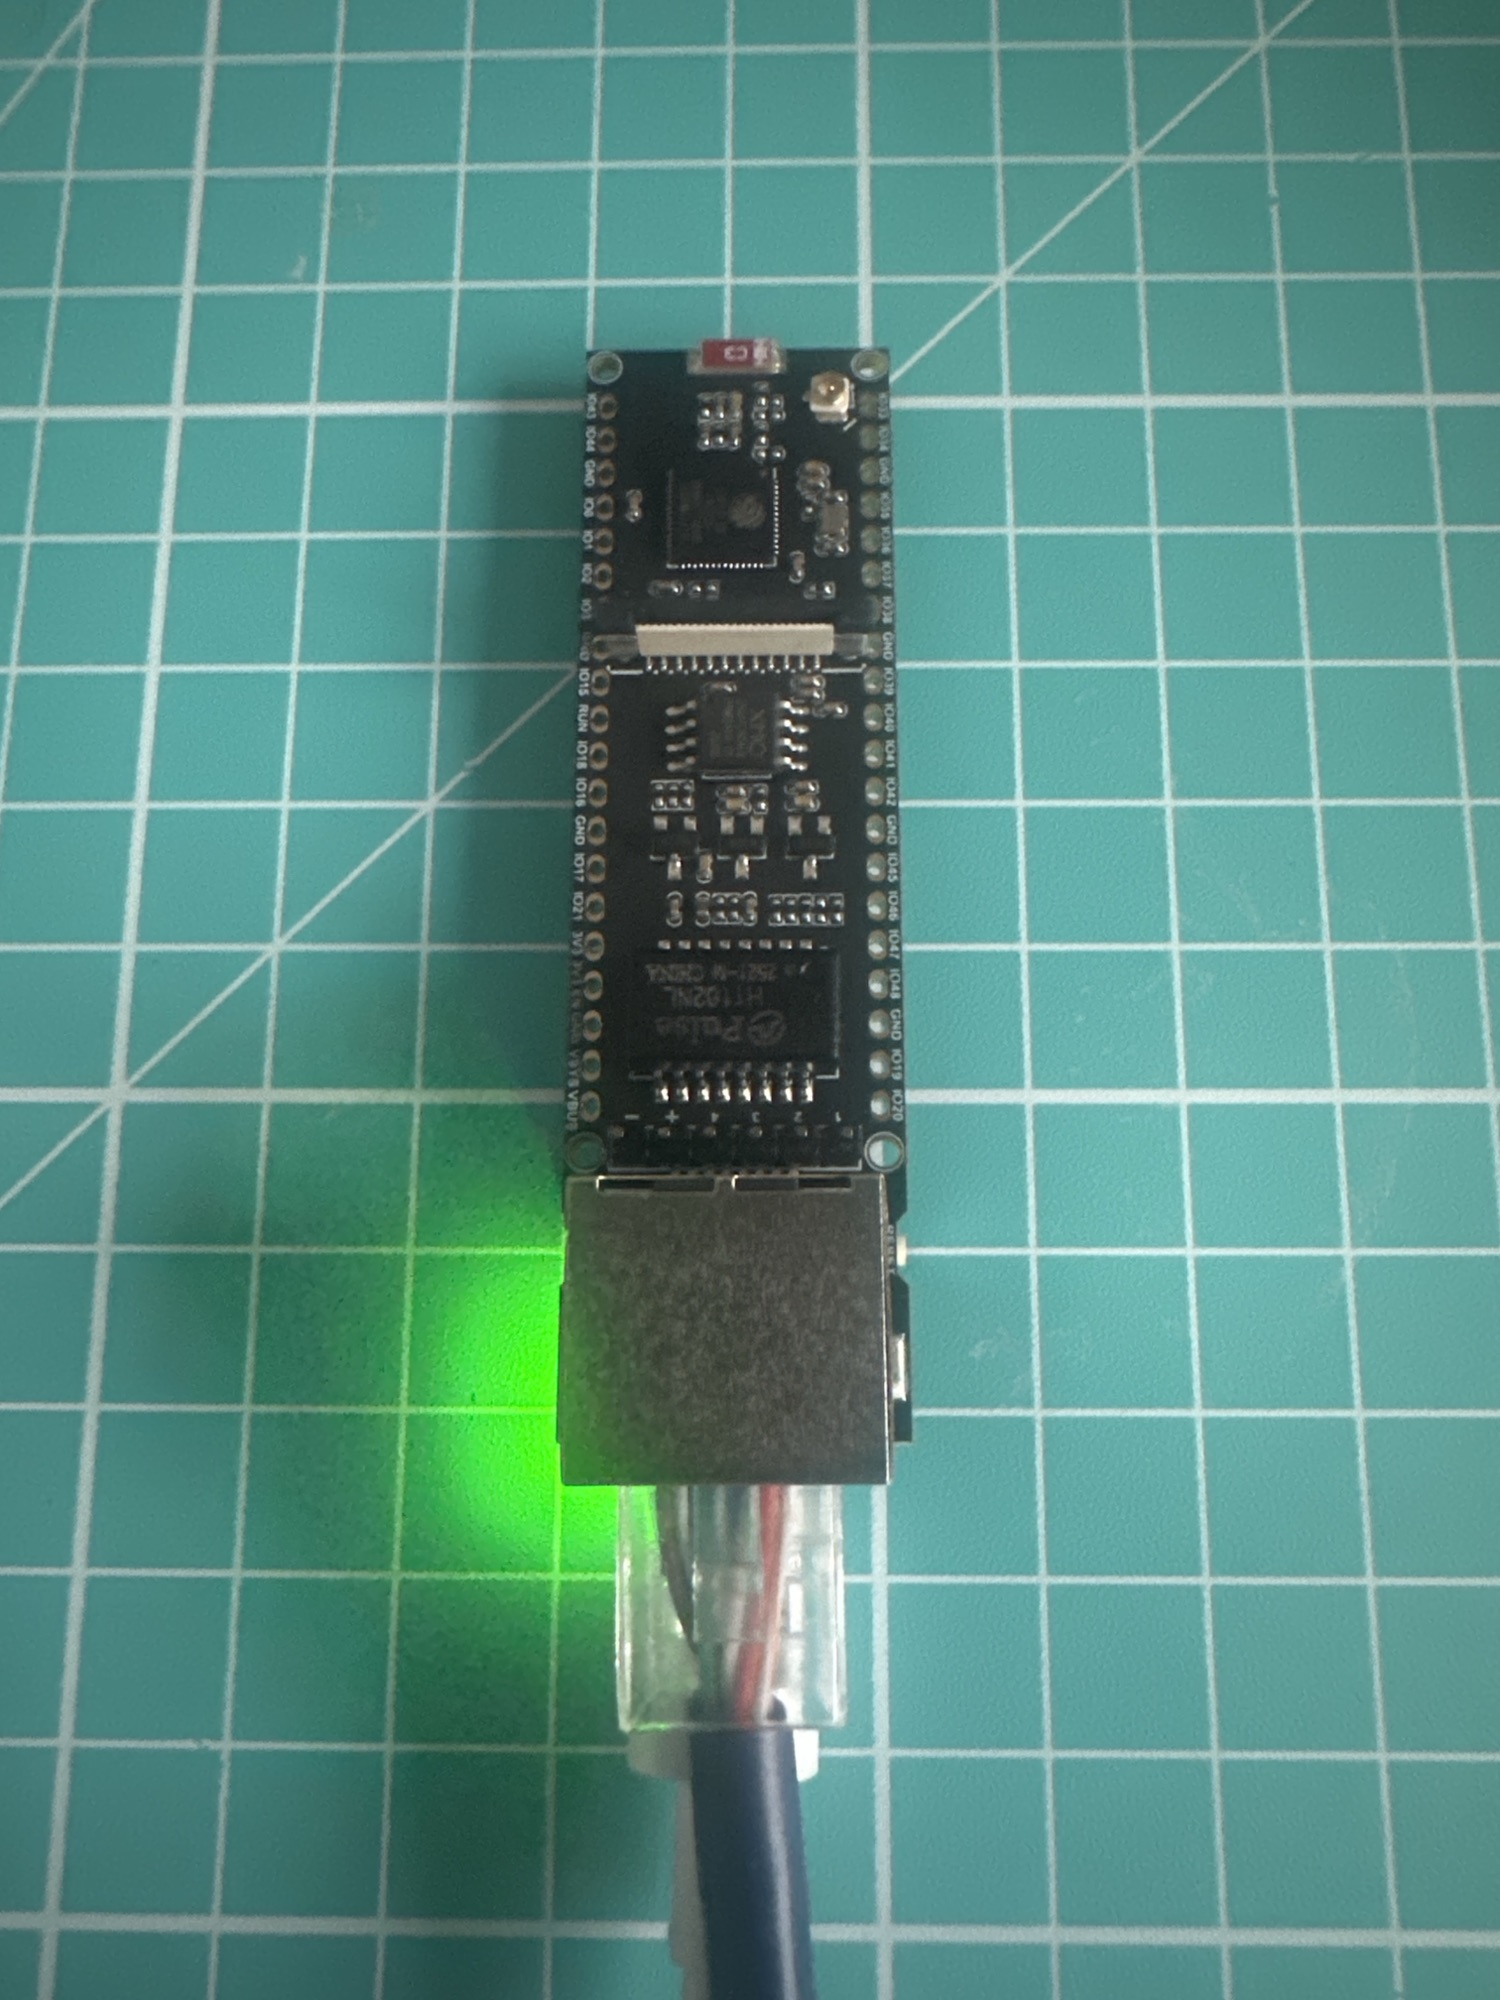
As I did with my Modbus serial interface, I’m using the Waveshare ESP32-S3-ETH dev board. This is a great board from Waveshare as it has integrated Ethernet support and an S3, with plenty of umph, flash and memory.
I then added a React web application and a REST API (with some web-socket supported sprinkled in too).
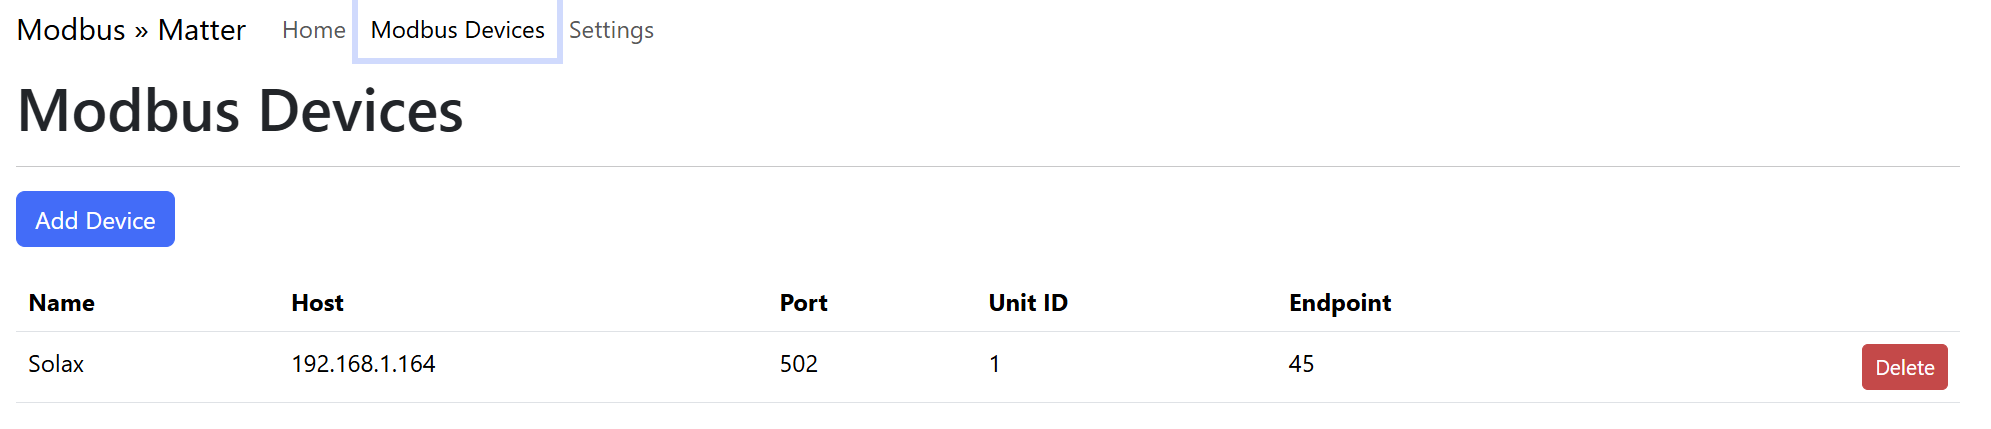
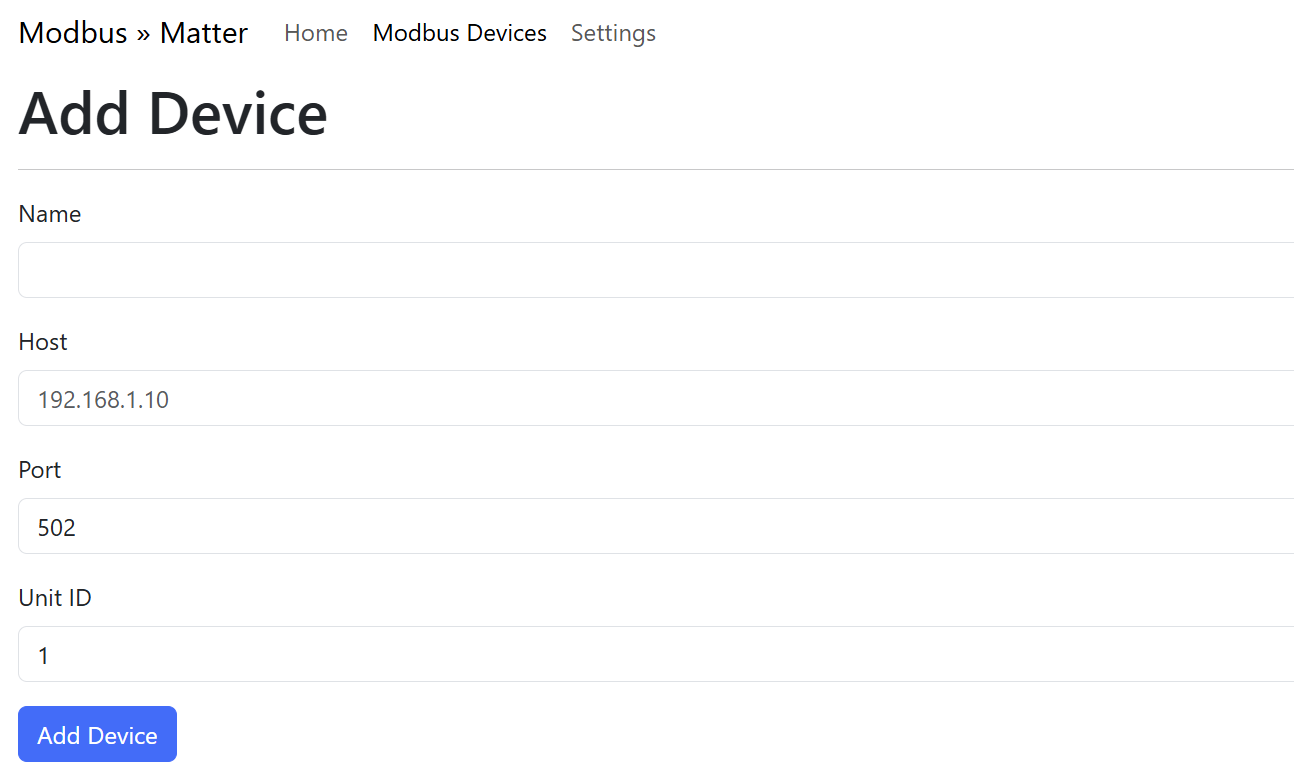
The first screen needed is for managing Modbus devices. It provides a name, IP address, port, Modbus address and Matter endpoint number.
The Add Device screen allows additional Modbus devices to be added, by grabbing IP, port and Modbus address.
Once added, the Bridge exposes the device. To demonstrate this, I can use the chip-tool to show the composition of the bridge.
First, the bridge must be commissioned. I tried to make this easier by displaying the various bits of information on a separate page. Here we have the QR code, the pairing code itself and the payload (from the QR code).
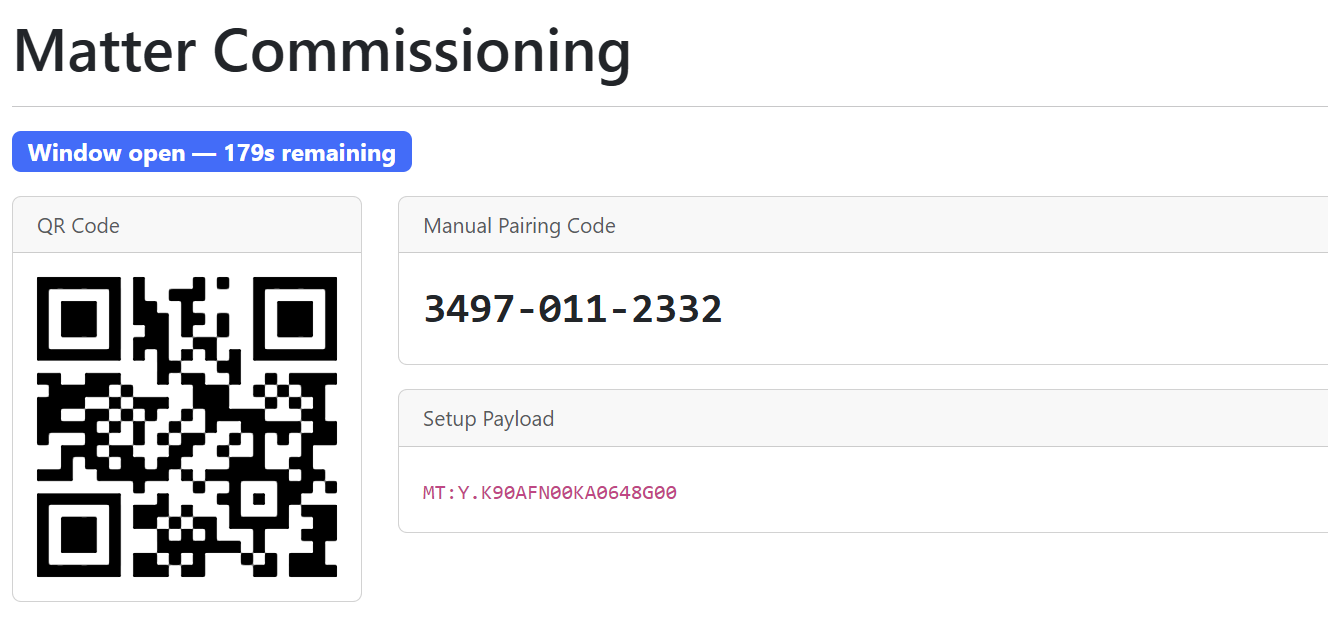
I can then commission the device using the chip-tool. I choose 0x22 as the node id. This is arbitrary.
chip-tool pairing code 0x22 3497-011-2332
After commissioning, I can query the aggregator endpoint to see what parts it has. My aggregator is on Endpoint 0x01. Let’s read the parts-list for node 0x22, which is my Modbus bridge.
chip-tool descriptor read parts-list 0x22 0x01
This returns a single entry, 45 (0x2D).

If you refer to the Devices screenshot above, you’ll see that the Solax Modbus device is on endpoint 45. If we query the device-type-list for this endpoint, we should see all the devices that make up a Solar Device.
chip-tool descriptor read device-type-list 0x22 45
This returns four device types. Bridged Node is a *special* Device type, which is required because I’m acting as a Bridge. The other devices, Solar Power, Power Source and Electrical Sensor can be seen in the diagram above.
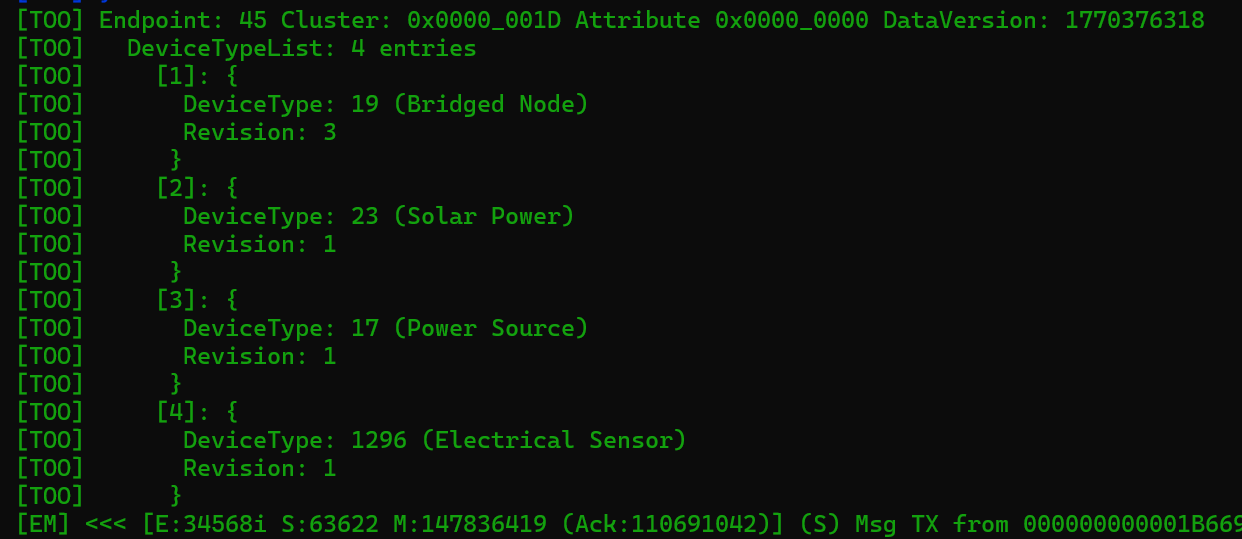
Before moving on, I want to make a brief note about the Bridged Node. This device type exists to expose details of the bridged device. In this case, it’s my Solax Inverter. I could use the Bridged Node to share manufacturer details, serial numbers etc.
I do make use of it in my implementation, exposing the name of the Modbus device (set by the user). This can be fetched using a special cluster called BridgedDeviceBasicInformation.
chip-tool bridgeddevicebasicinformation read node-label 0x22 0x2D
This returns Solax, matching the assigned name. This information makes it easier to differentiate bridged devices.

Querying the electrical power measurement cluster yields expected data.
chip-tool electricalpowermeasurement read voltage 0x22 0x2D

We can see 247V. Matter uses the unit mV, so the number looks larger that it is! 247V is high for the UK, but well within allowed margins (230V +/- 10%).
chip-tool electricalpowermeasurement read active-power 0x22 0x2D

Power is shown at ~500W, which is about right.
To finish off, these values, including current, are shown on the front page of the web application!

3rd Party Support
Unfortunately, like I stated at the start, there is very little support for Matter Solar Power devices. The iOS Home app could commission the device, evening showing the node-label value…
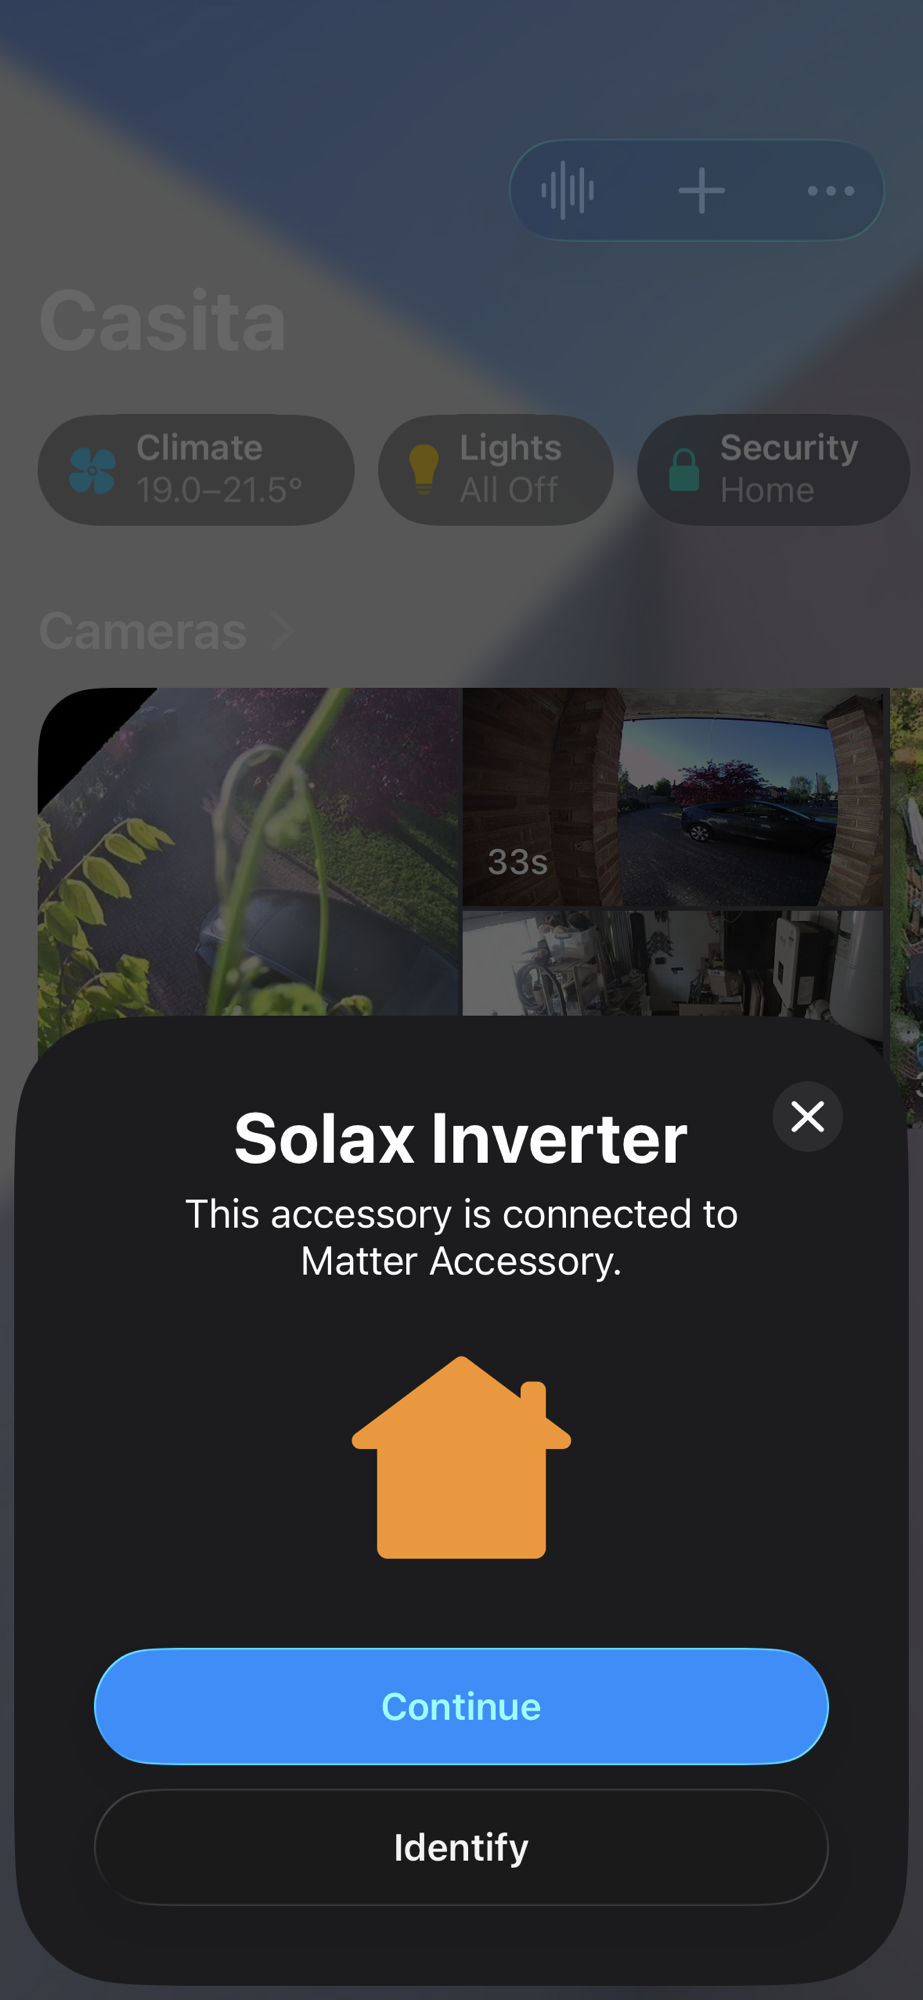
Unfortunately, once added, it said it didn’t support it.
The Aqara ecosystem faired a better, showing the Inverter as an Energy Monitor. At least it was showing *something*.
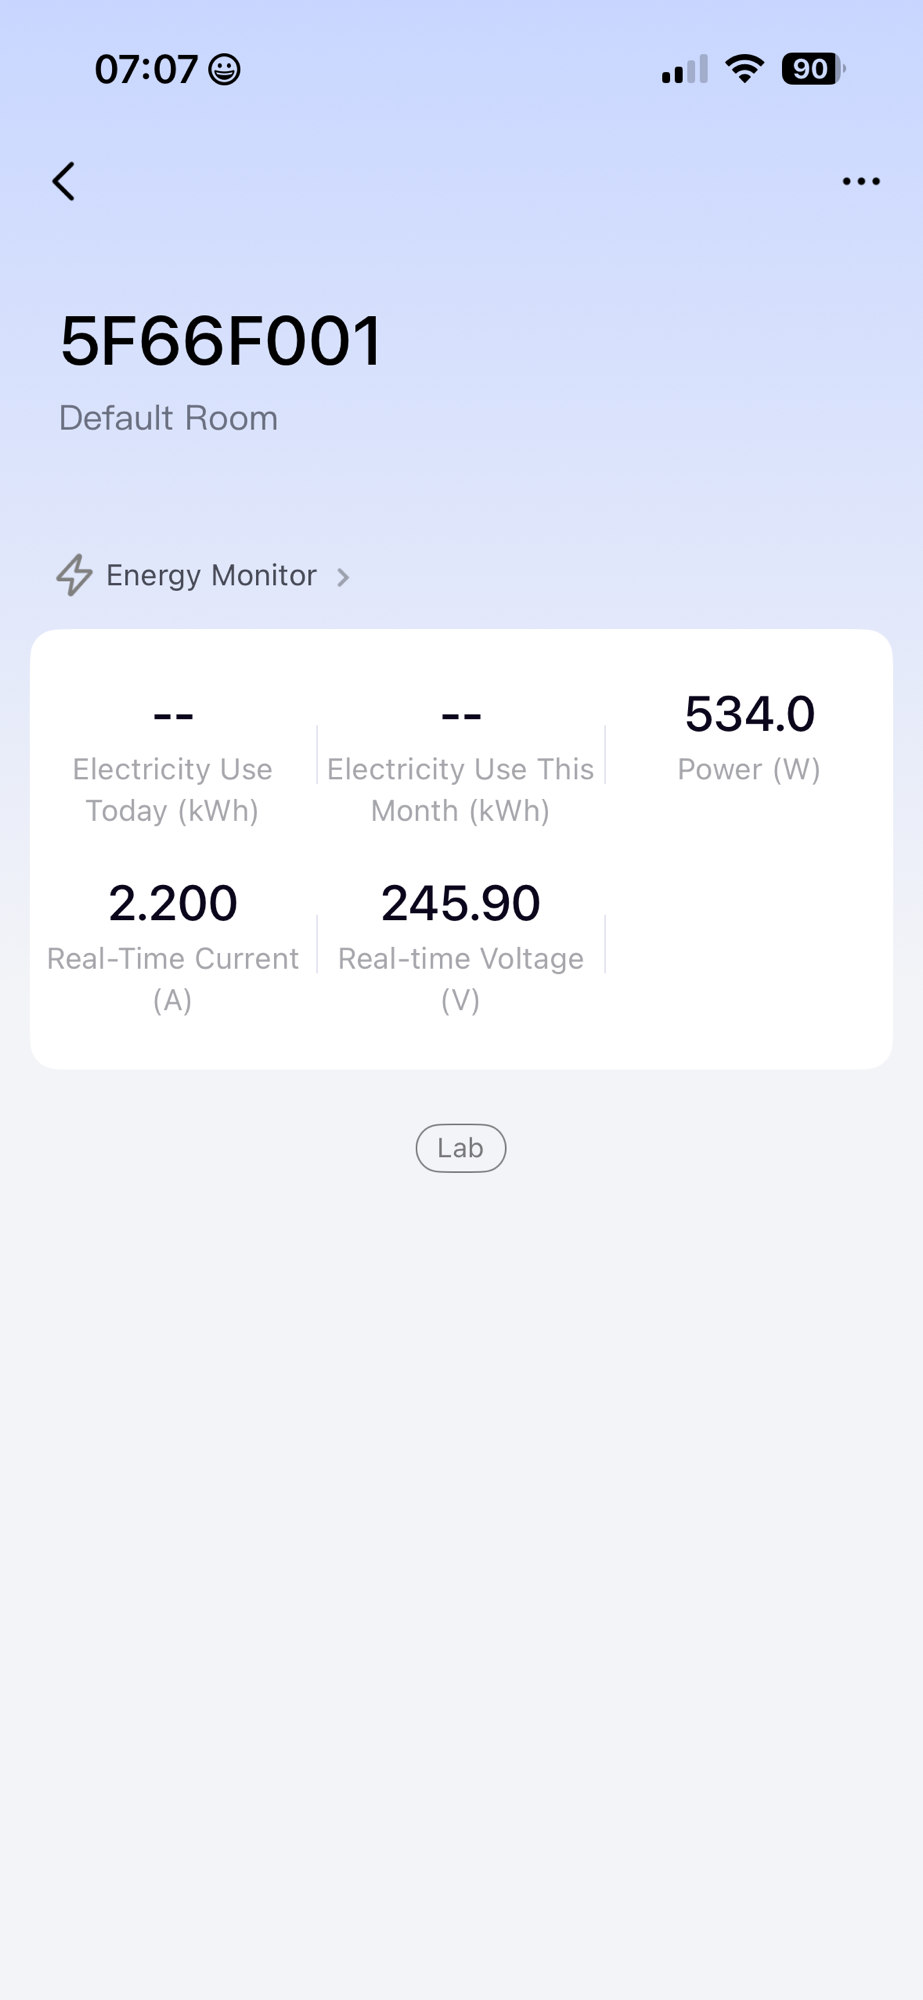
Of course, the app’s inability to show the right device could be down to my code, but I’m sure the app just doesn’t support it.
Code
If you want to take a look, all the code is available in Github – https://github.com/tomasmcguinness/matter-esp32-modbus-tcp-bridge
Summary
There you have it. I successfully exposed my Solax Inverter as a Matter Solar Power device.
There is much more to add, like support for the individual PV strings and, of course, my battery. These will add more useful information to the device. For now, I’m happy to have a working bridge, even if it’s hardcoded to support just one piece of hardware 🙂
Next steps for this project; update my Home Energy Monitor to support Solar Power devices. I want to be able to commission my bridge and import the inverter information. This will then unlock the next steps for that project.
Stay tuned. Be sure to subscribe if you don’t want to miss anything!
Did you enjoy this post?
If you found this blog post useful and want to say thanks, you’re welcome to buy me a coffee.
Be sure to check out my YouTube Channel too – https://youtube.com/tomasmcguinness
Thanks,
Tom!

Leave a comment