In Part #1, I started trying to convert my simple two probe temperature sensor from BLE to Zigbee. I got off to a slow start, dealing with compilation issues and incorrect behaviour.
When I finished the previous post, I was waiting to hear back from Nordic’s support.
I’m writing this second post as I heard back from Nordic! Unfortunately, they just pointed me at another question and a sample, both of which I’d already looked at!
I was convinced that reporting was still the issue, so I continued my investigation down that path.
After more reading, I found a way to check the reporting configuration of an attribute. By calling “zcl_is_attr_reported”, I would get a true/false telling me if an attribute had reporting configured or not.
I added two blocks like this for ENDPOINT_1 and ENDPOINT_2:

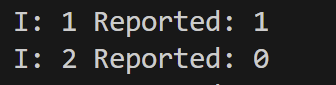
As expected, only ENDPOINT_1 showed that reporting was configured. I was now confident that I was on the right track.
The question now: Why was the Home Assistant ZHA integration not able to set up reporting on ENDPOINT_2. Was the issue with the ZHA code or my Zigbee code?
The answer came through this very old question I found!
Thankfully, the author had a Github repo too, with his solution – https://github.com/nickit94/zigbee-template/tree/master.
After implementing some of his code and *numerous* erase cycles (caching?), I got it reporting working as desired!
The key lied setting up only one reporting context. At least, that’s what nickit94 said. I don’t really understand it, but the results are clear.
After changing the EP macros in my code, both attributes started to indicated reporting was configured.

In Home Assistant the values started updated every 30 seconds. There was a short lag between the values changing, but they were changing!
Moving to my PCB
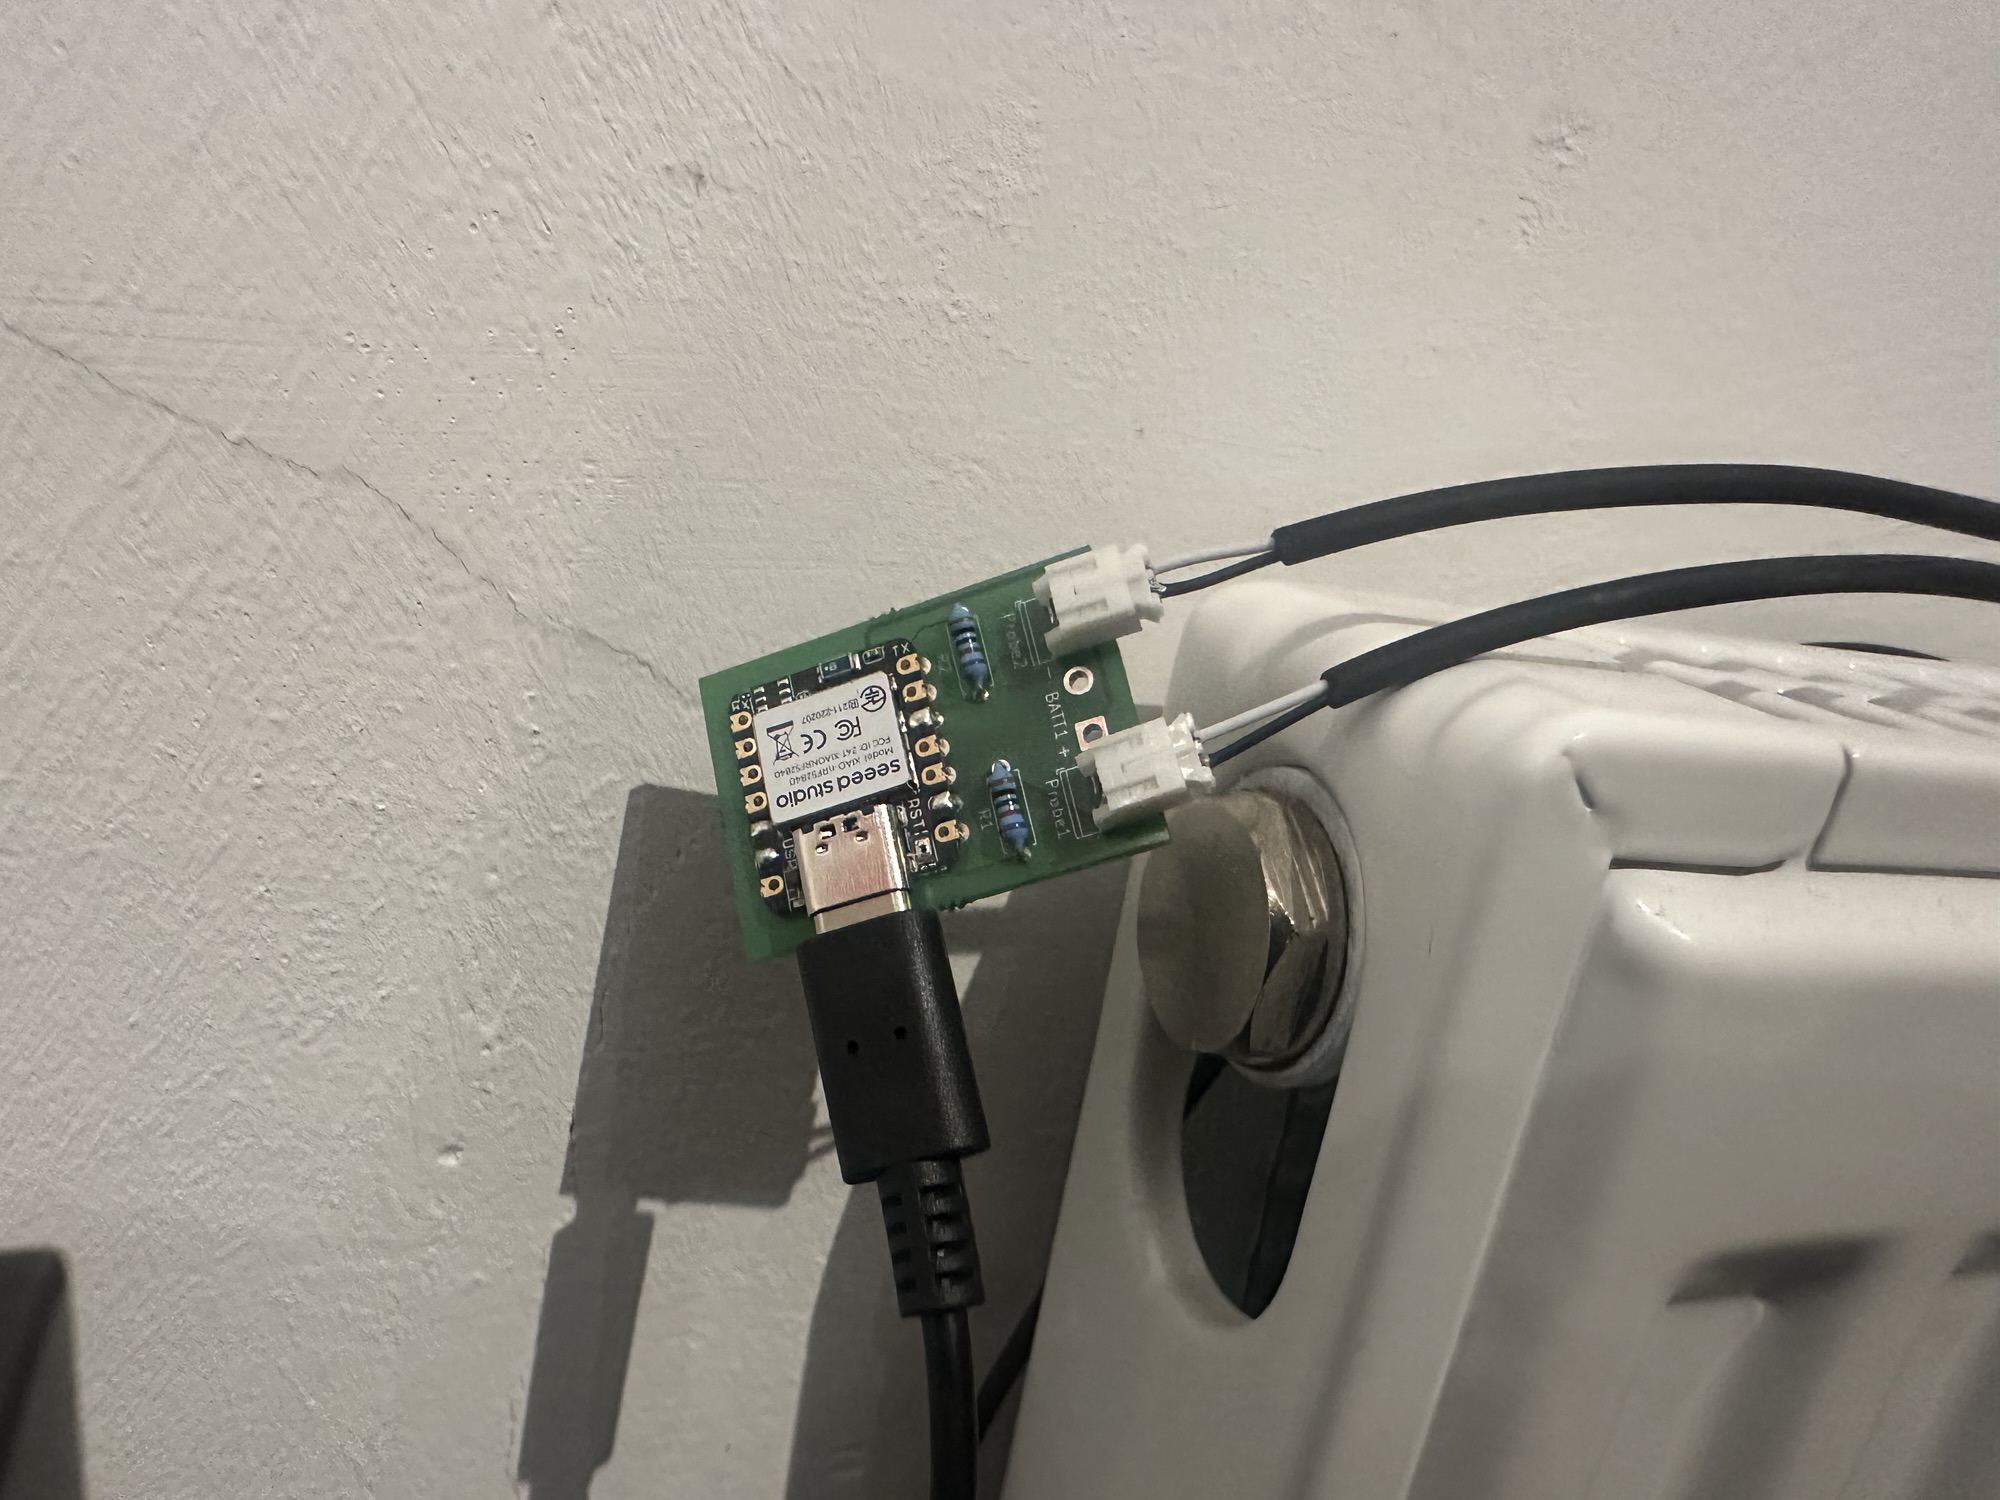
With the code working well on the development kit, it was time to move to my custom PCB!
I just flashed the code onto the XIAO nRF52840 and it appeared in Home Assistant ready for pairing.
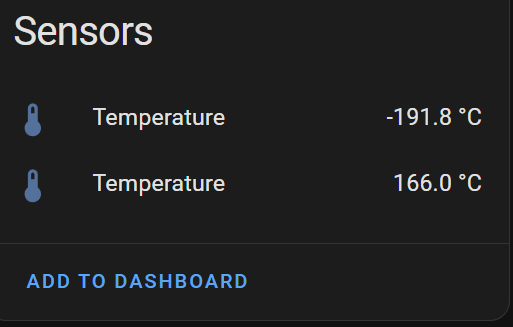
The readings, however, were a little on the high side!
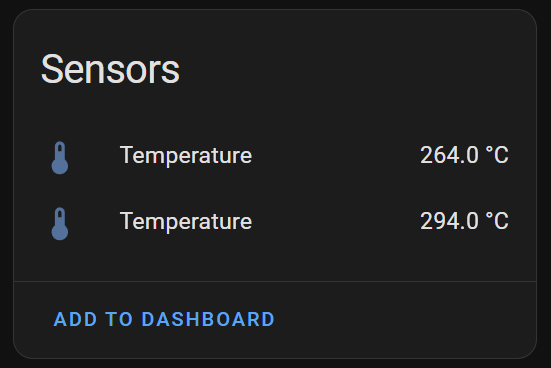
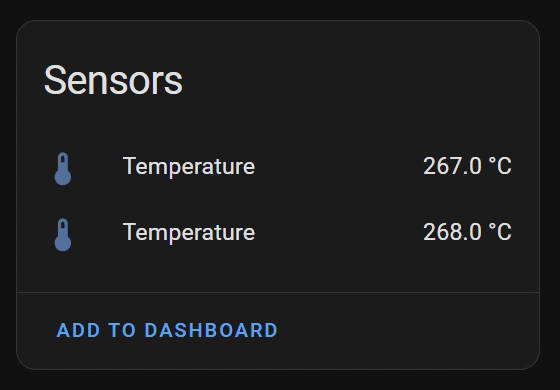
I’d forgotten I was multiplying the calculated temperatures already when sending over BLE!!! One tweak later and …

My Zigbee device was now reporting the temperature of the tails on my office radiator!
Next Steps
Thrilled to have figured this much out and to have a sensor working is brilliant, but as ever, what’s next?
There are a few things I’d like to look at:
- Can I set the default reporting from the device?
- Can I change the labels to Flow and Return?
- Can I have a switch or button to flip the values?
- Battery operation? One big 18650 to last six months?
- Implement reset of the device using the onboard button.
- Add “identify” support, so the little light blinks.
- Get the code up on Github
- Maybe sell the unit as a kit??
Read more in Part #3 – Switching my Temperature Sensor from BLE to Zigbee (Part #3)
Update 26th Jan 2025
Everything is now available on Github
https://github.com/tomasmcguinness/zigbee-nrf-flow-and-return-temperature-sensor

Leave a comment